ProActive Quickstart -Data Visualization Using Visdom and Tensorboard
ProActive AI Orchestration (PAIO) is an interactive graphical interface that enables developers and data scientists to quickly and easily build, train, and deploy machine learning models at any scale. It provides a rich set of generic machine learning tasks that can be connected together to build basic or complex machine learning workflows for various use cases such as: fraud detection, text analysis, online offer recommendations, prediction of equipment failures, facial expression analysis, etc. These tasks are open source and can be easily customized according to your needs. PAIO can schedule and orchestrate executions while optimising the use of computational resources. Usage of resources (e.g. CPU, GPU, local, remote nodes) can be quickly monitored.
This tutorial will show you how to:
- Support your data visualization in ProActive using Visdom and Tensorboard.
1 Data Visualization with Visdom
Following the below instructions, you will be able to visualize your data using Visdom. Slide through the images for the steps illustration.
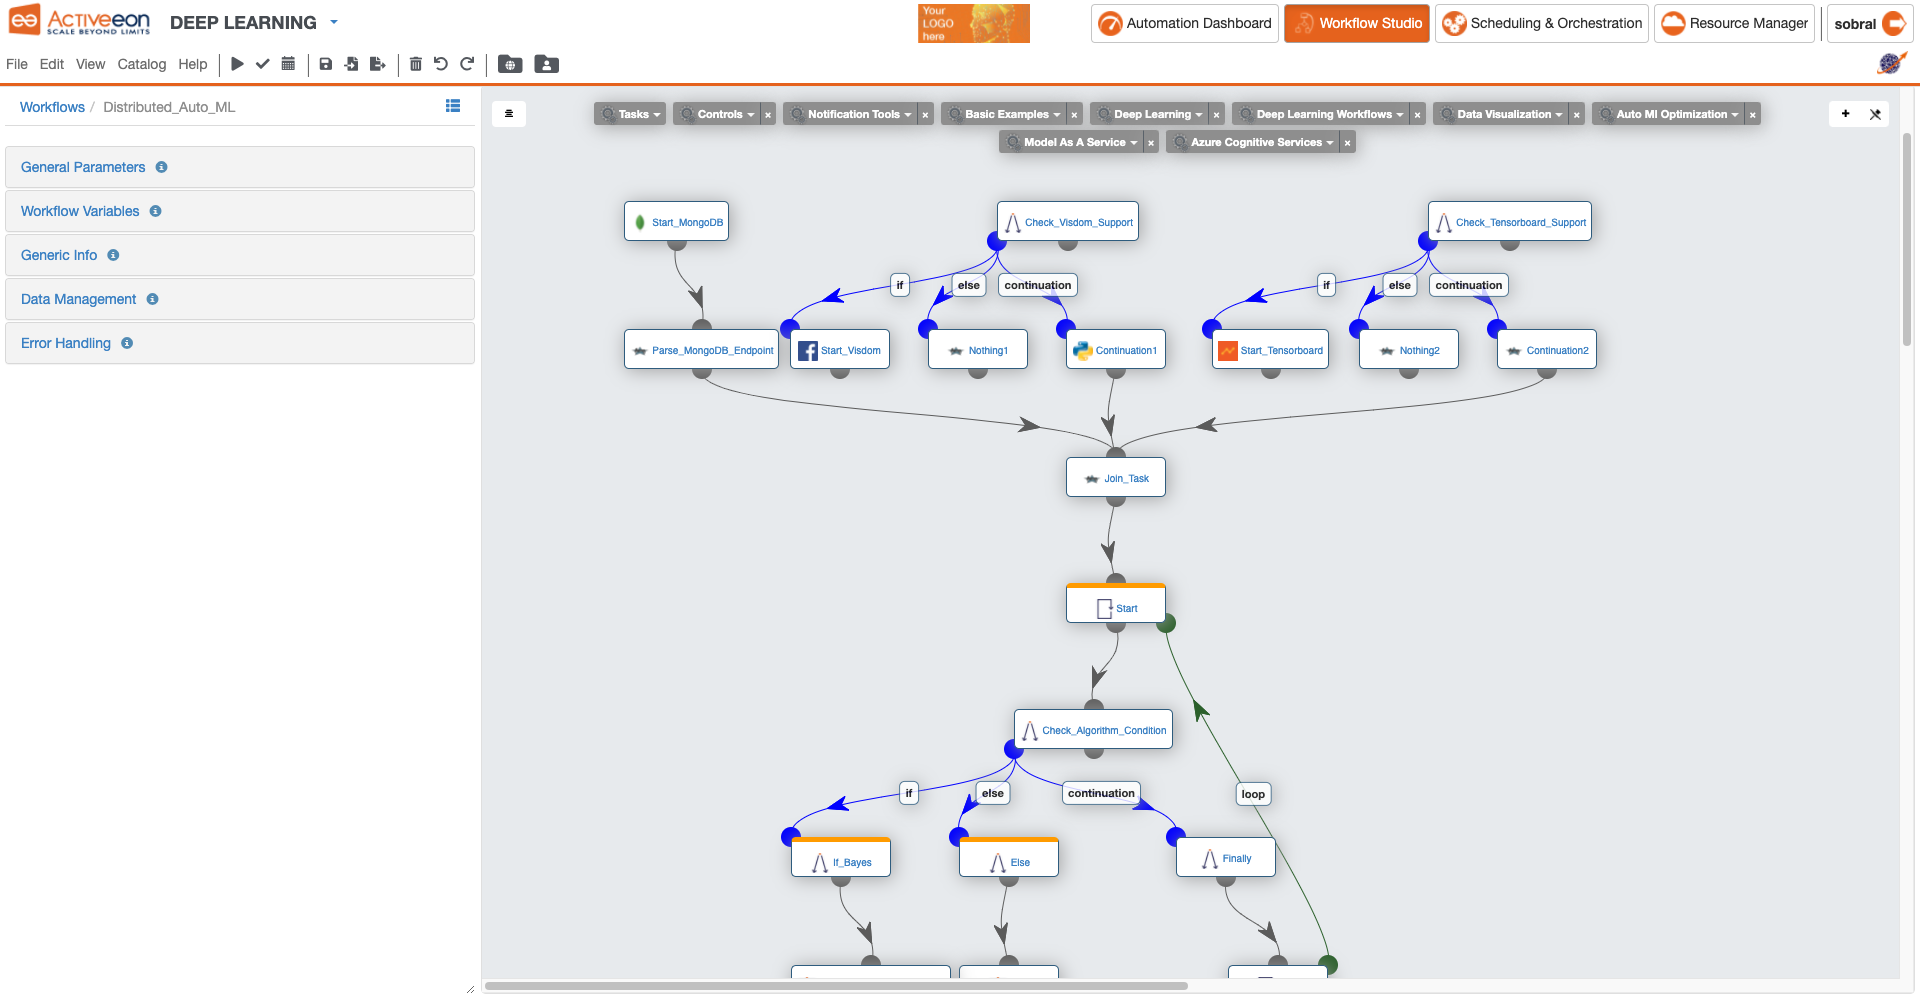
- Open ProActive Workflow Studio home page.
- Follow the steps illustrated in the third part (AutoML with Job Analytics) of Hyper Parameter Optimization (AutoML) tutorial. Make sure you do not submit your workflow before applying the following steps.
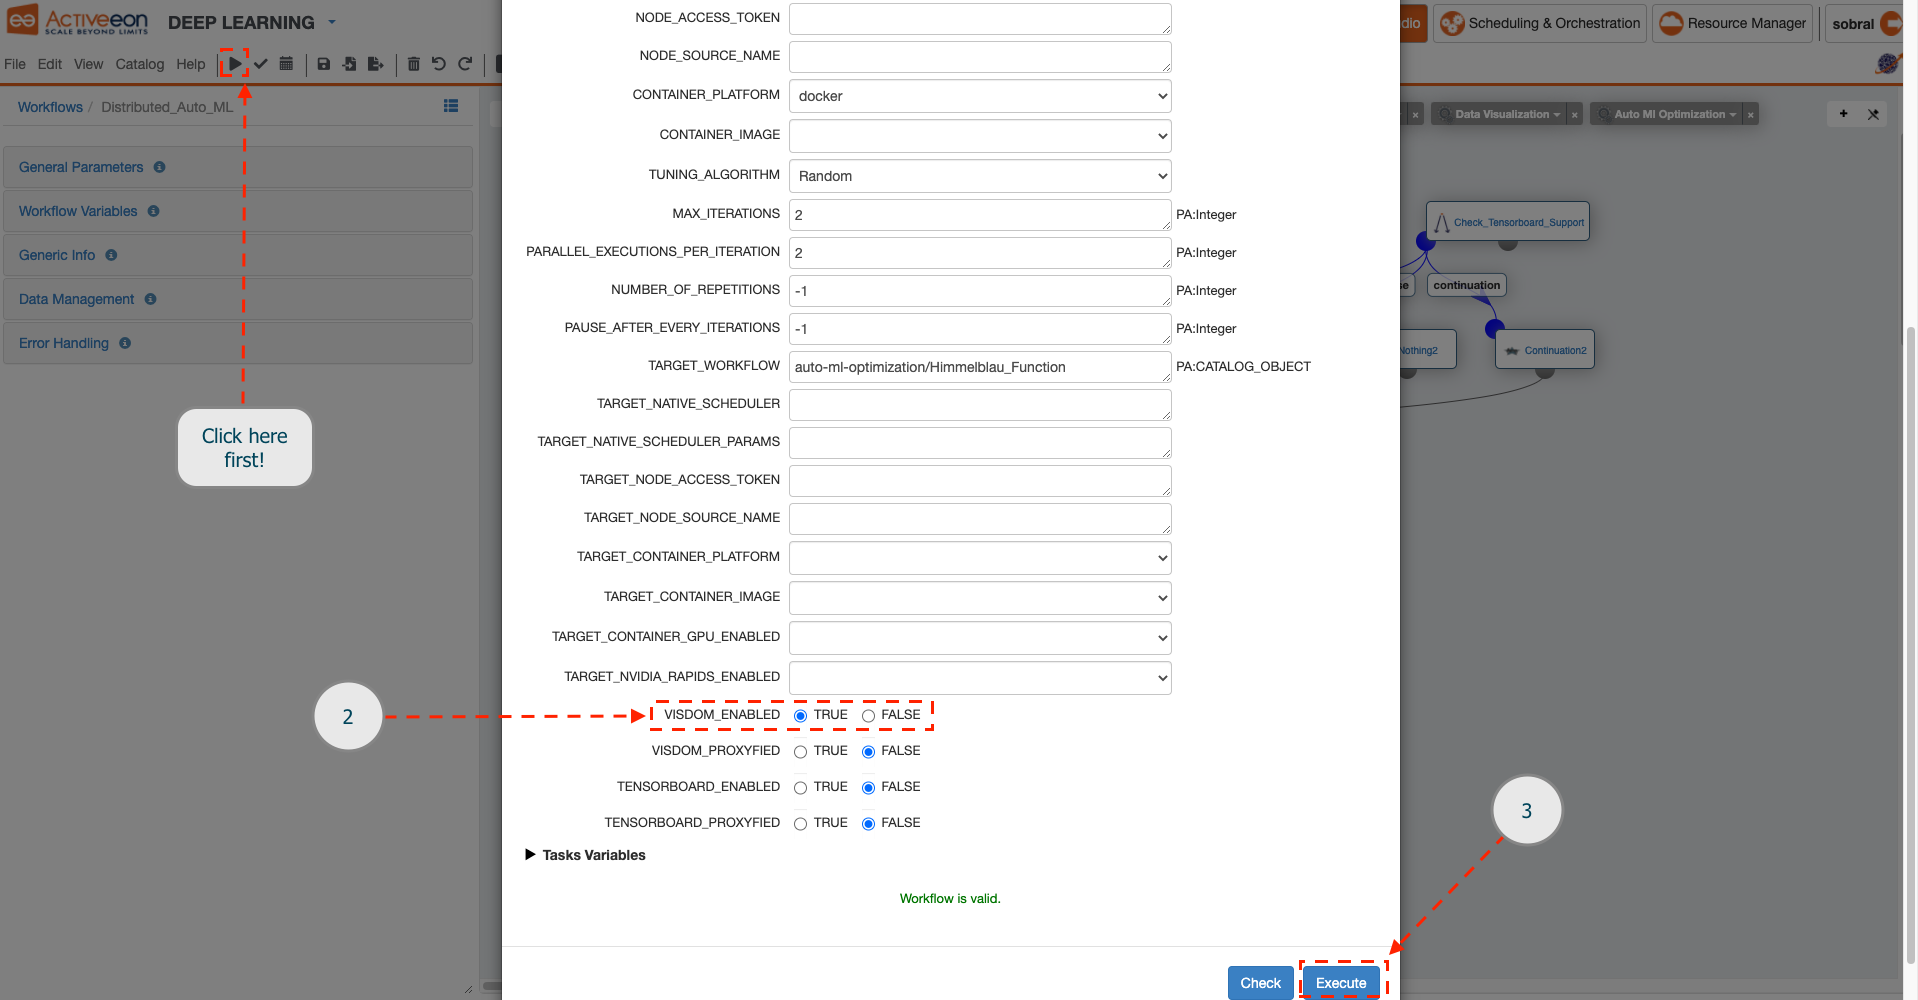
- Before clicking on the Execute button, find and select VISDOM_ENABLED option to TRUE.
- Click on the Execute button.
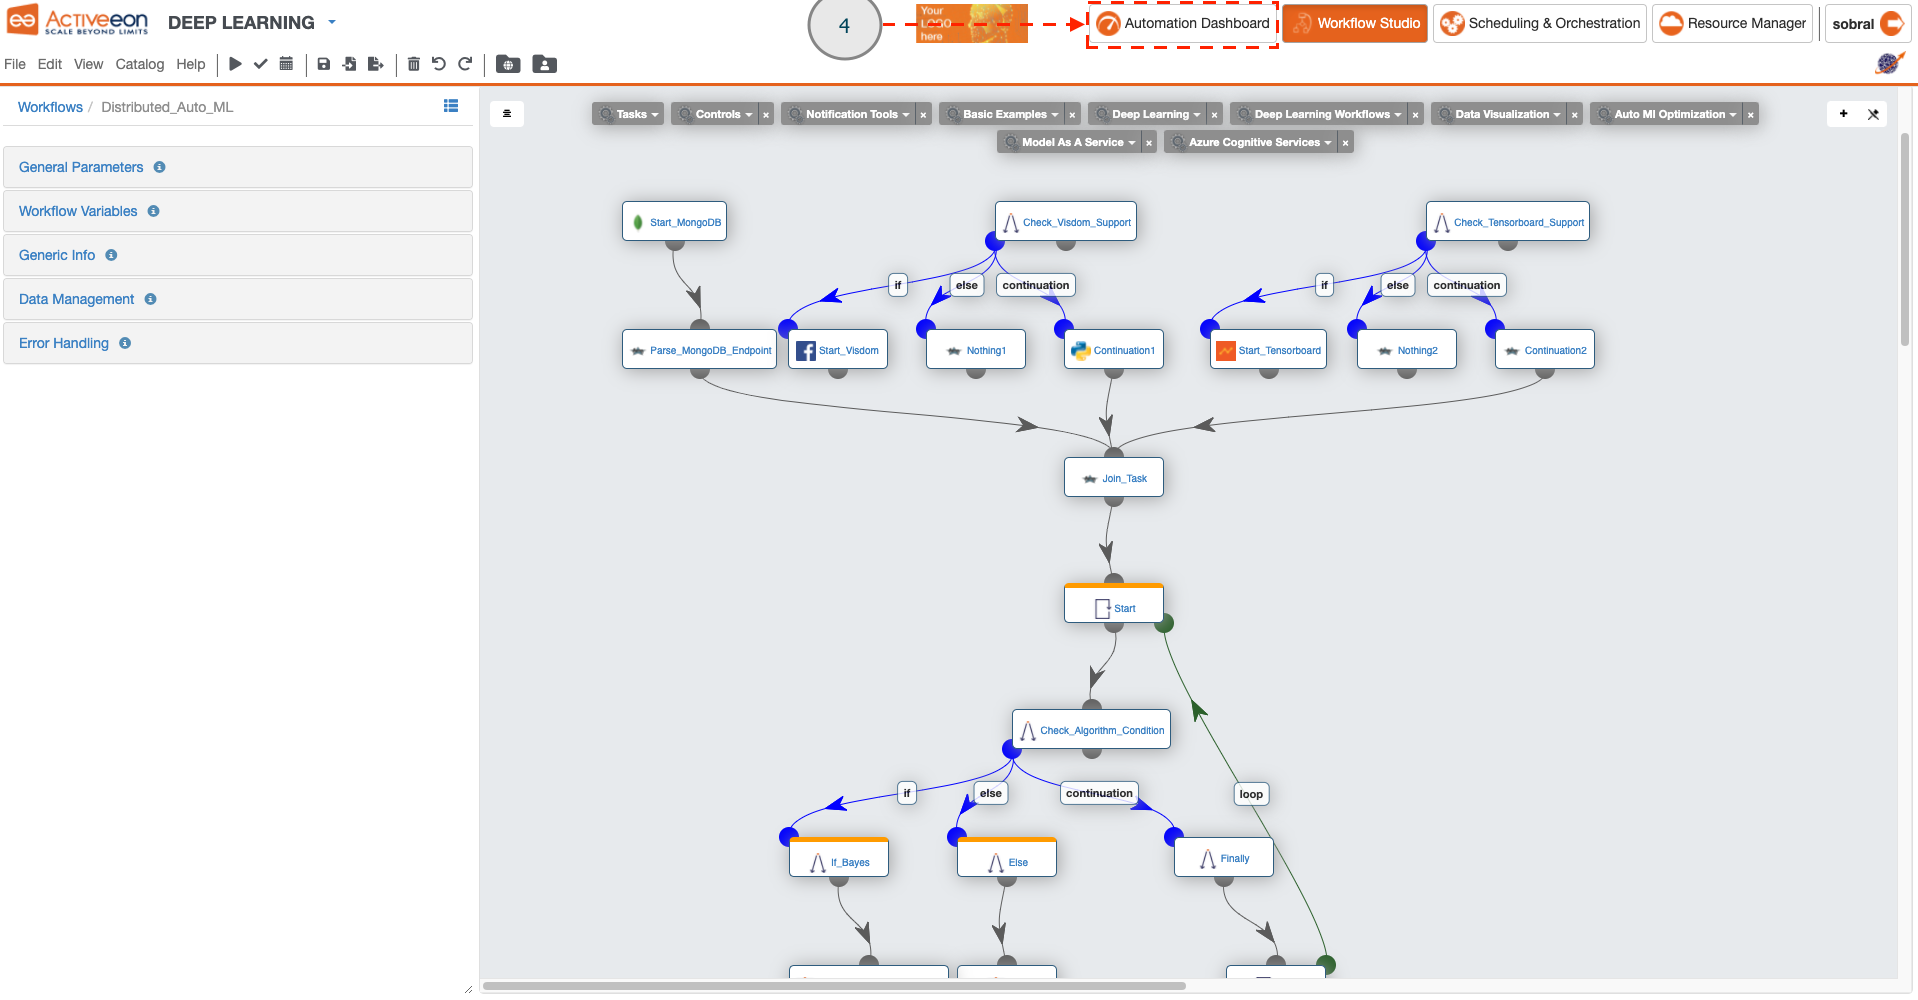
- Click on the Automation Dashboard menu.
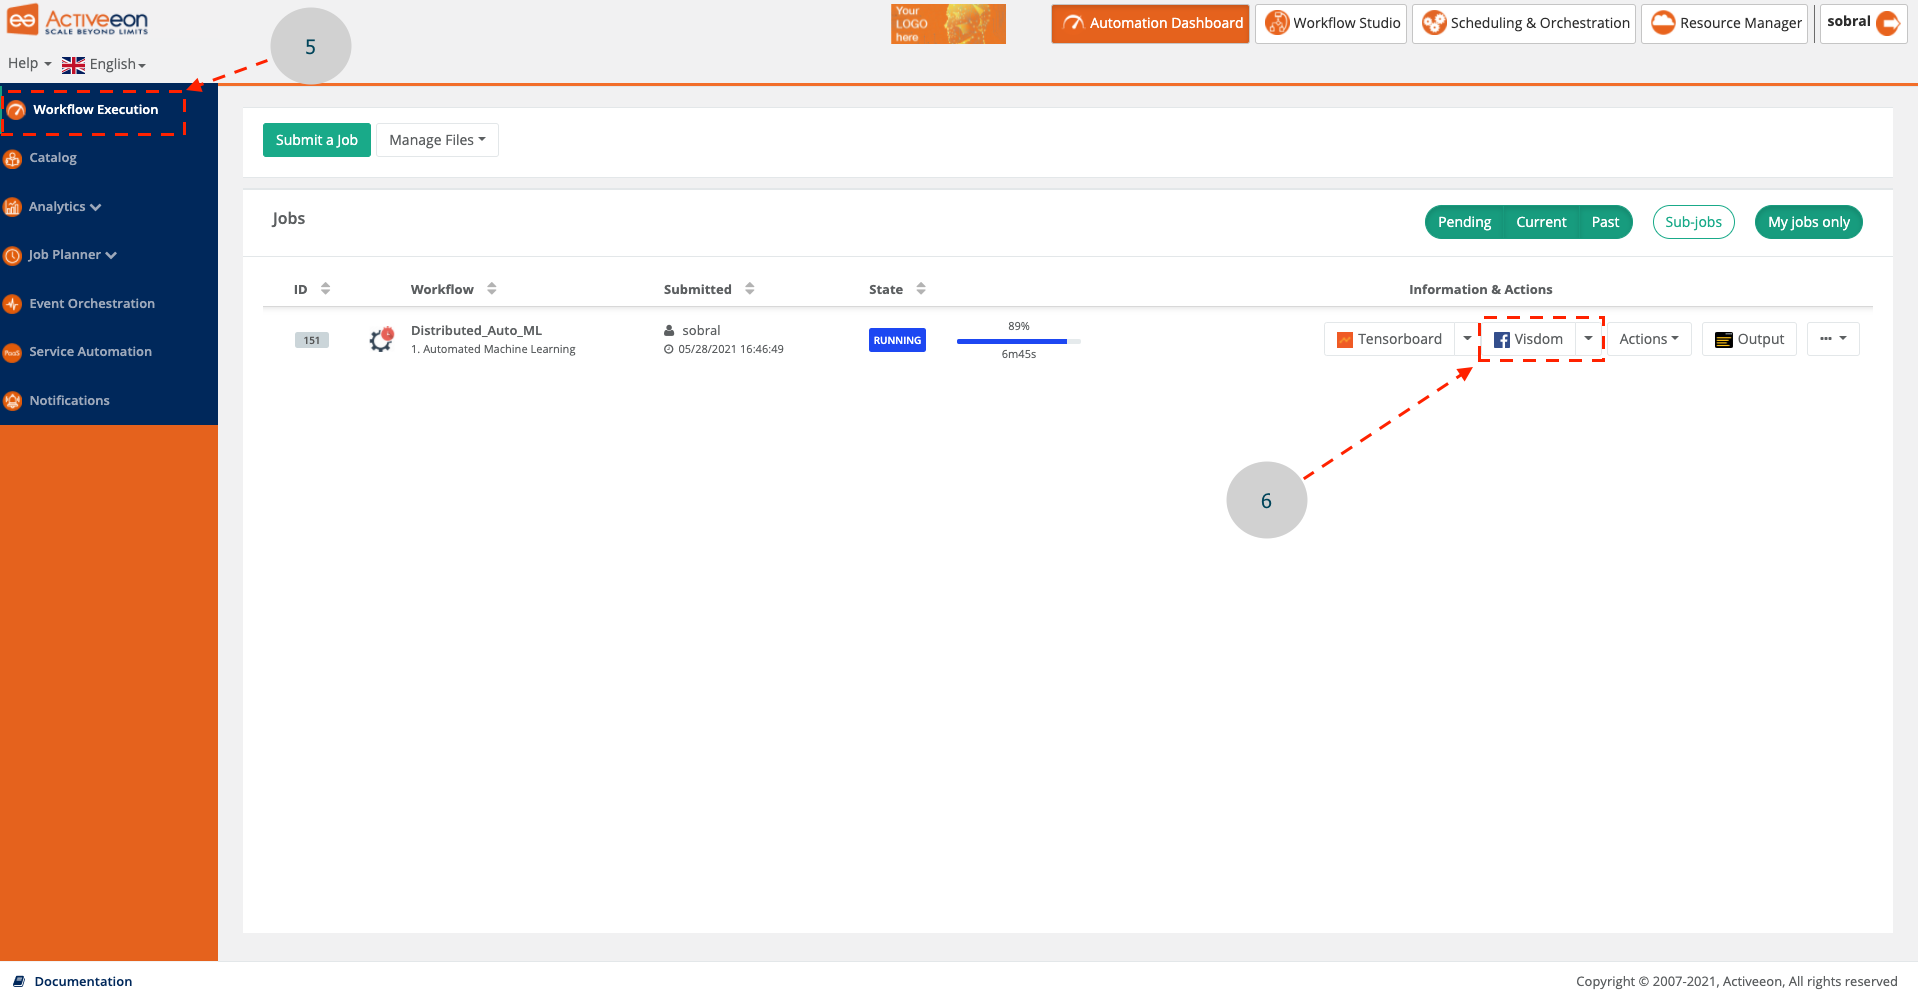
- Click on the Workflow Execution menu.
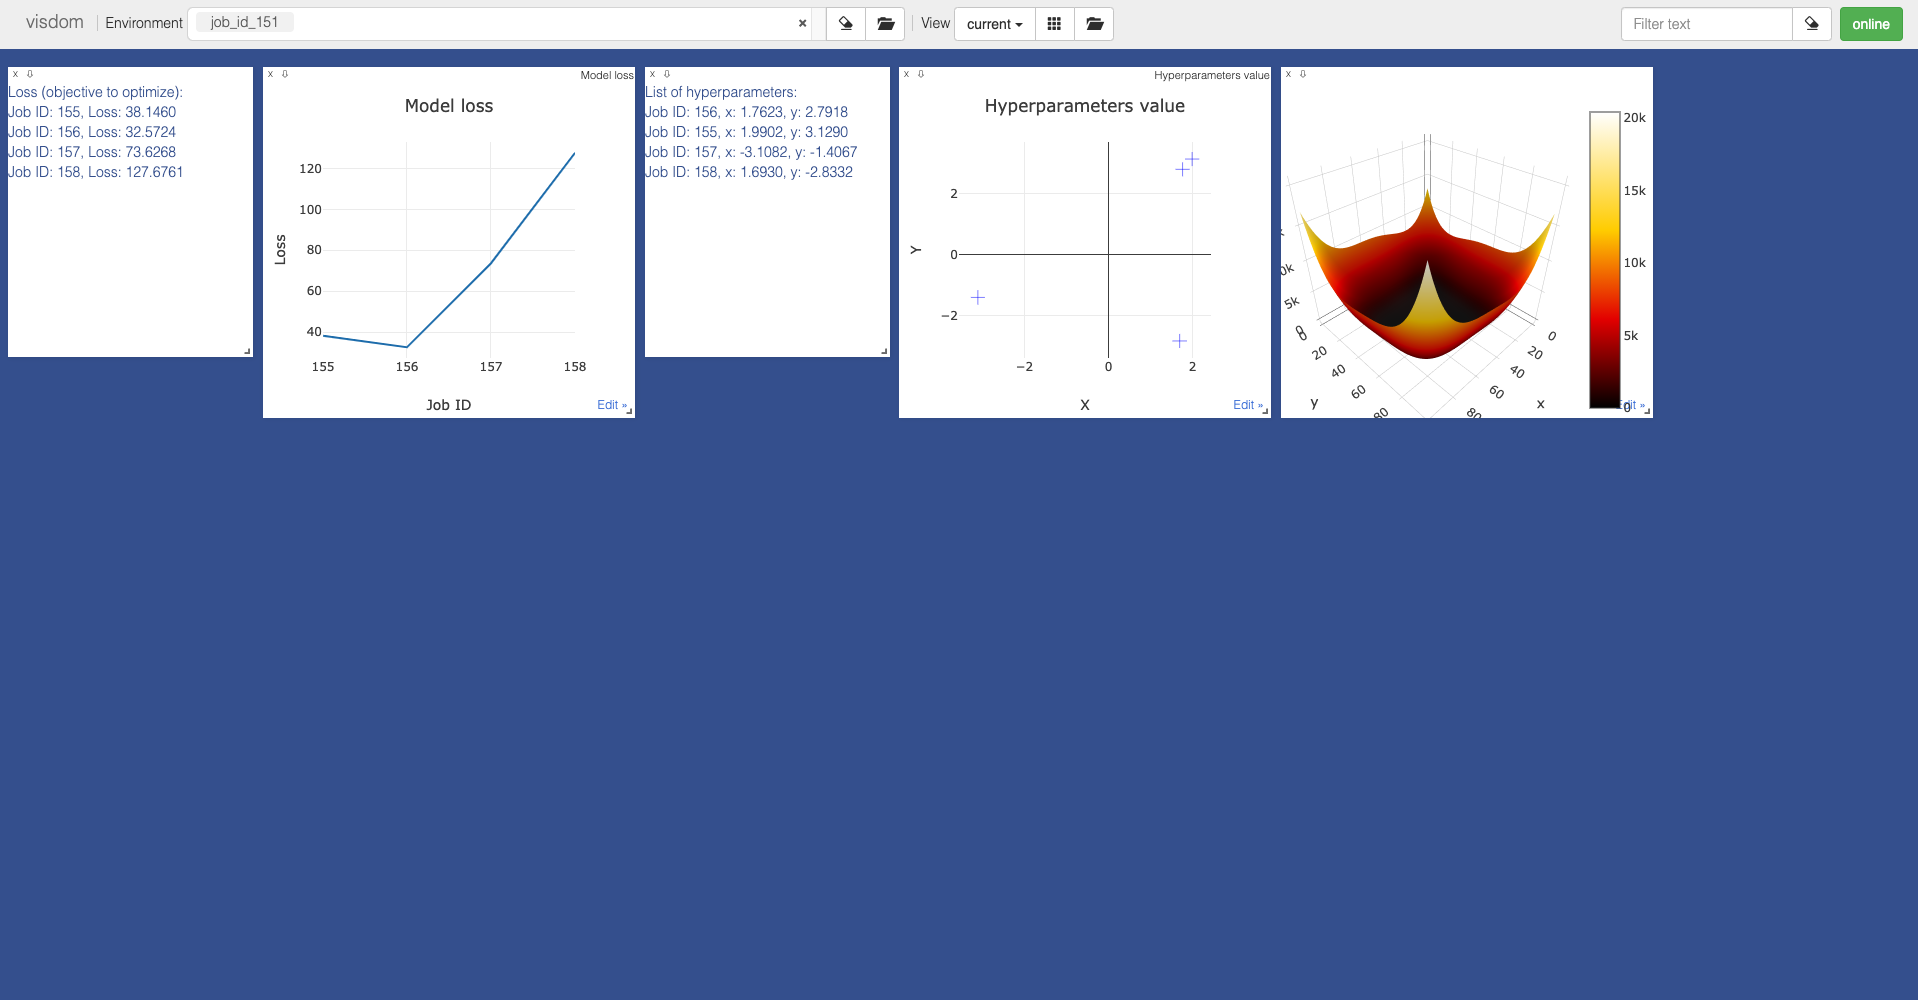
- Click on the visdom-gui endpoint button to visualize the Visdom web interface.
- Visualize the Visdom graphs.
2 Data Visualization with Tensorboard
Following the below instructions, you will be able to visualize your data using Tensorboard. Slide through the images for the steps illustration.
- Open ProActive Workflow Studio home page.
- Follow the steps illustrated in the third part (AutoML with Job Analytics) of Hyper Parameter Optimization (AutoML) tutorial. Make sure you do not submit your workflow before applying the following steps.
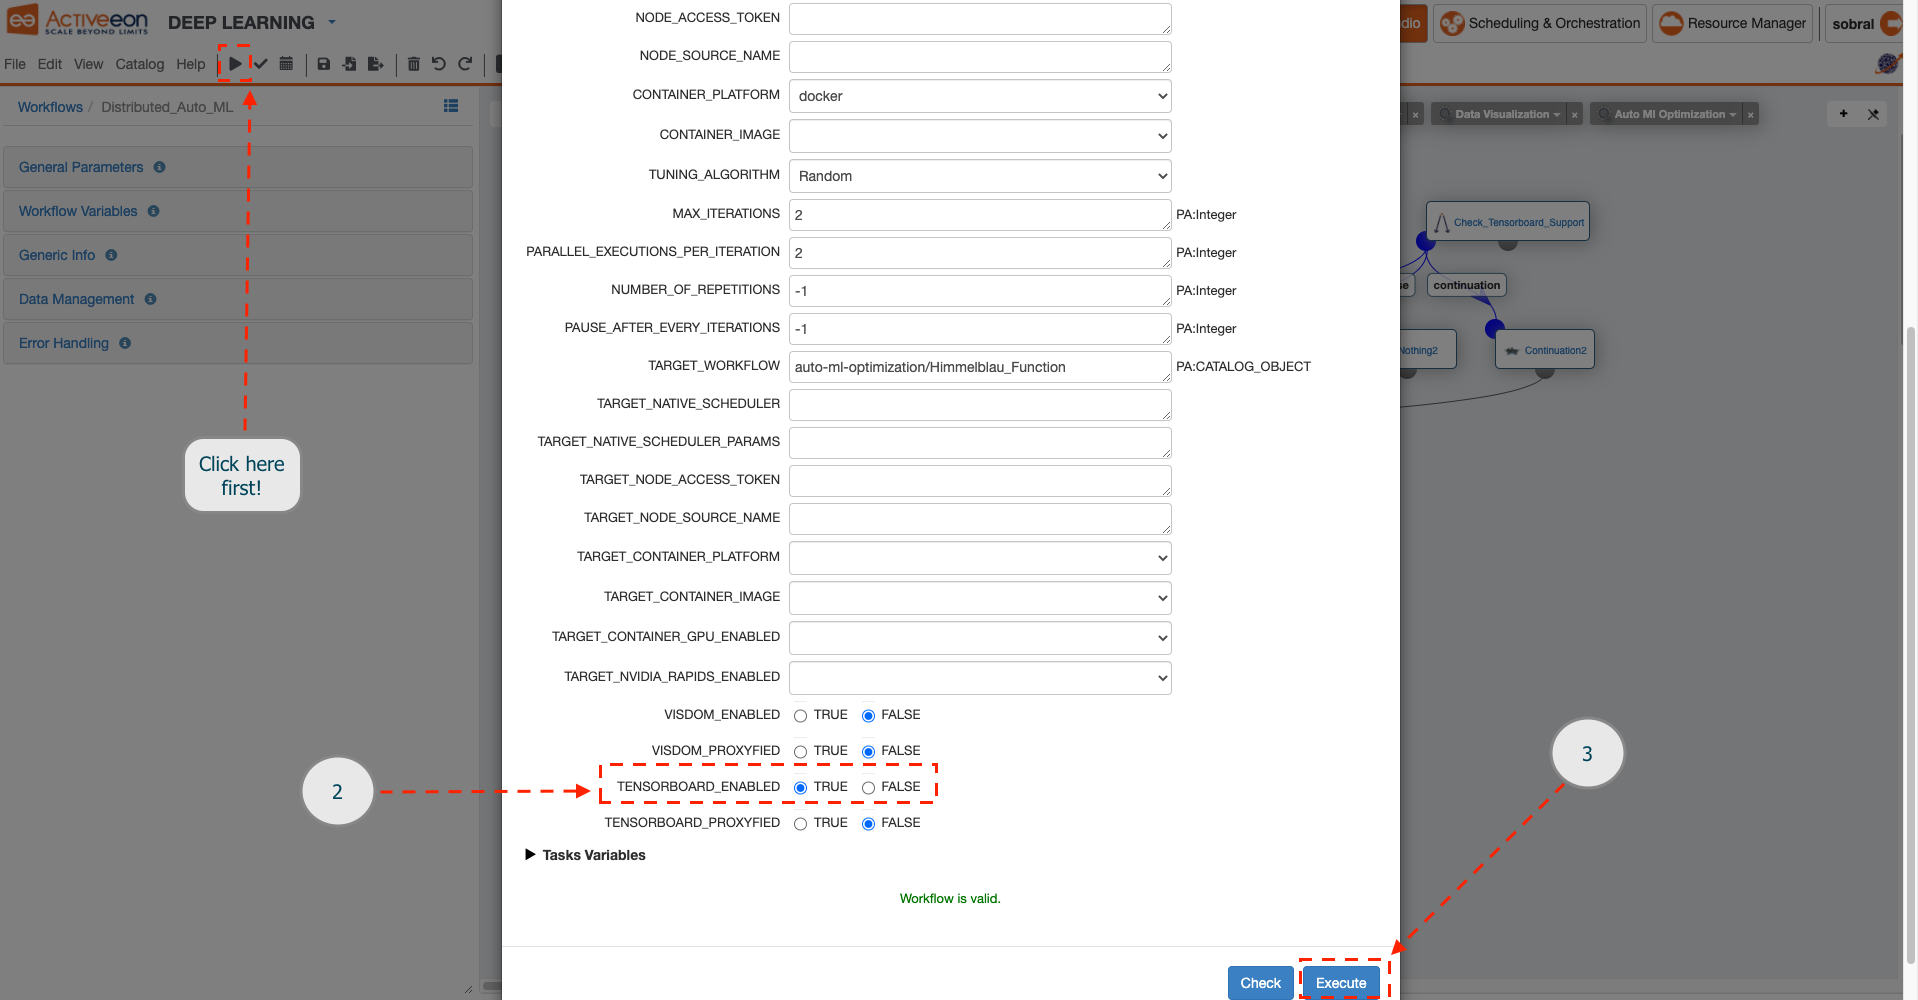
- Before clicking on the Execute button, find and select TENSORBOARD_ENABLED option to TRUE.
- Click on the Execute button.
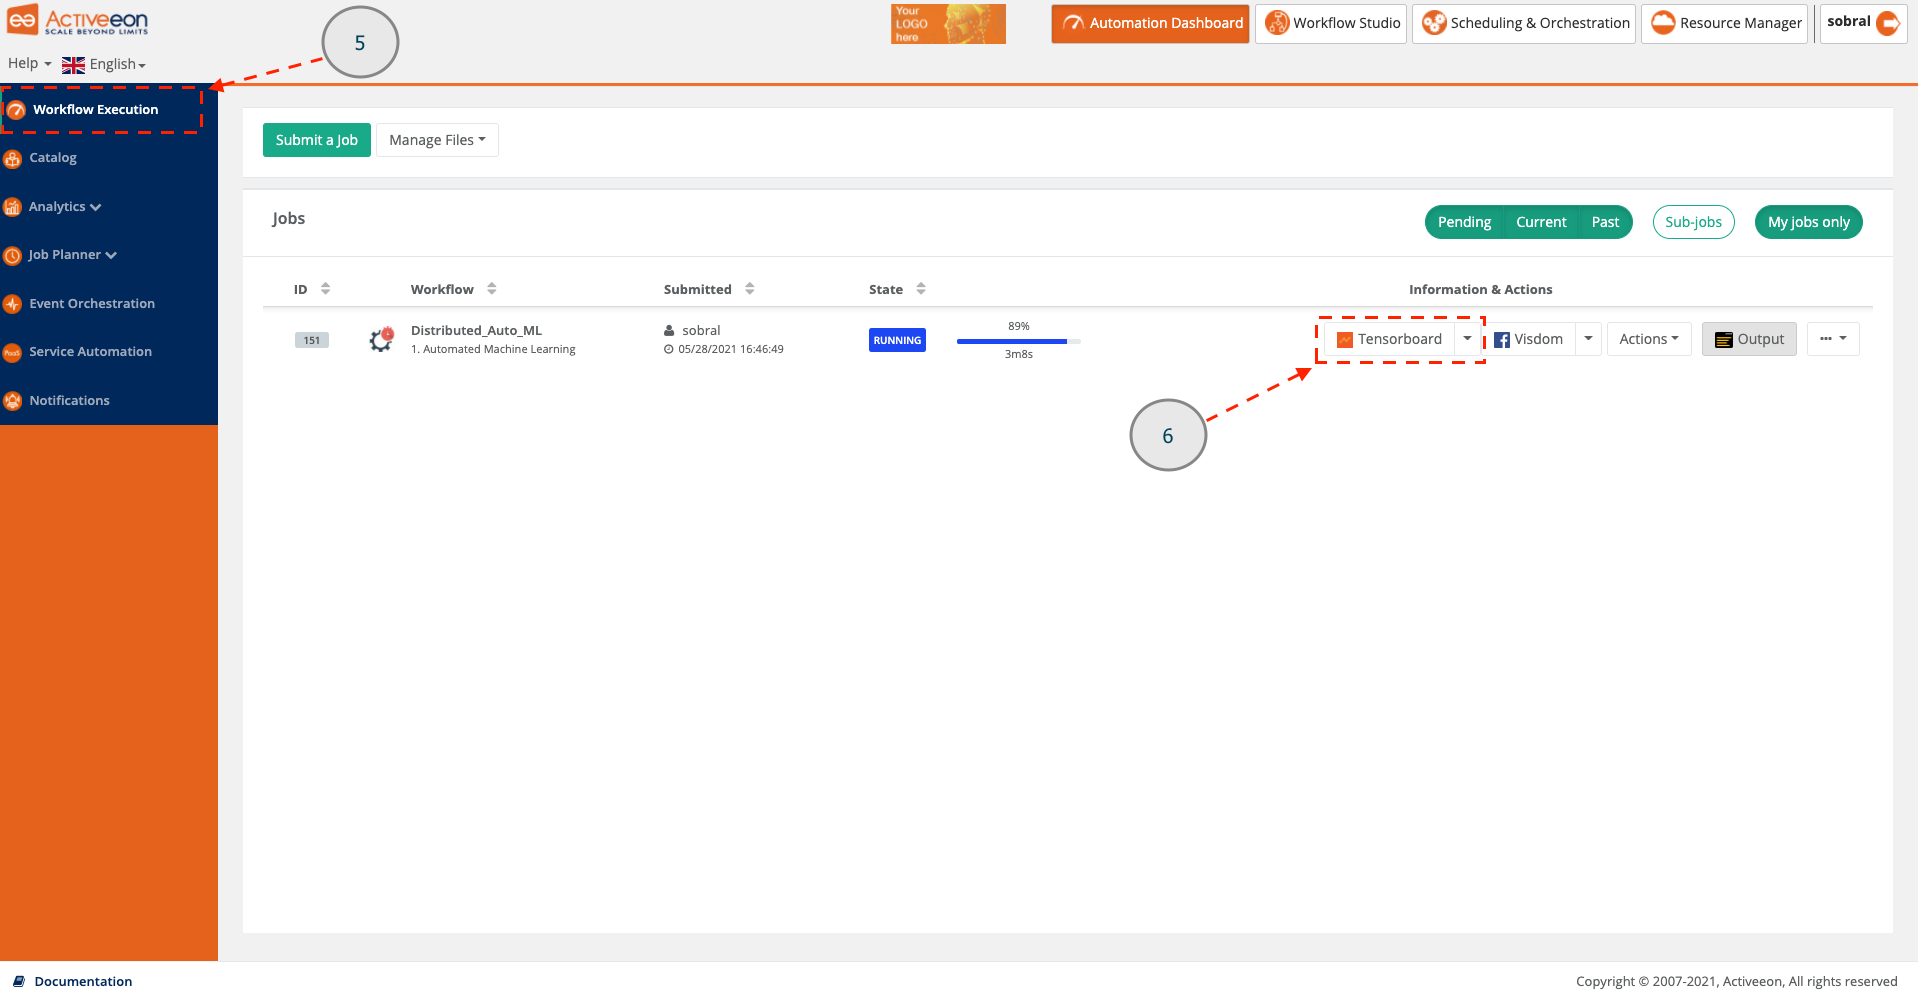
- Click on the Automation Dashboard menu.
- Click on the Workflow Execution menu.
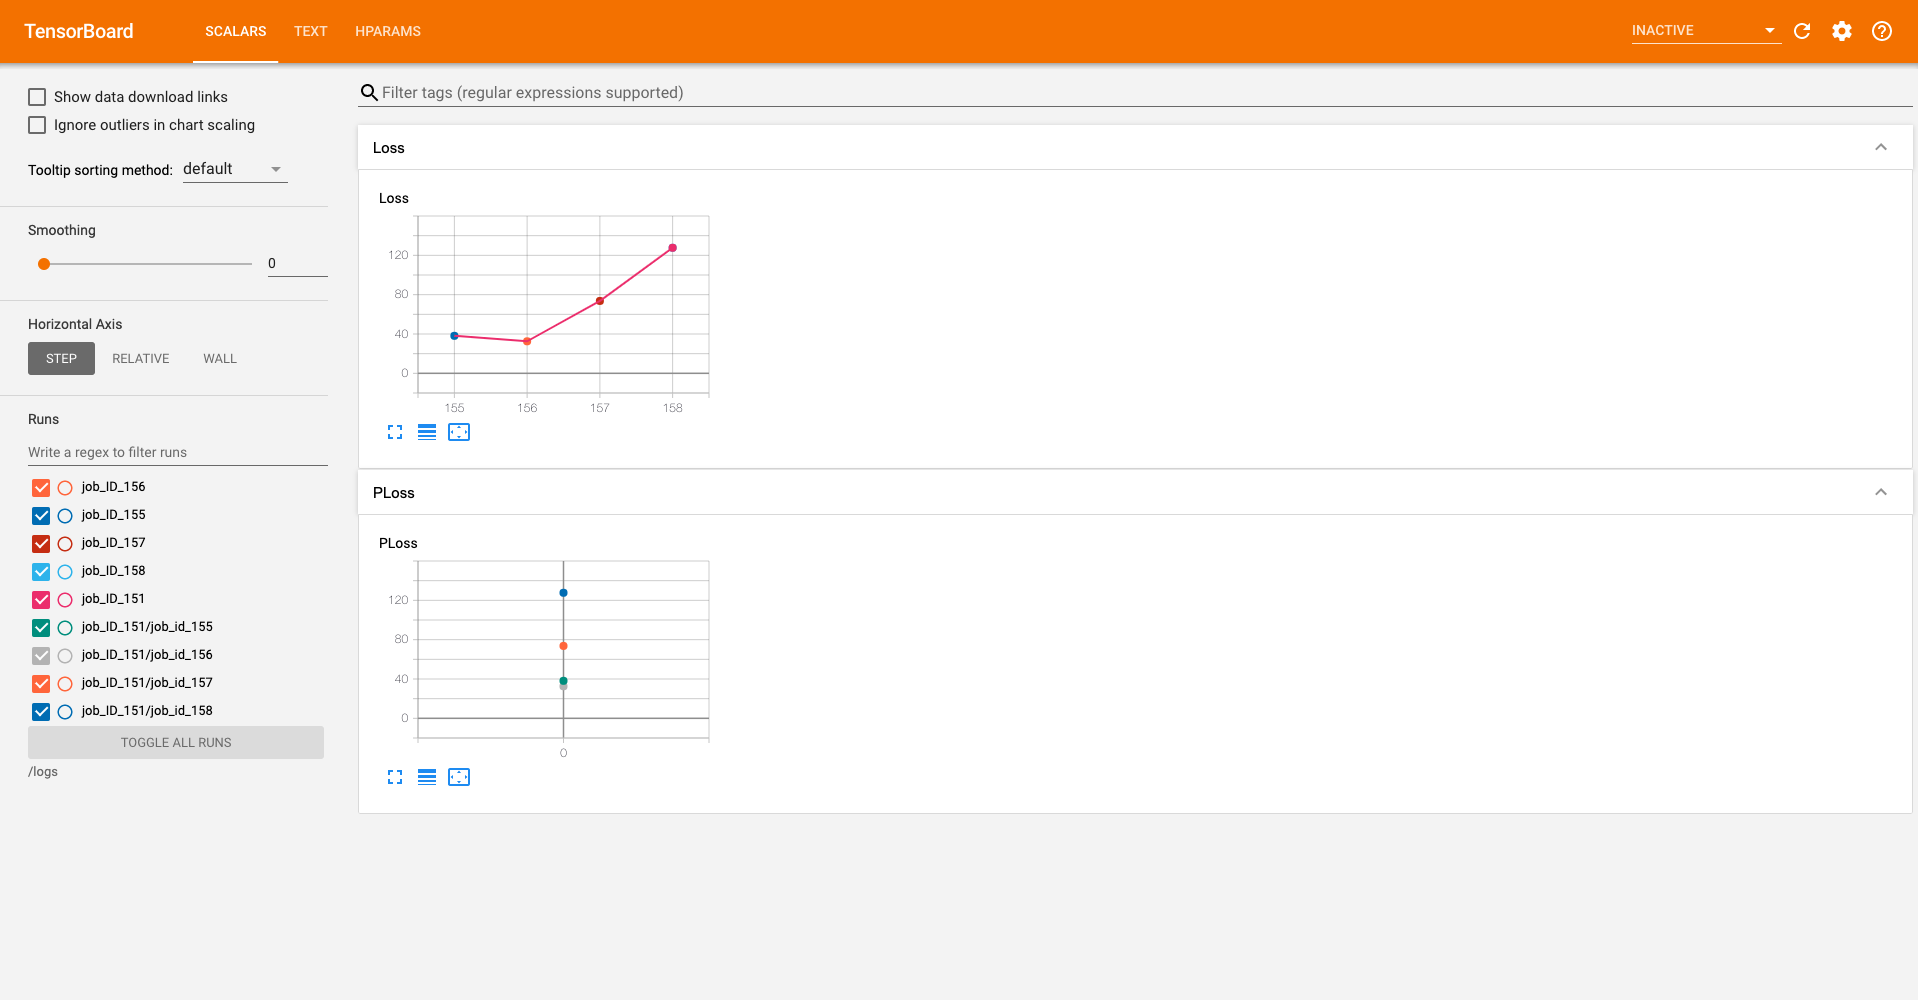
- Click on the tensorboard-gui endpoint button to visualize the Tensorboard web interface.
- Visualize the Tensorboard graphs.
- watch PAIO demo video
- the tutorial on machine learning as a service (mlaas)
- go through our documentation for more details