ProActive Quickstart -Hyper Parameter Optimization (AutoML)
ProActive AI Orchestration (PAIO) is an interactive graphical interface that enables developers and data scientists to quickly and easily build, train, and deploy machine learning models at any scale. It provides a rich set of generic machine learning tasks that can be connected together to build basic and complex machine learning workflows for various use cases such as: fraud detection, text analysis, online offer recommendations, prediction of equipment failures, facial expression analysis, etc. These tasks are open source and can be easily customized according to your needs. PAIO can schedule and orchestrate executions while optimising the use of computational resources. Usage of resources (e.g. CPU, GPU, local, remote nodes) can be quickly monitored.
This tutorial will show you how to:
- Create and optimize your machine learning workflow using AutoML.
- Submit it to the scheduler and monitor its execution.
- Analyze the job results using the Job Analytics.
1 Create and optimize your Workflow Using AutoML
Following the below instructions, you will be able to learn how to create and optimize your machine learning workflow using AutoML. Slide through the images for the steps illustration.
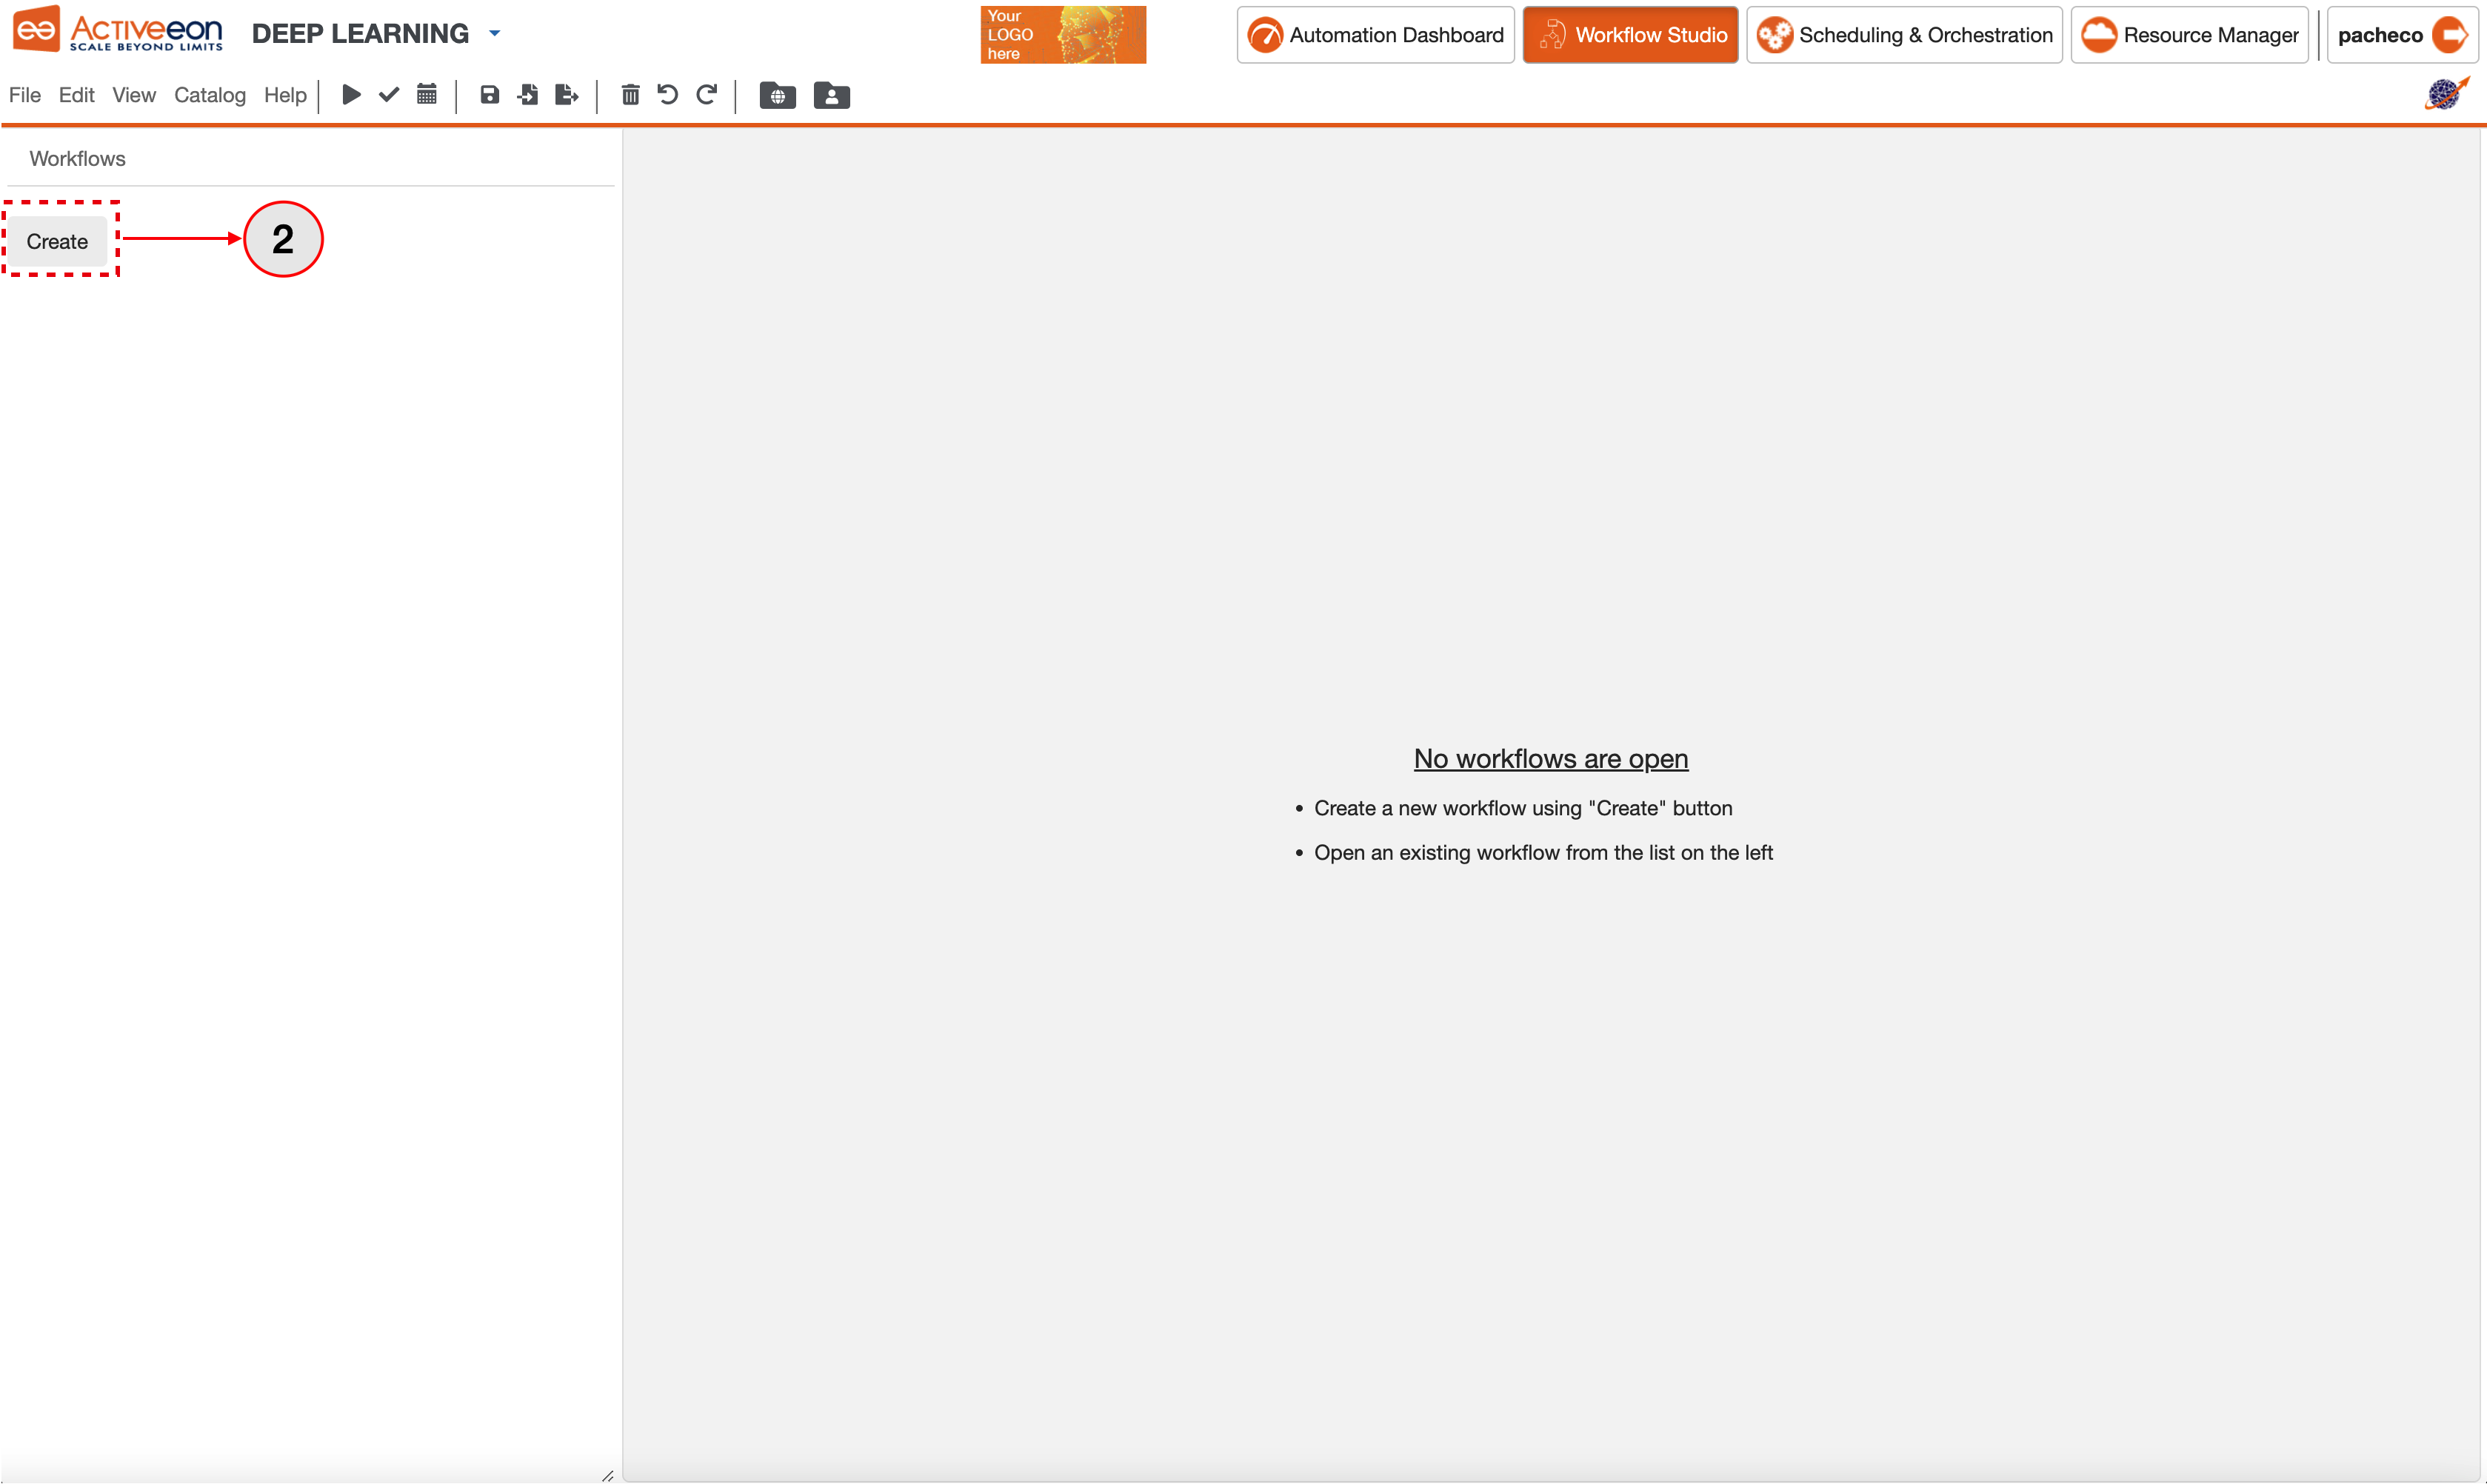
- Open ProActive Workflow Studio home page.
- Create a new workflow using the Create button.
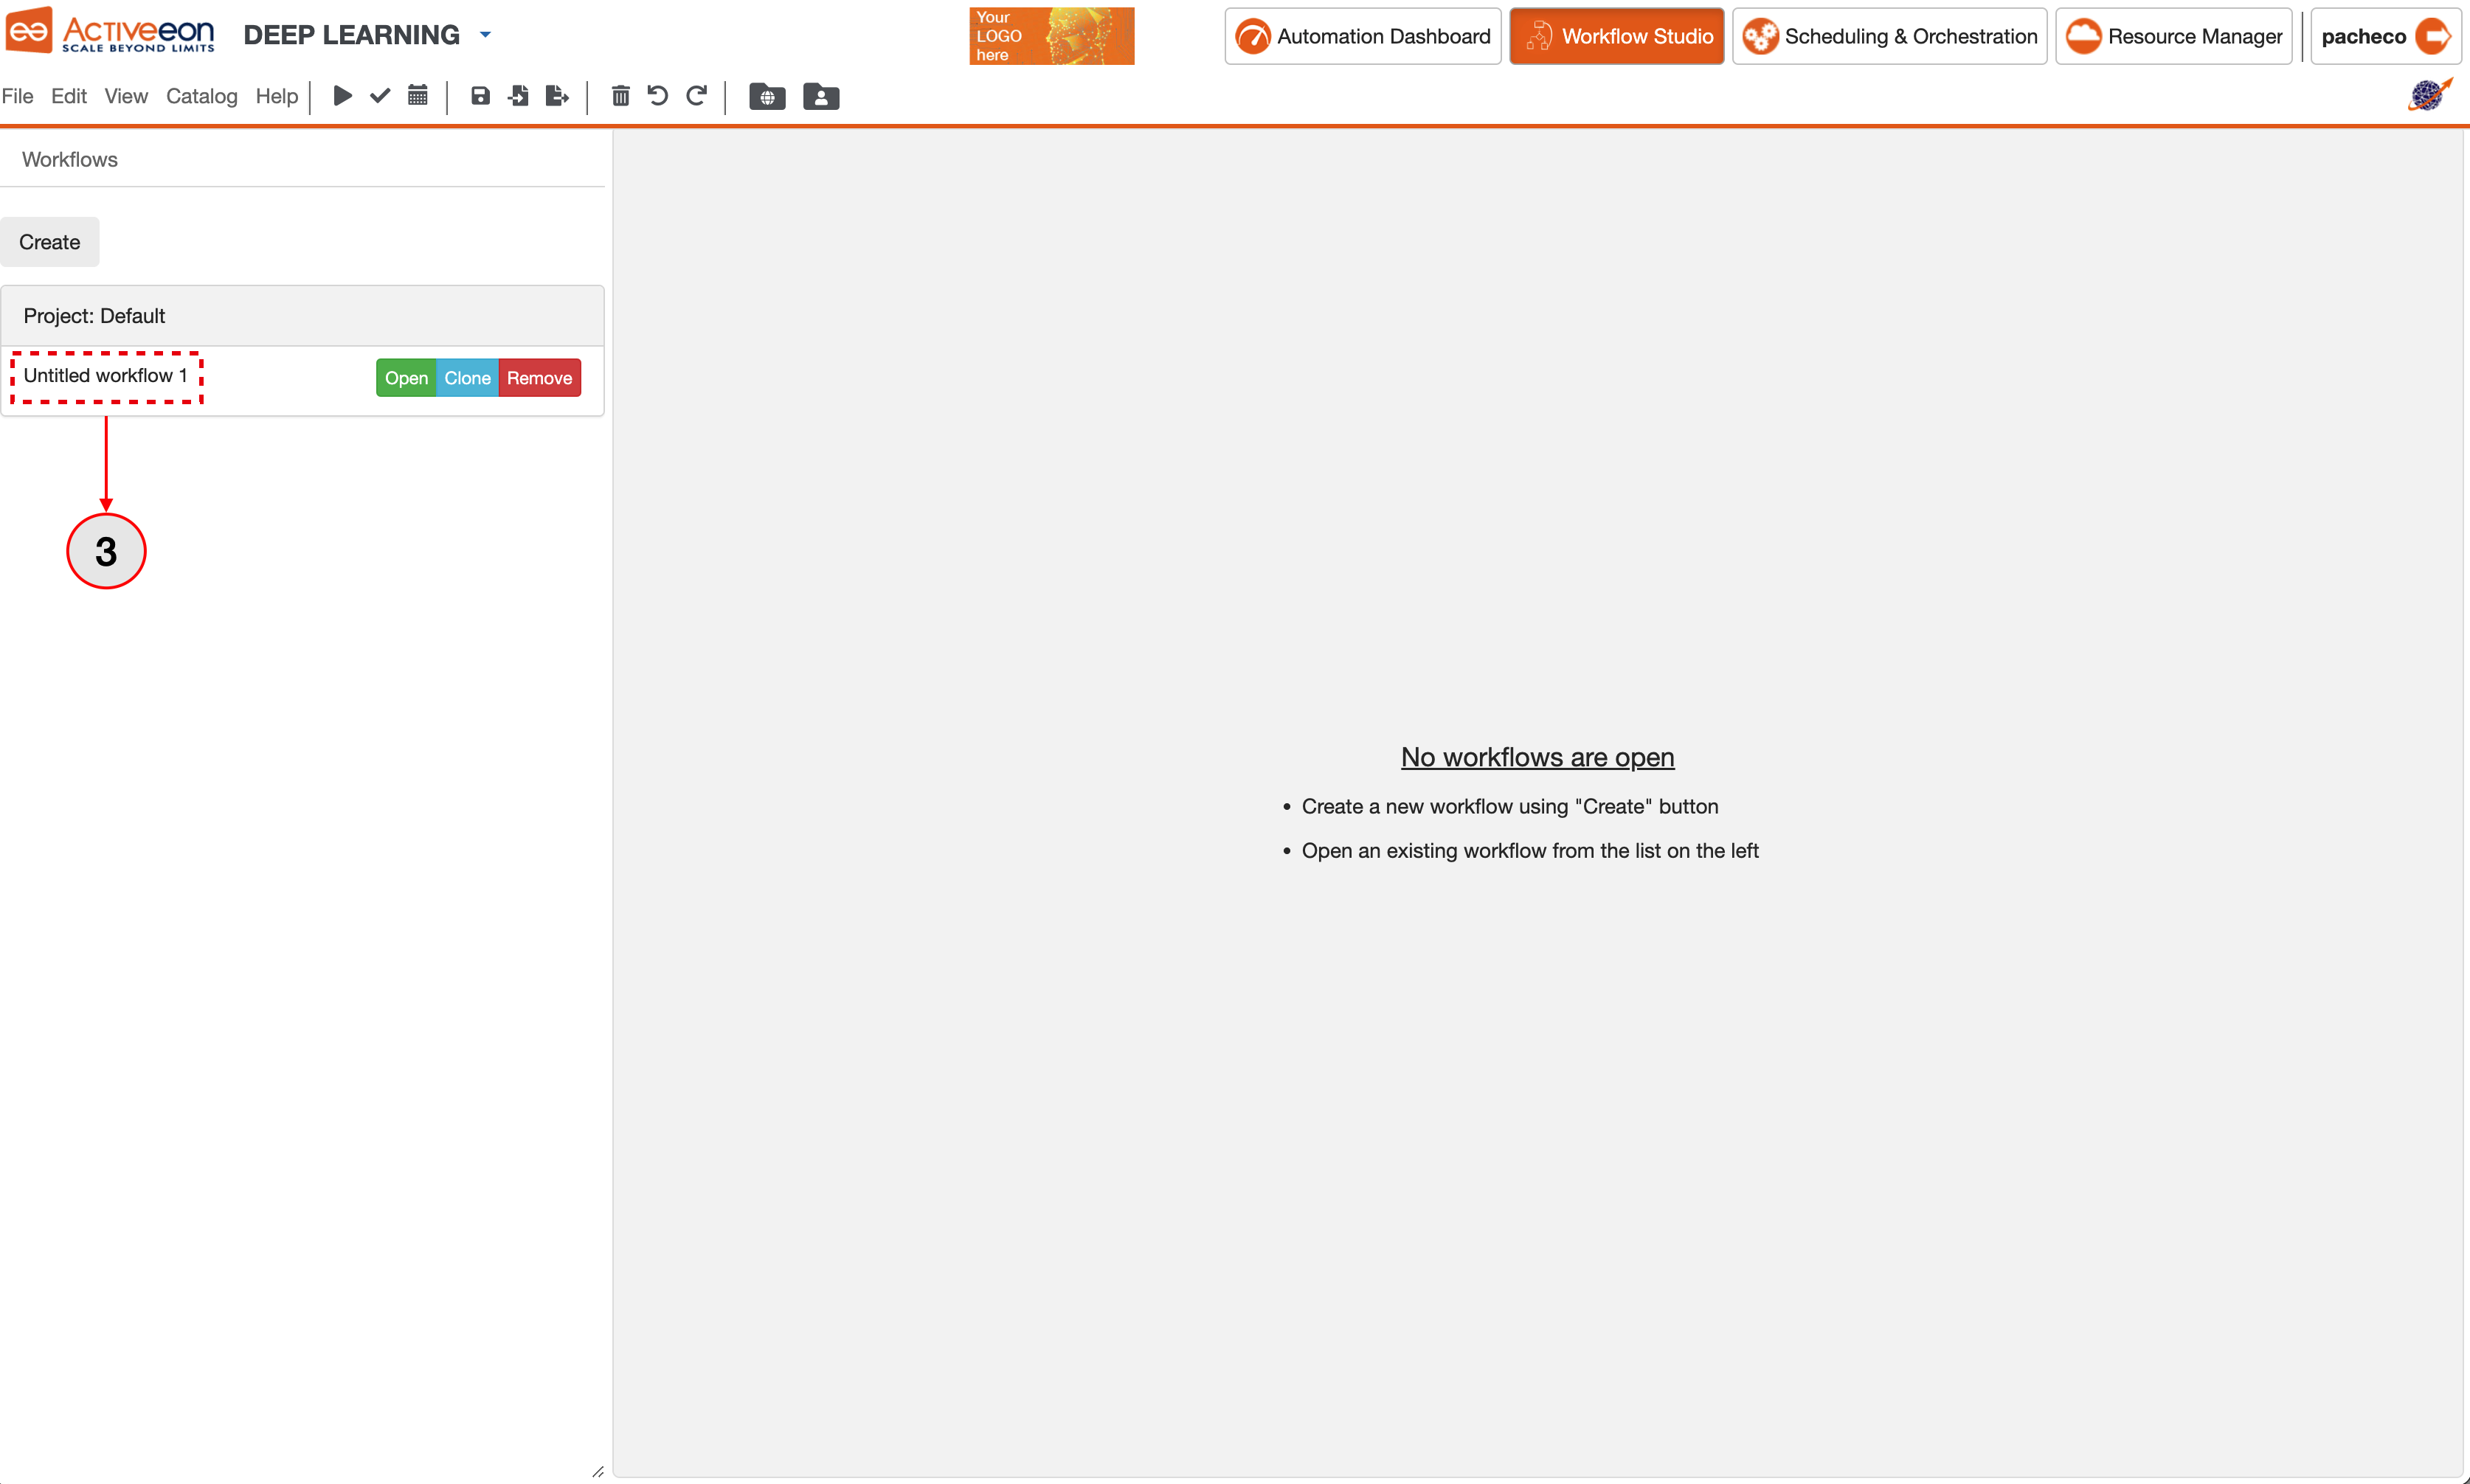
- Click on Untitled workflow 1.
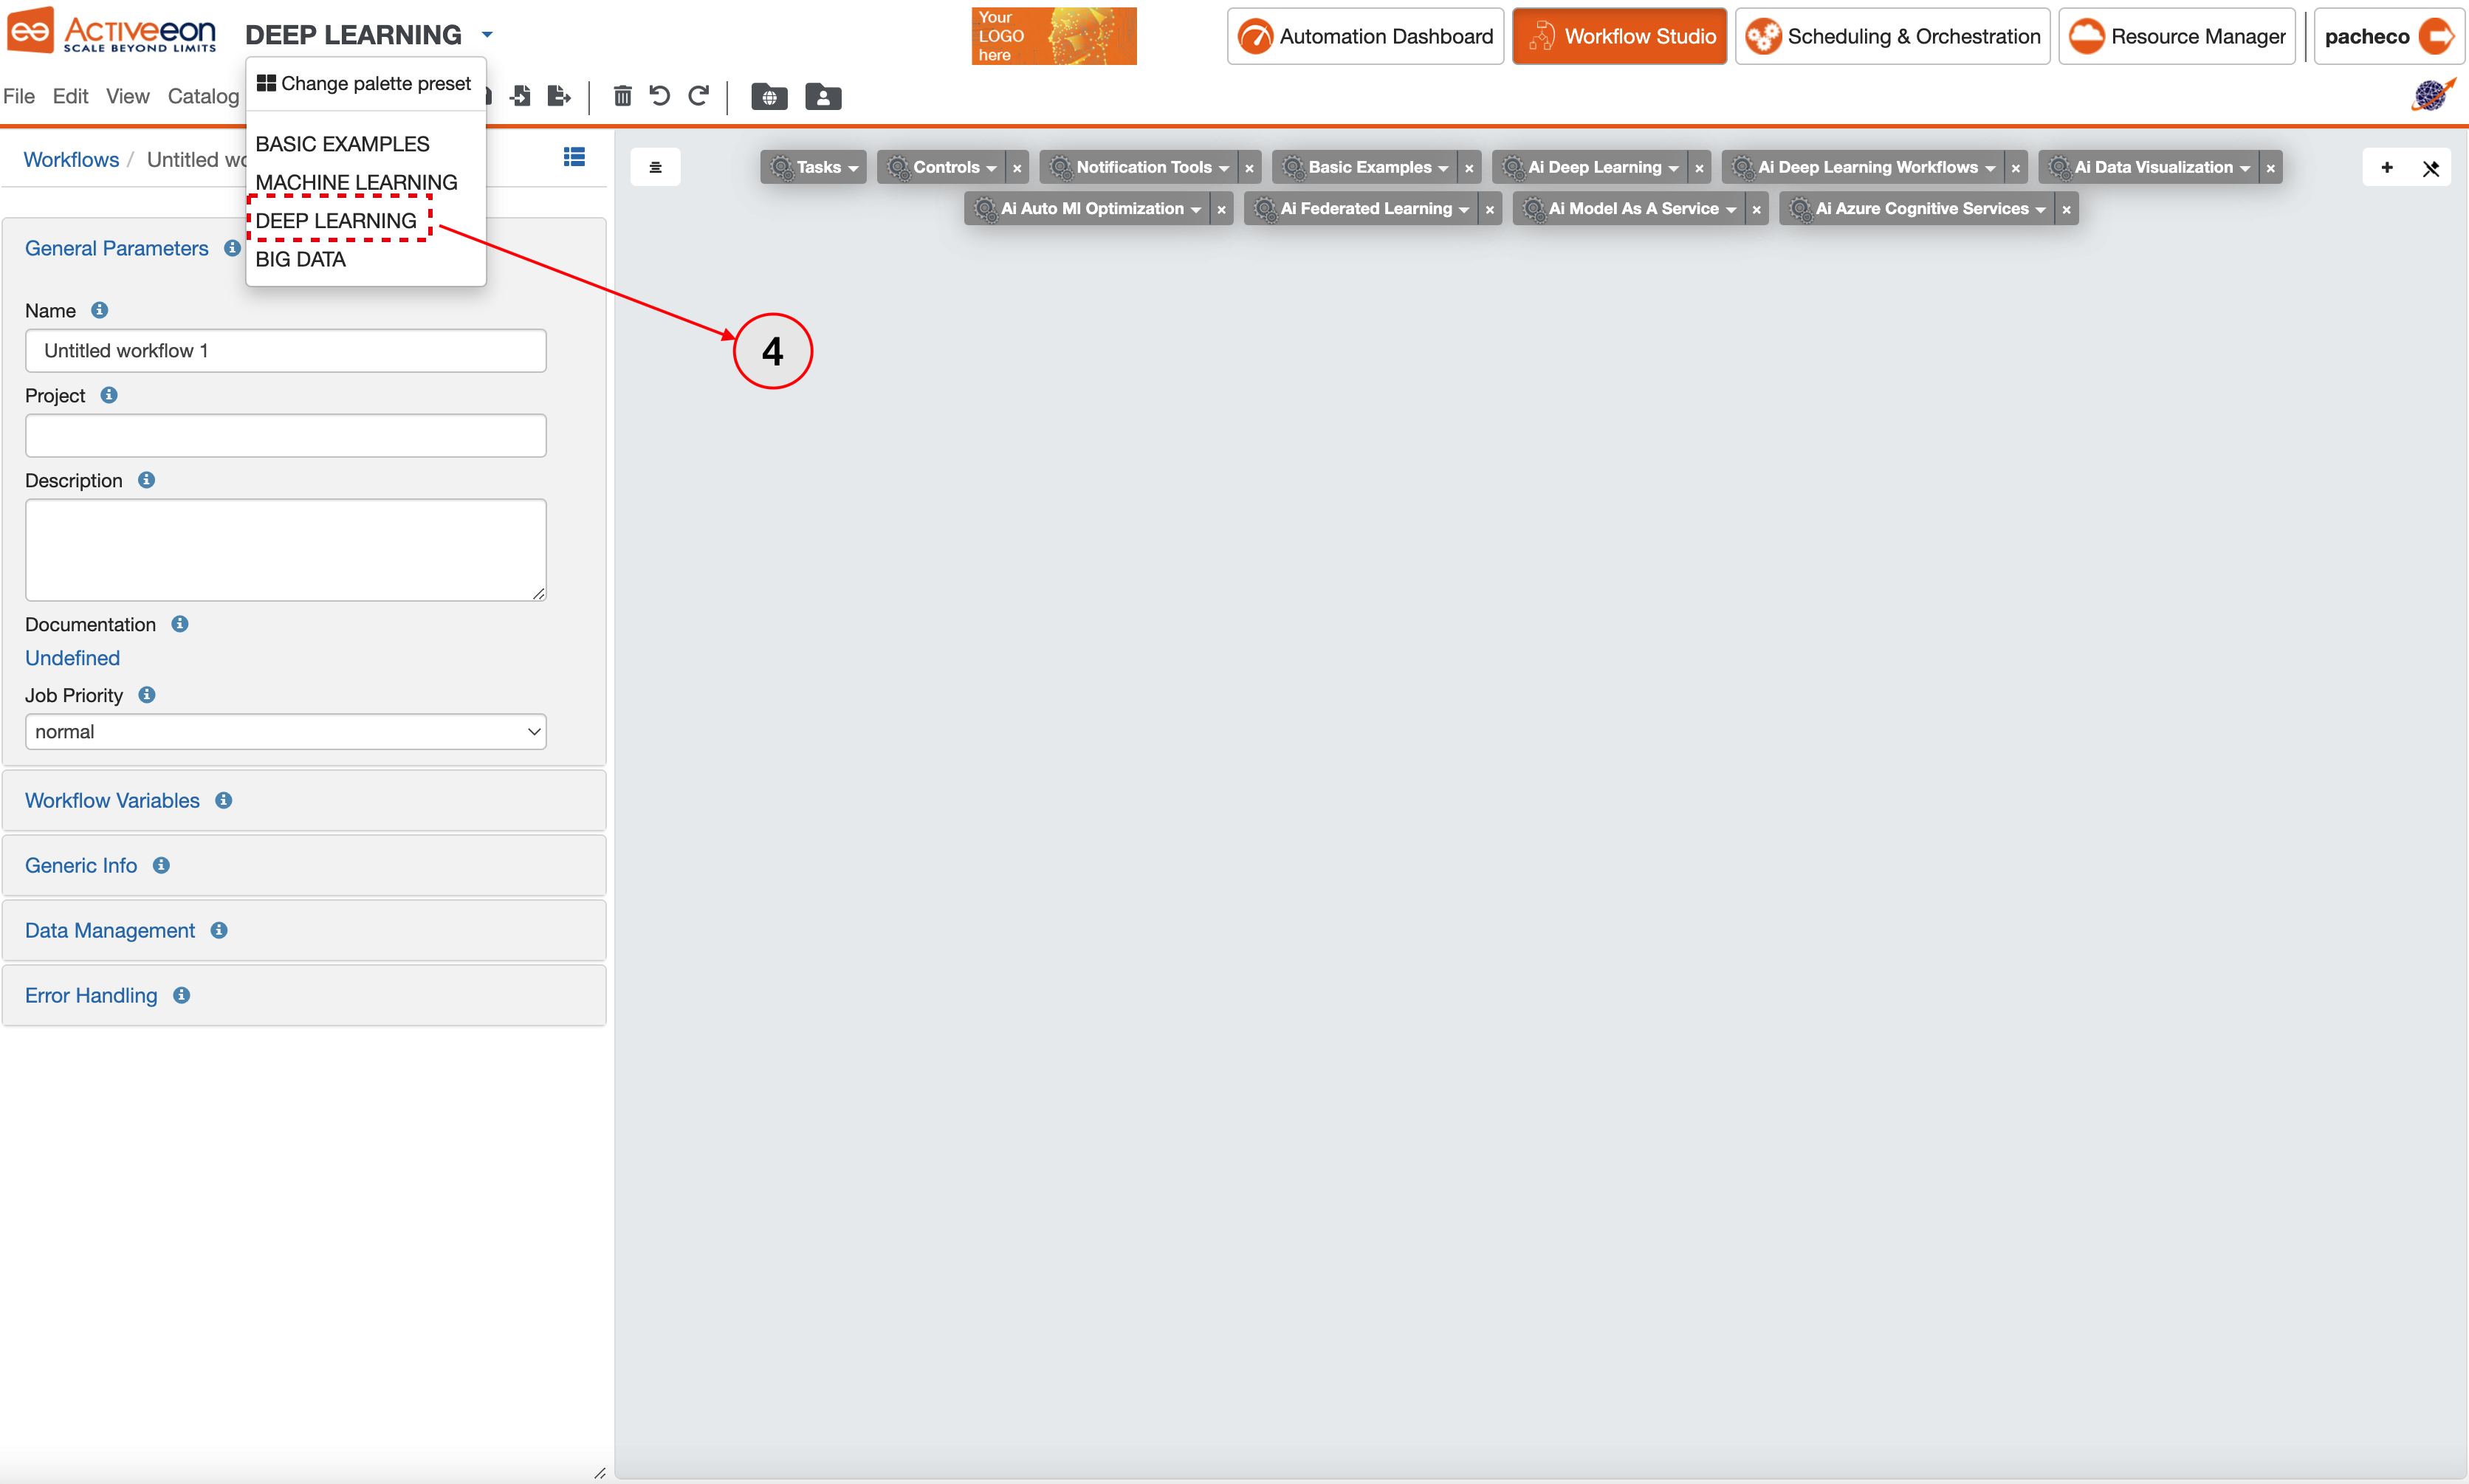
- Change palette preset to Deep Learning.
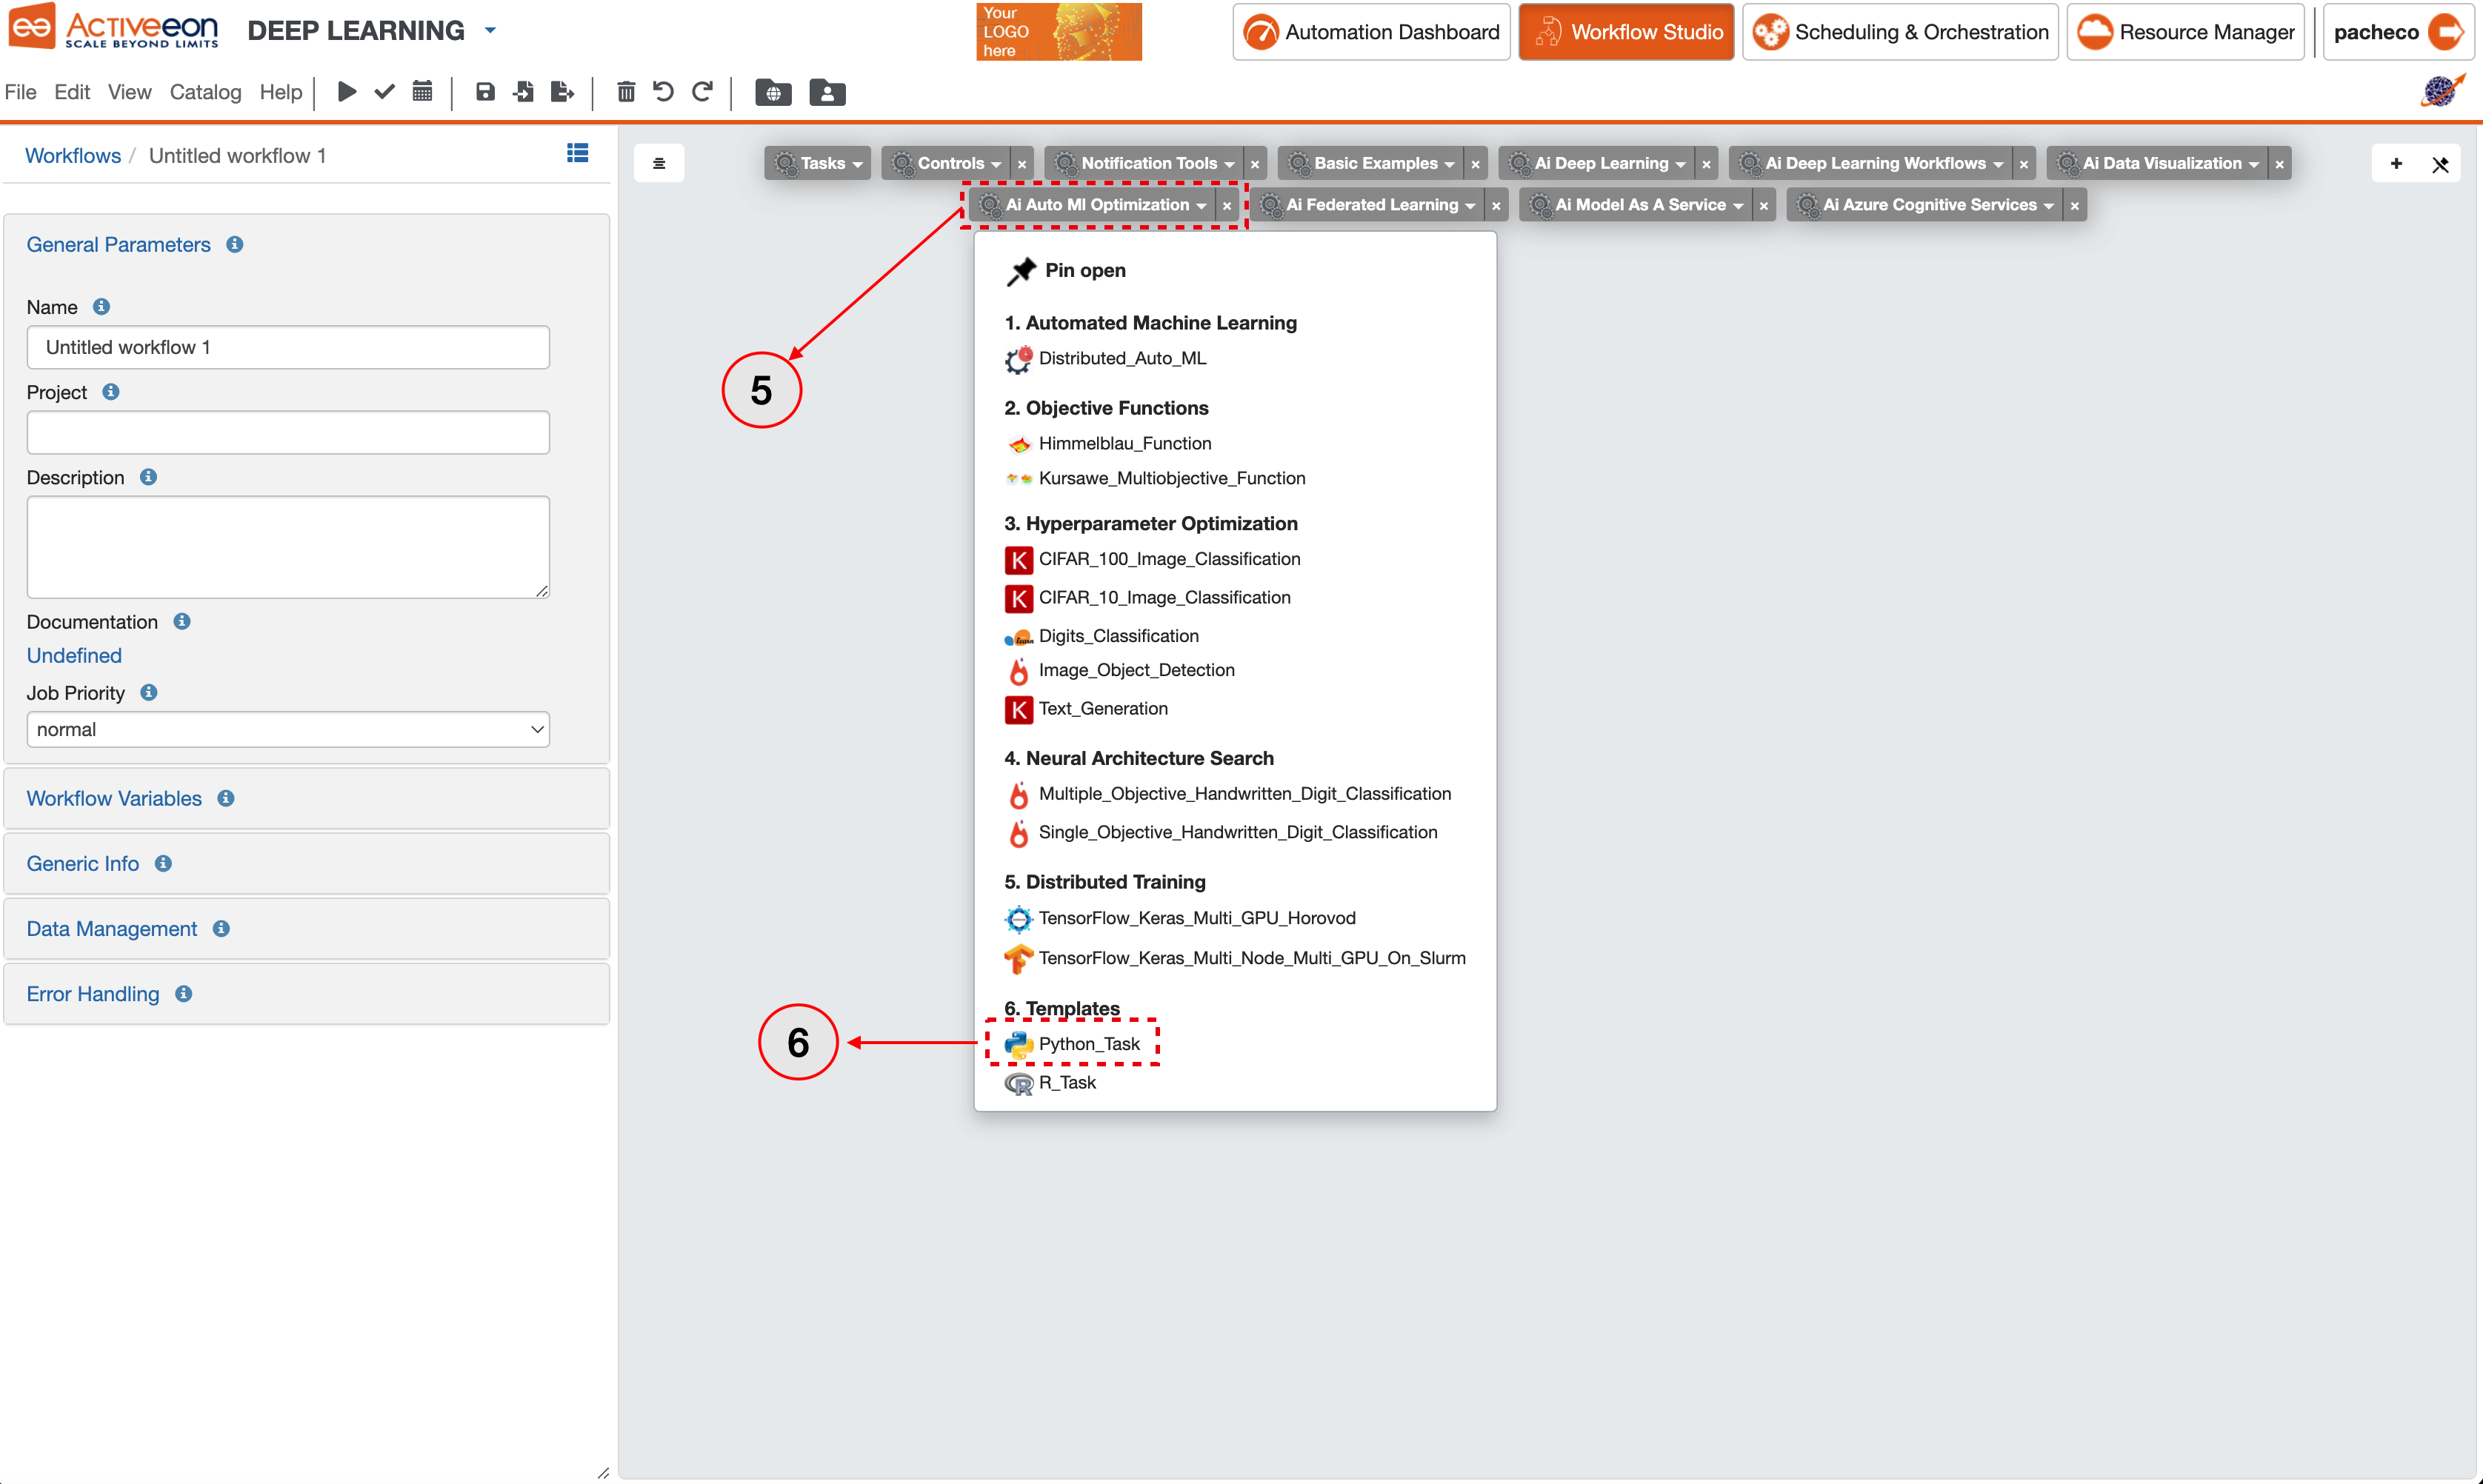
- Go to Ai Auto ML Optimization bucket.
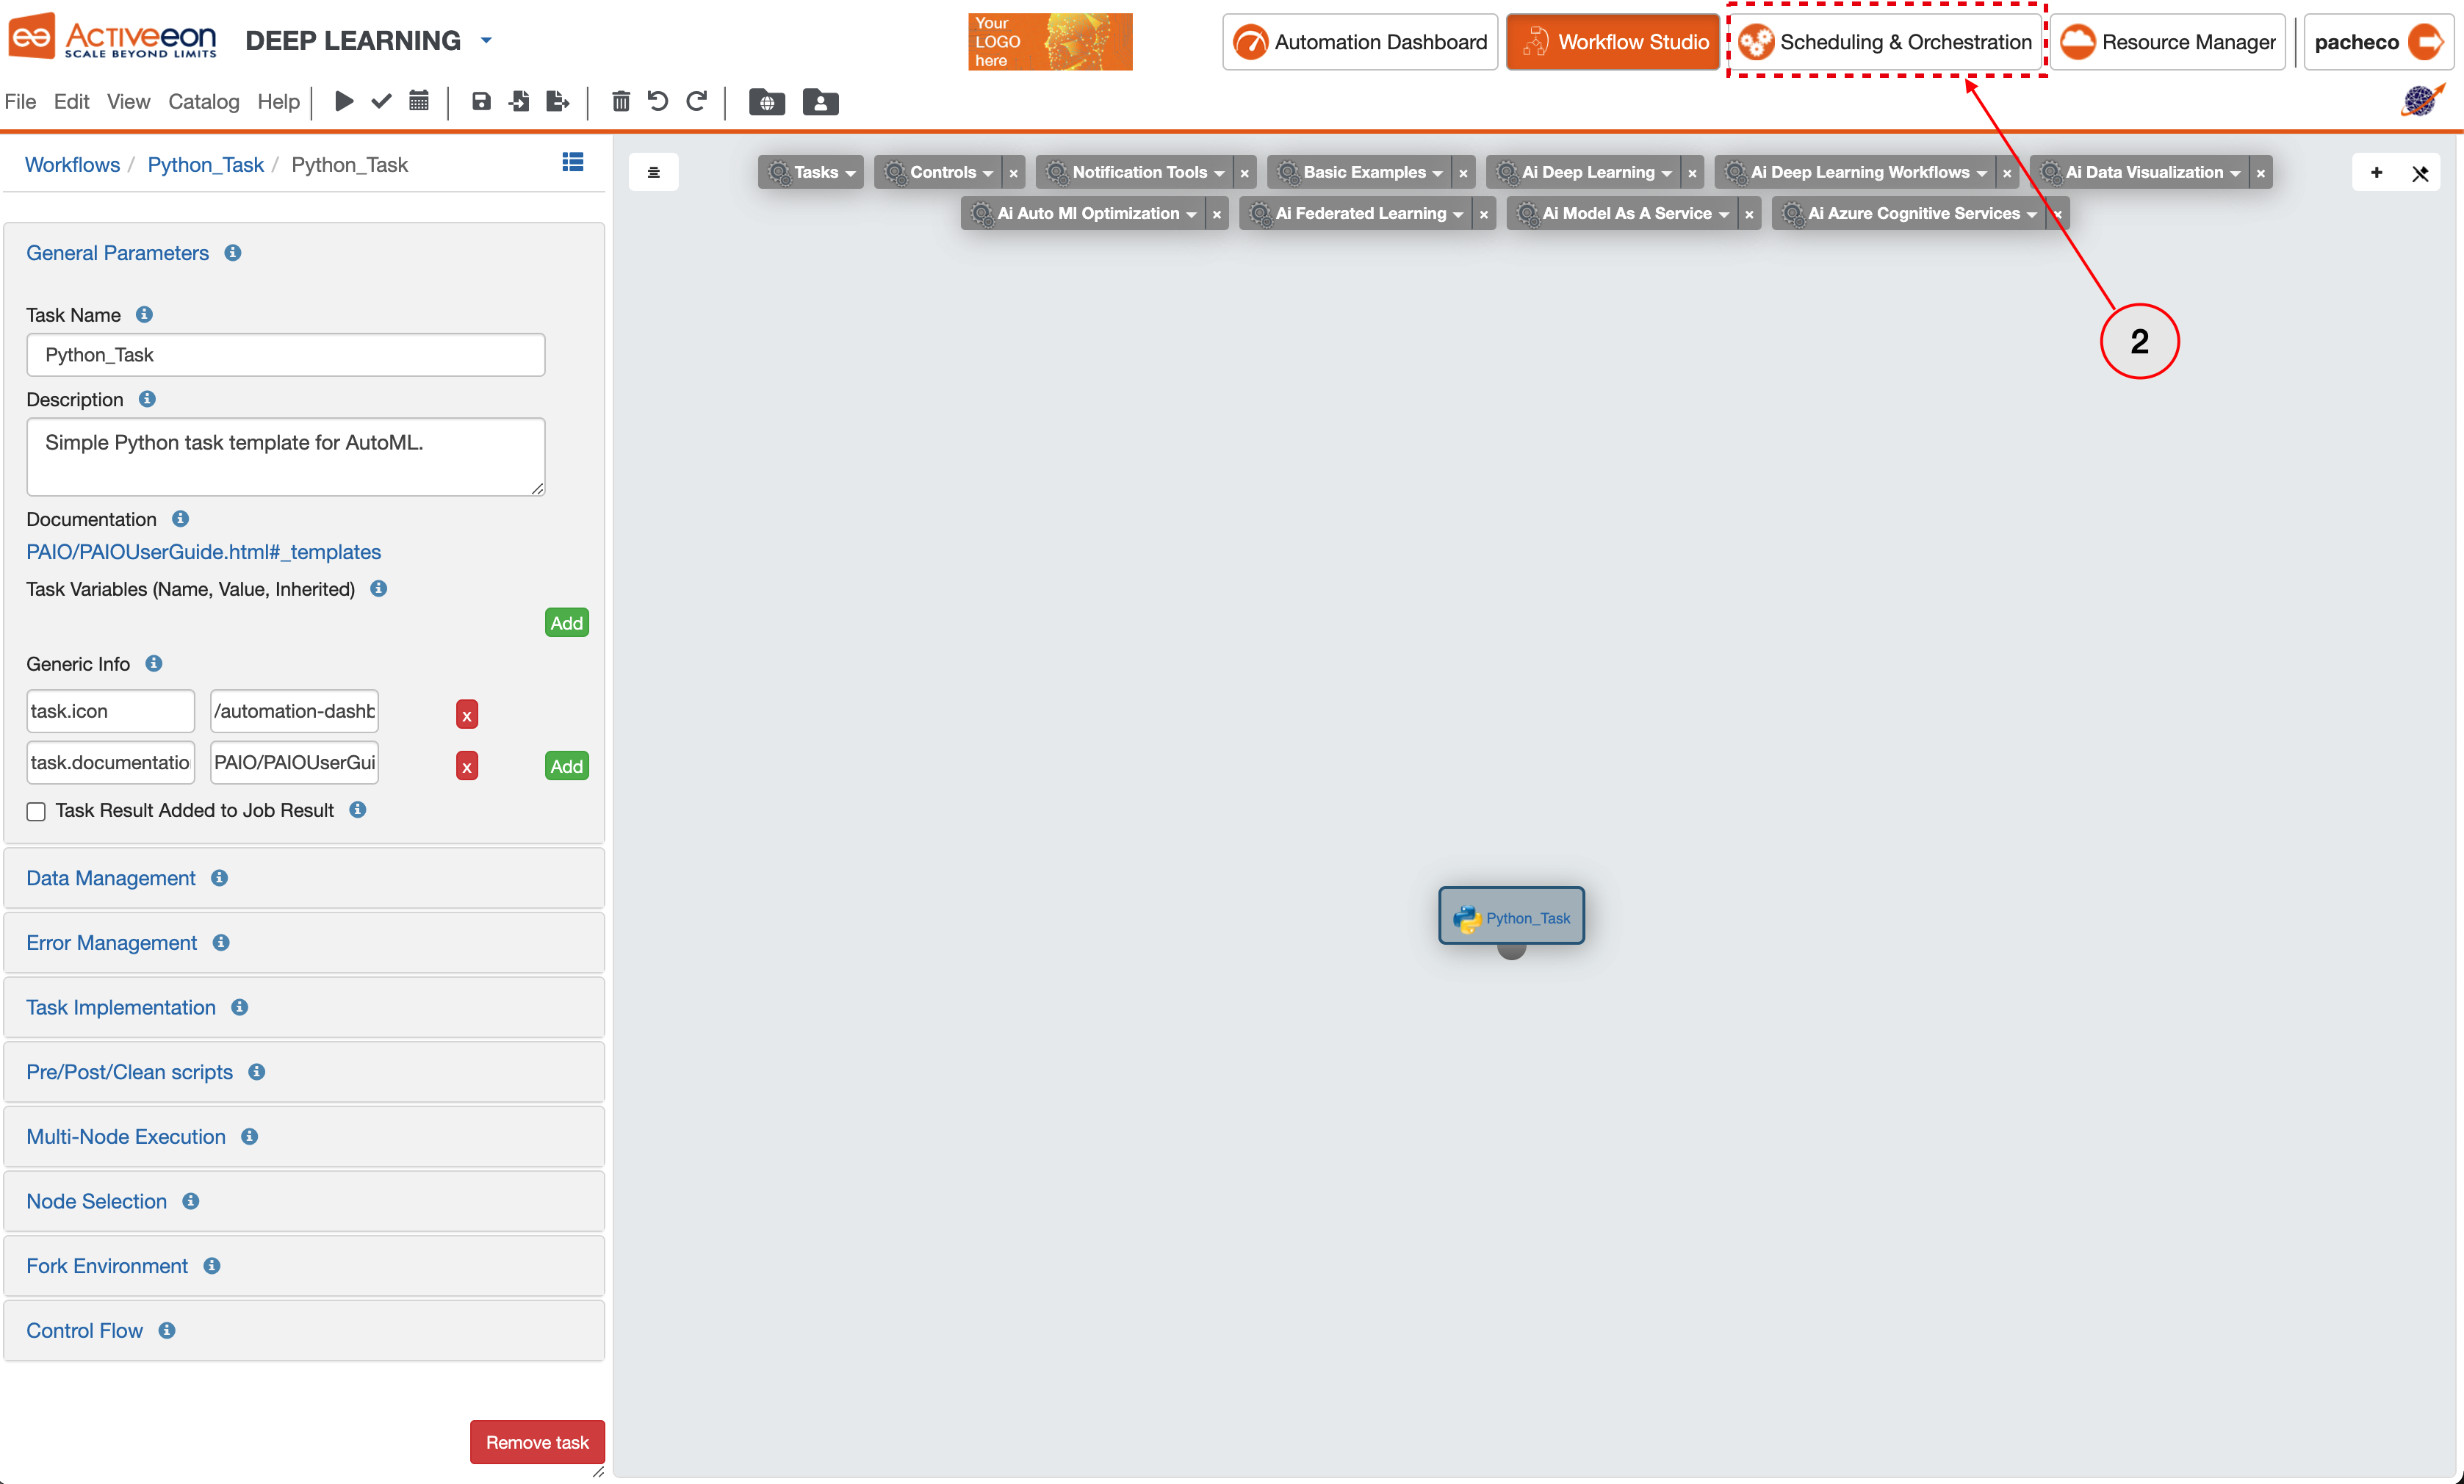
- Drag and drop the Python_Task.
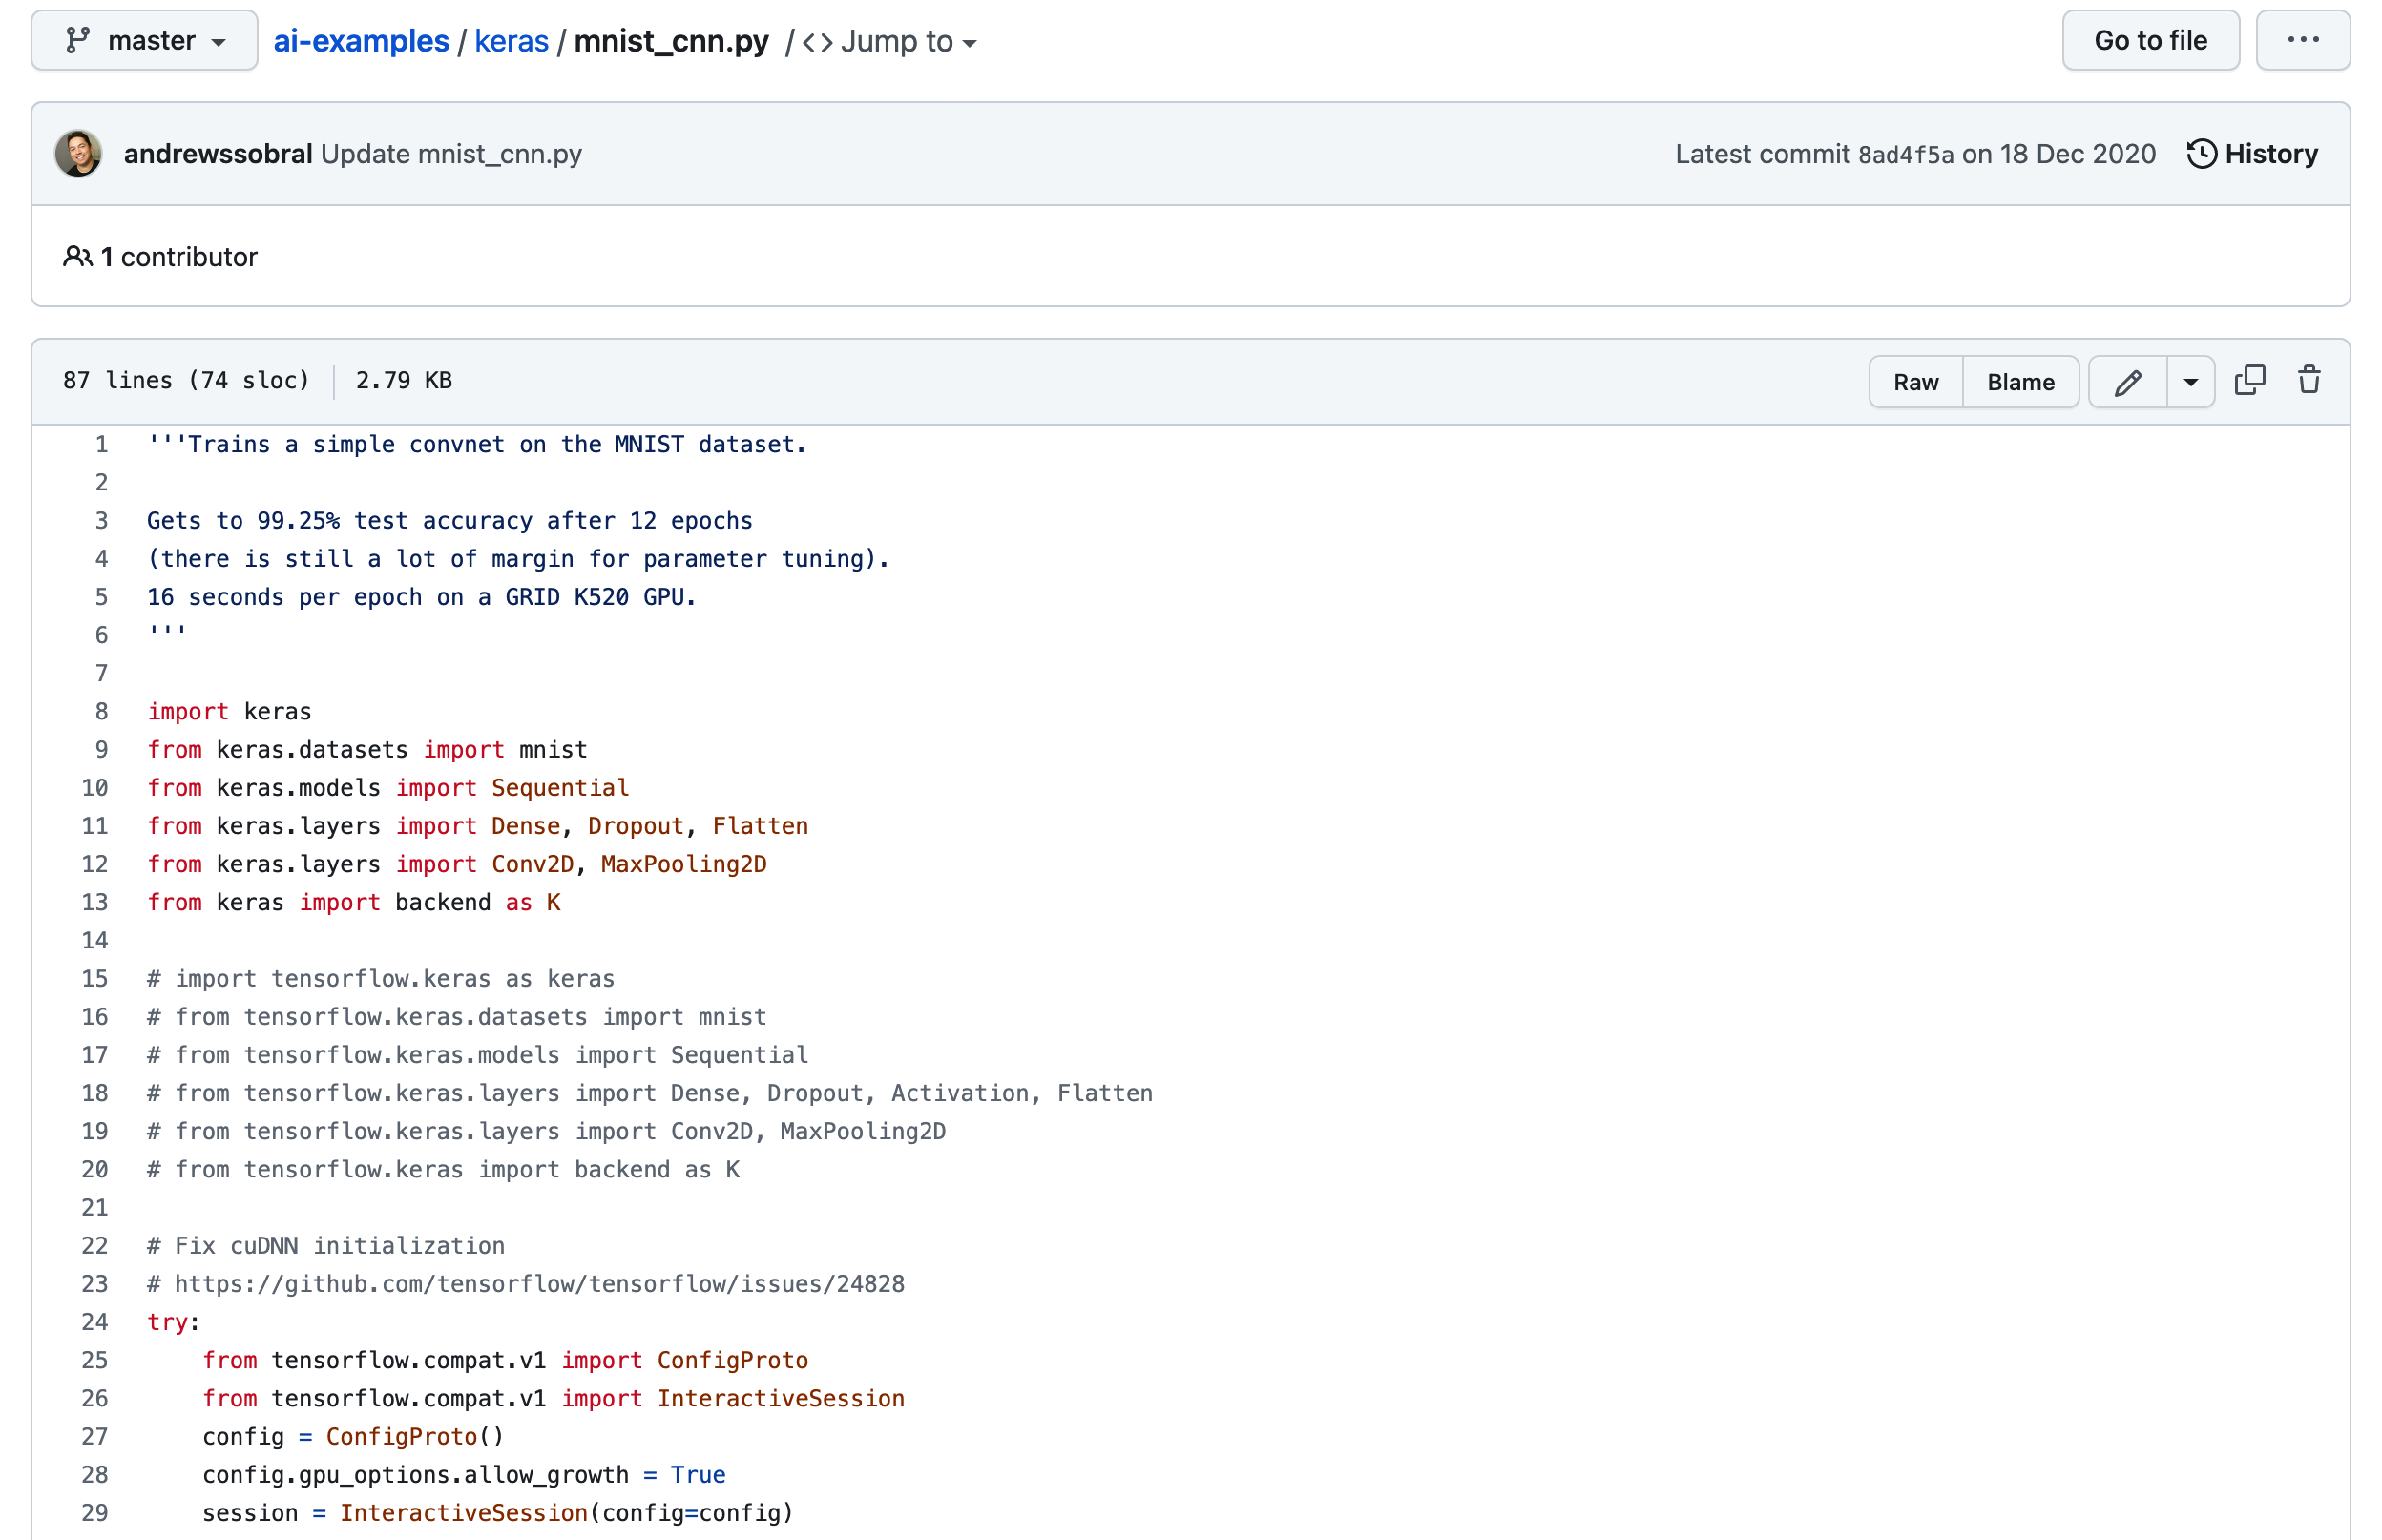
- Go to https://github.com/ow2-proactive/ai-examples/blob/master/keras/mnist_cnn.py repository.
- Copy all code.
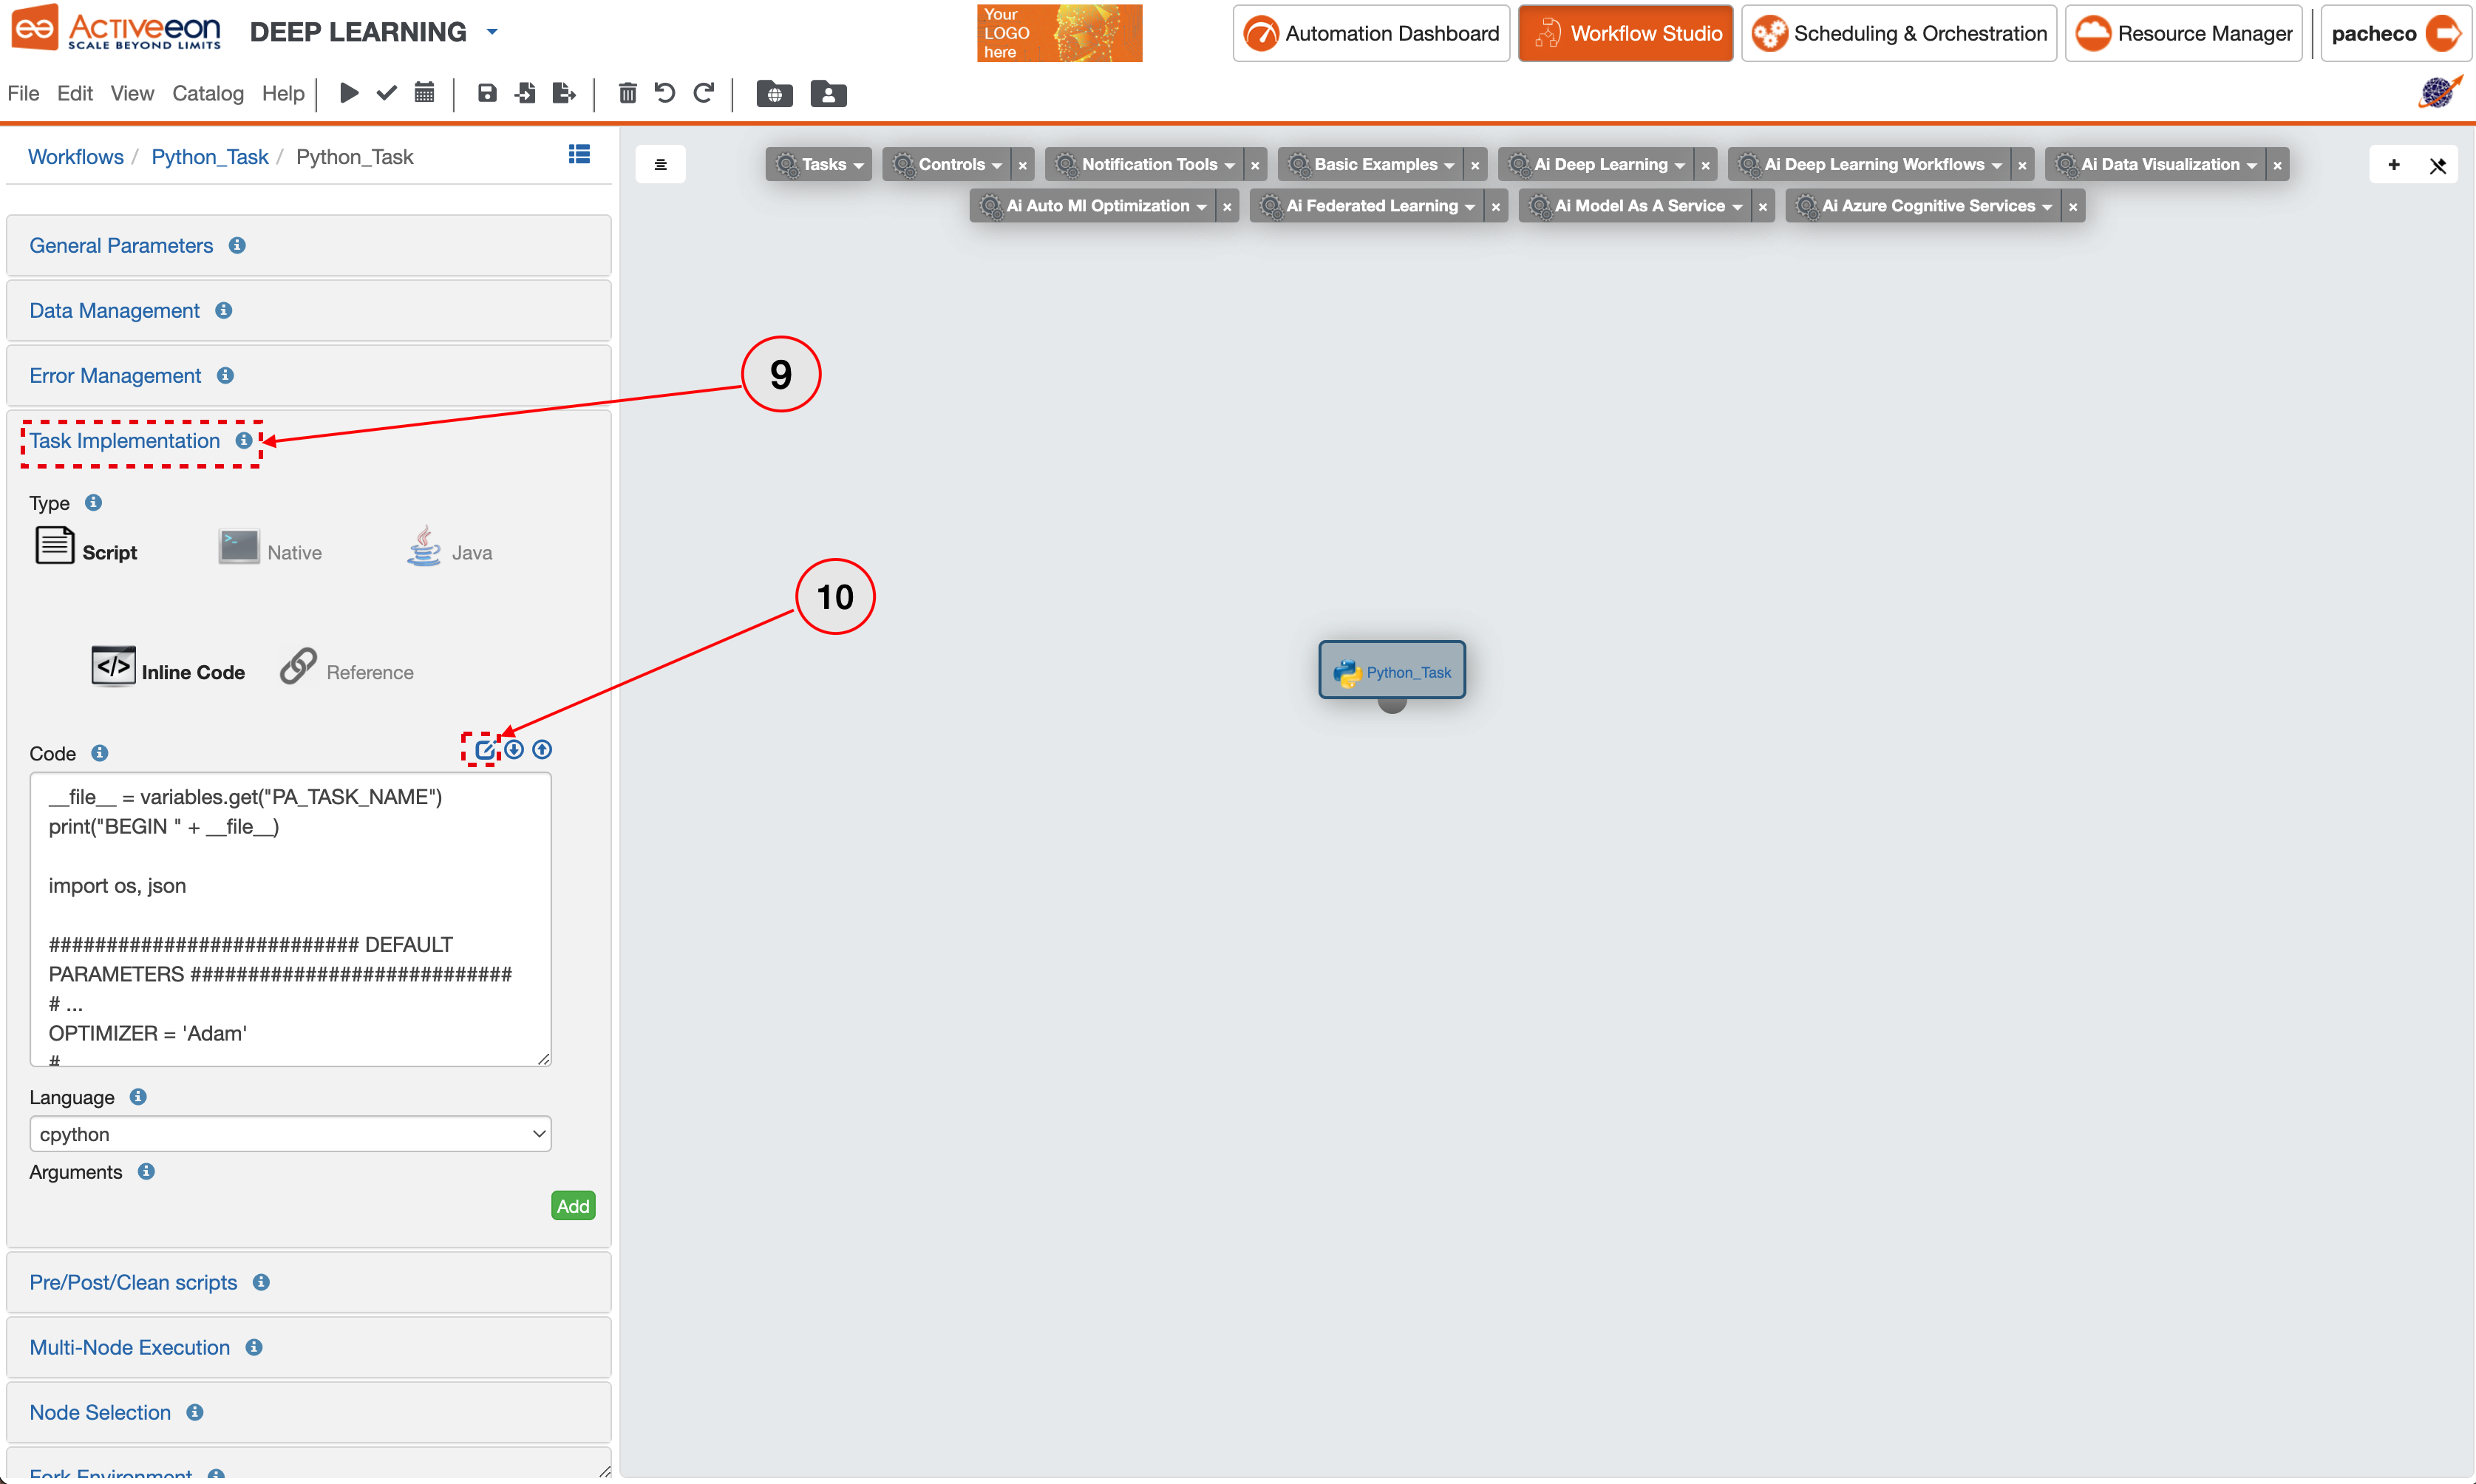
- Click in the Task Implementation menu.
- Click on the Edit button.
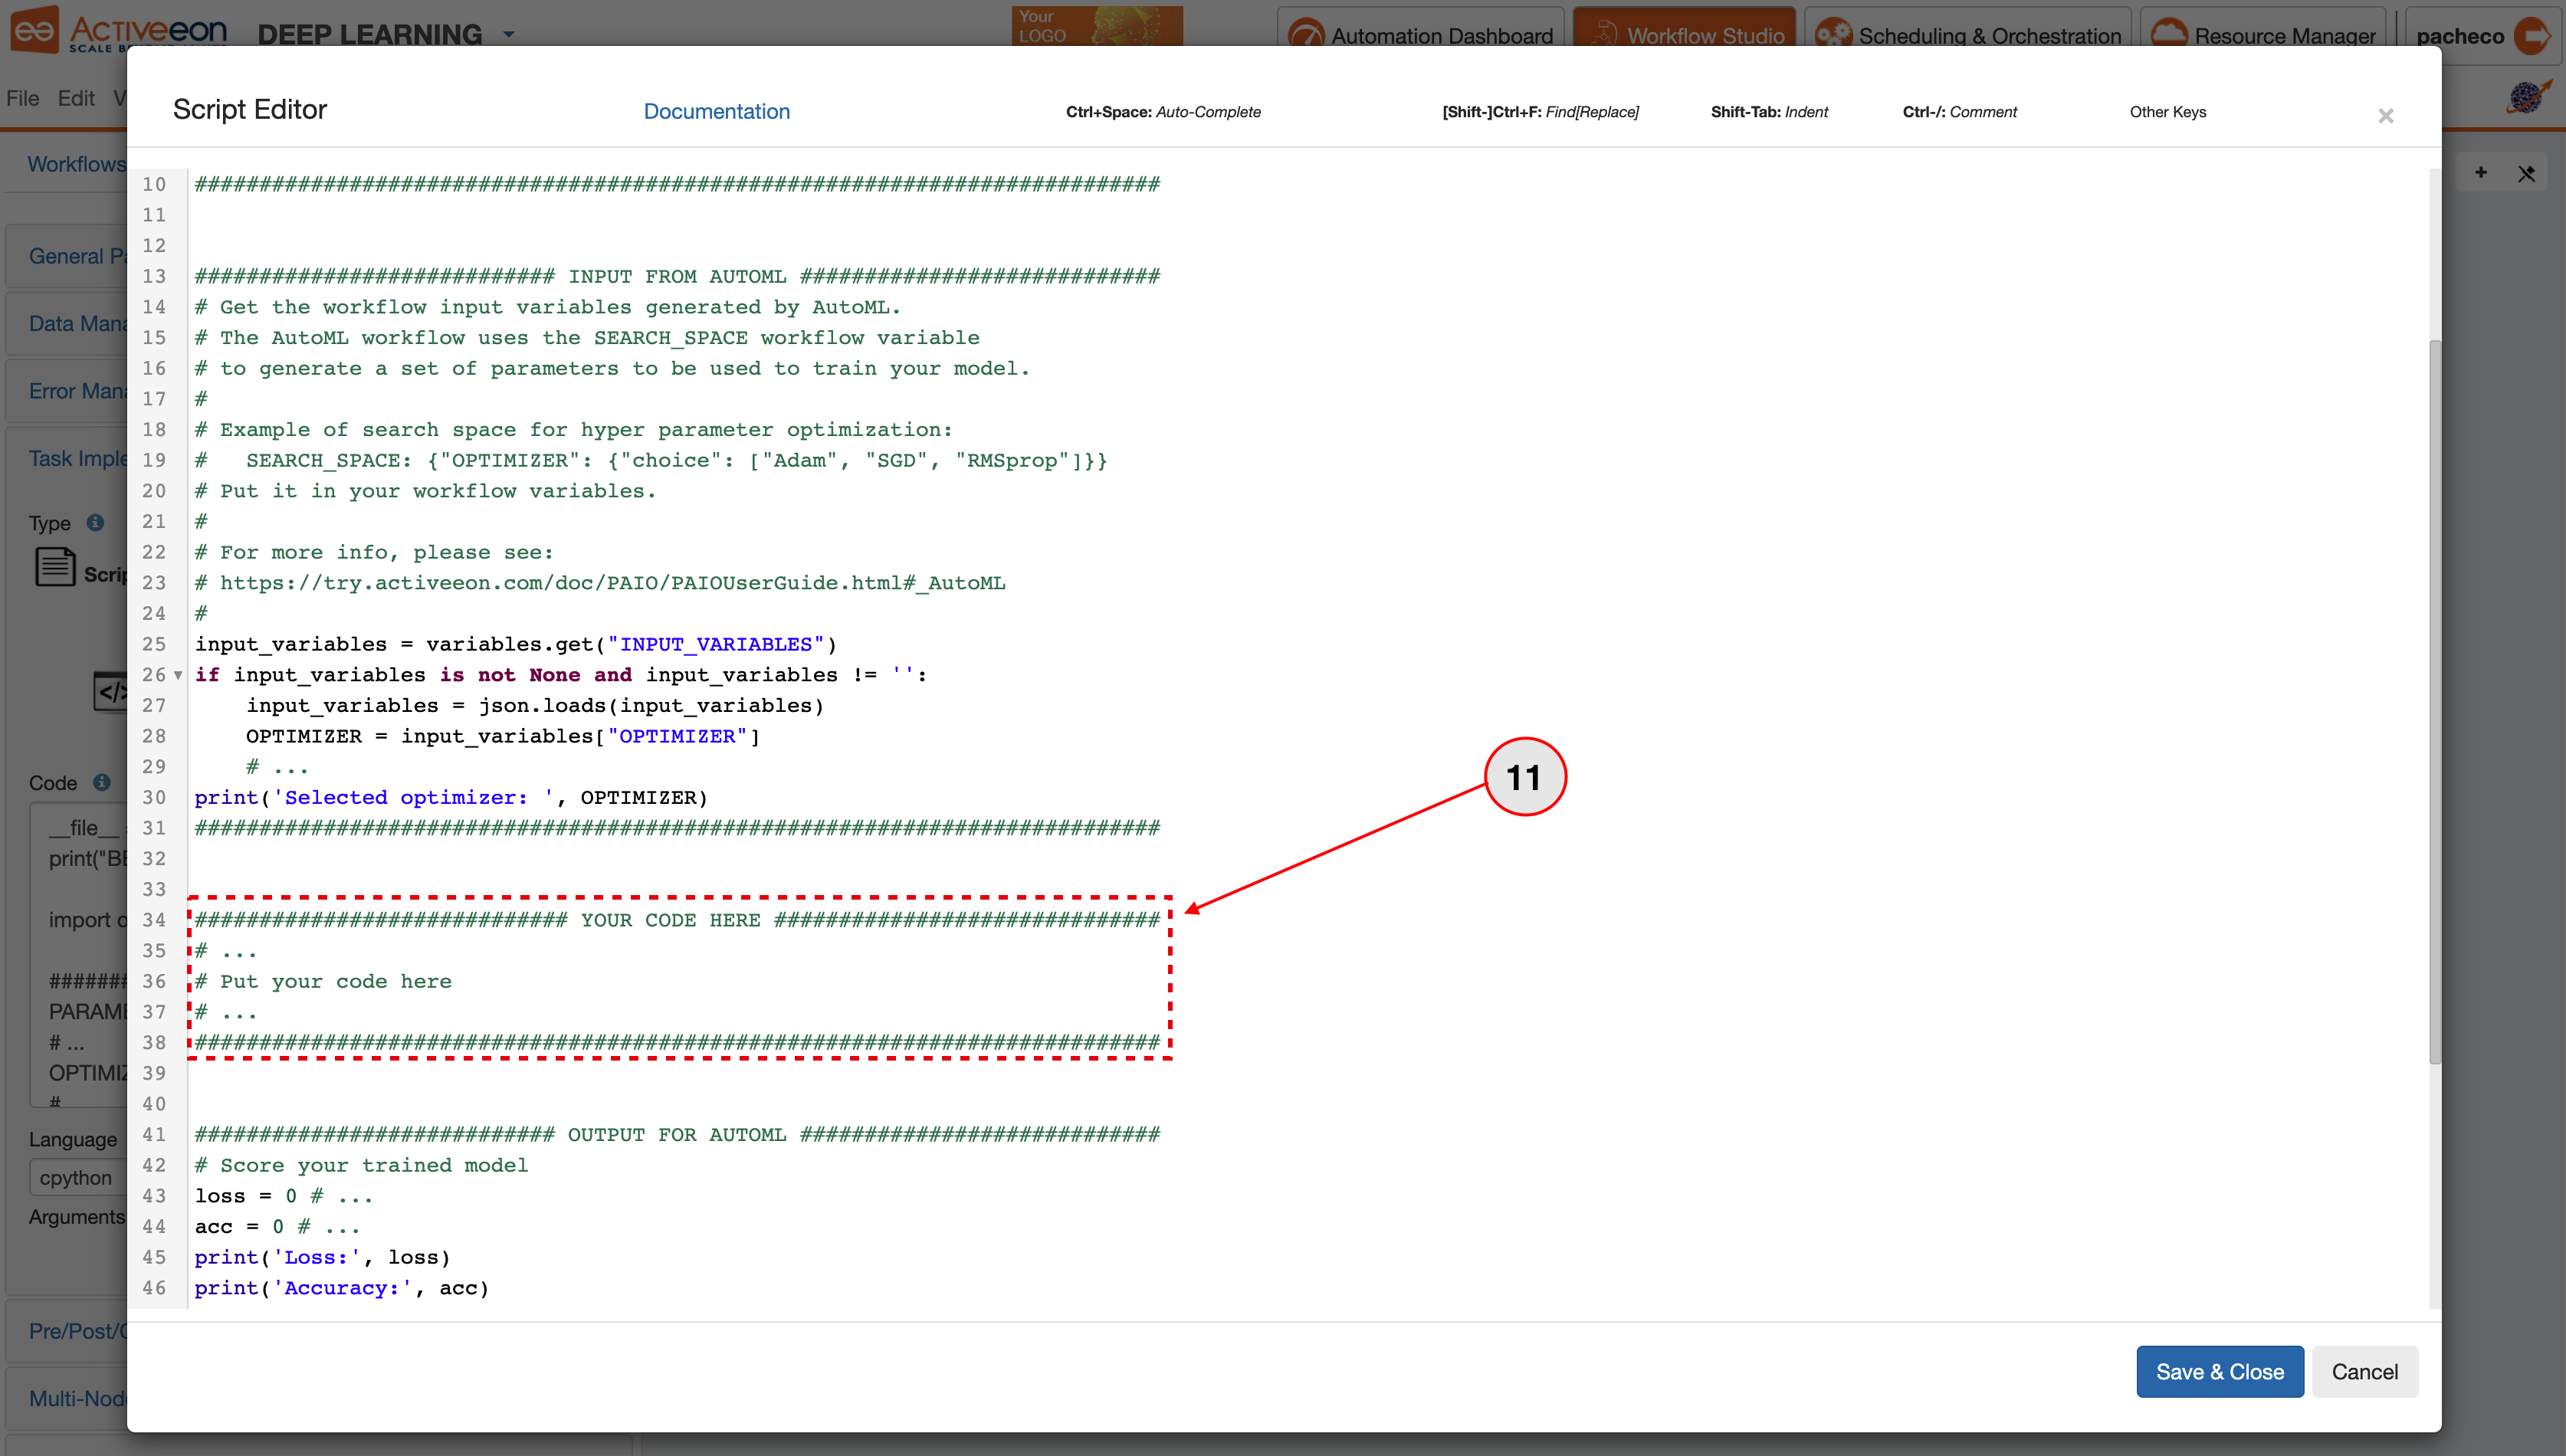
- Paste all the code in YOUR CODE HERE section.
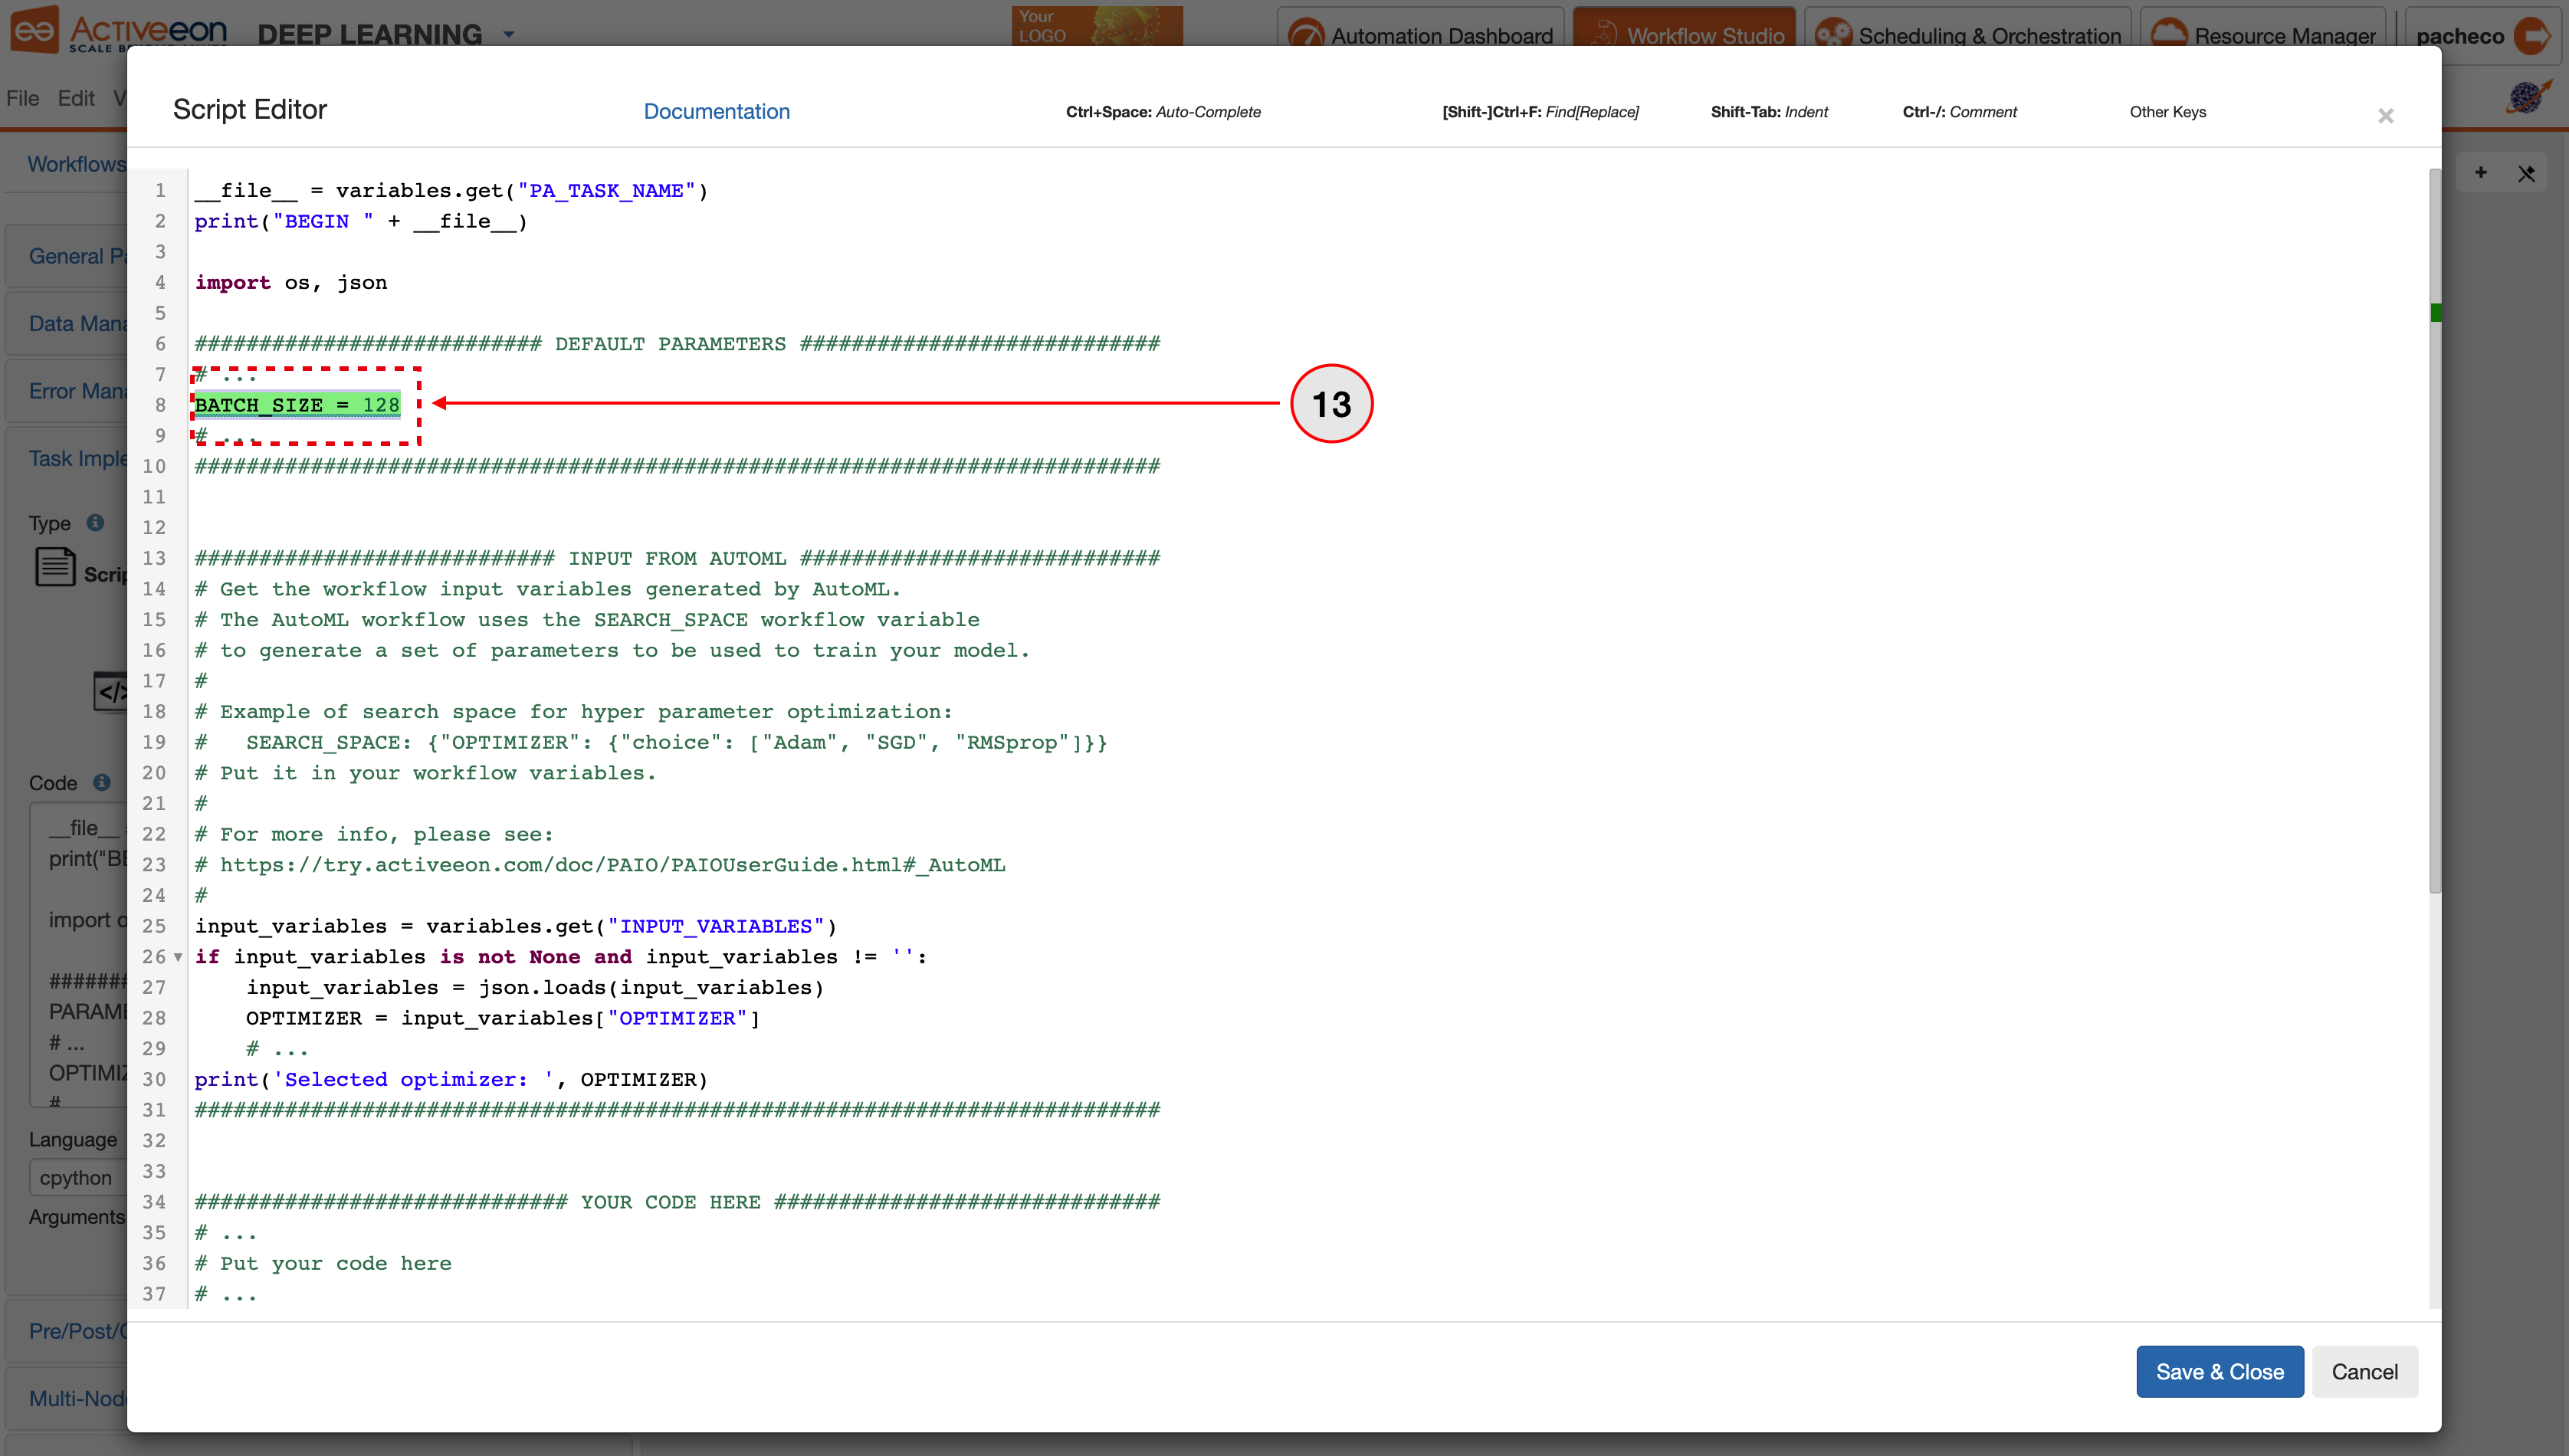
- Go to DEFAULT PARAMETERS section in the code.
- Replace OPTIMIZER='Adam' variable by BATCH_SIZE=128.
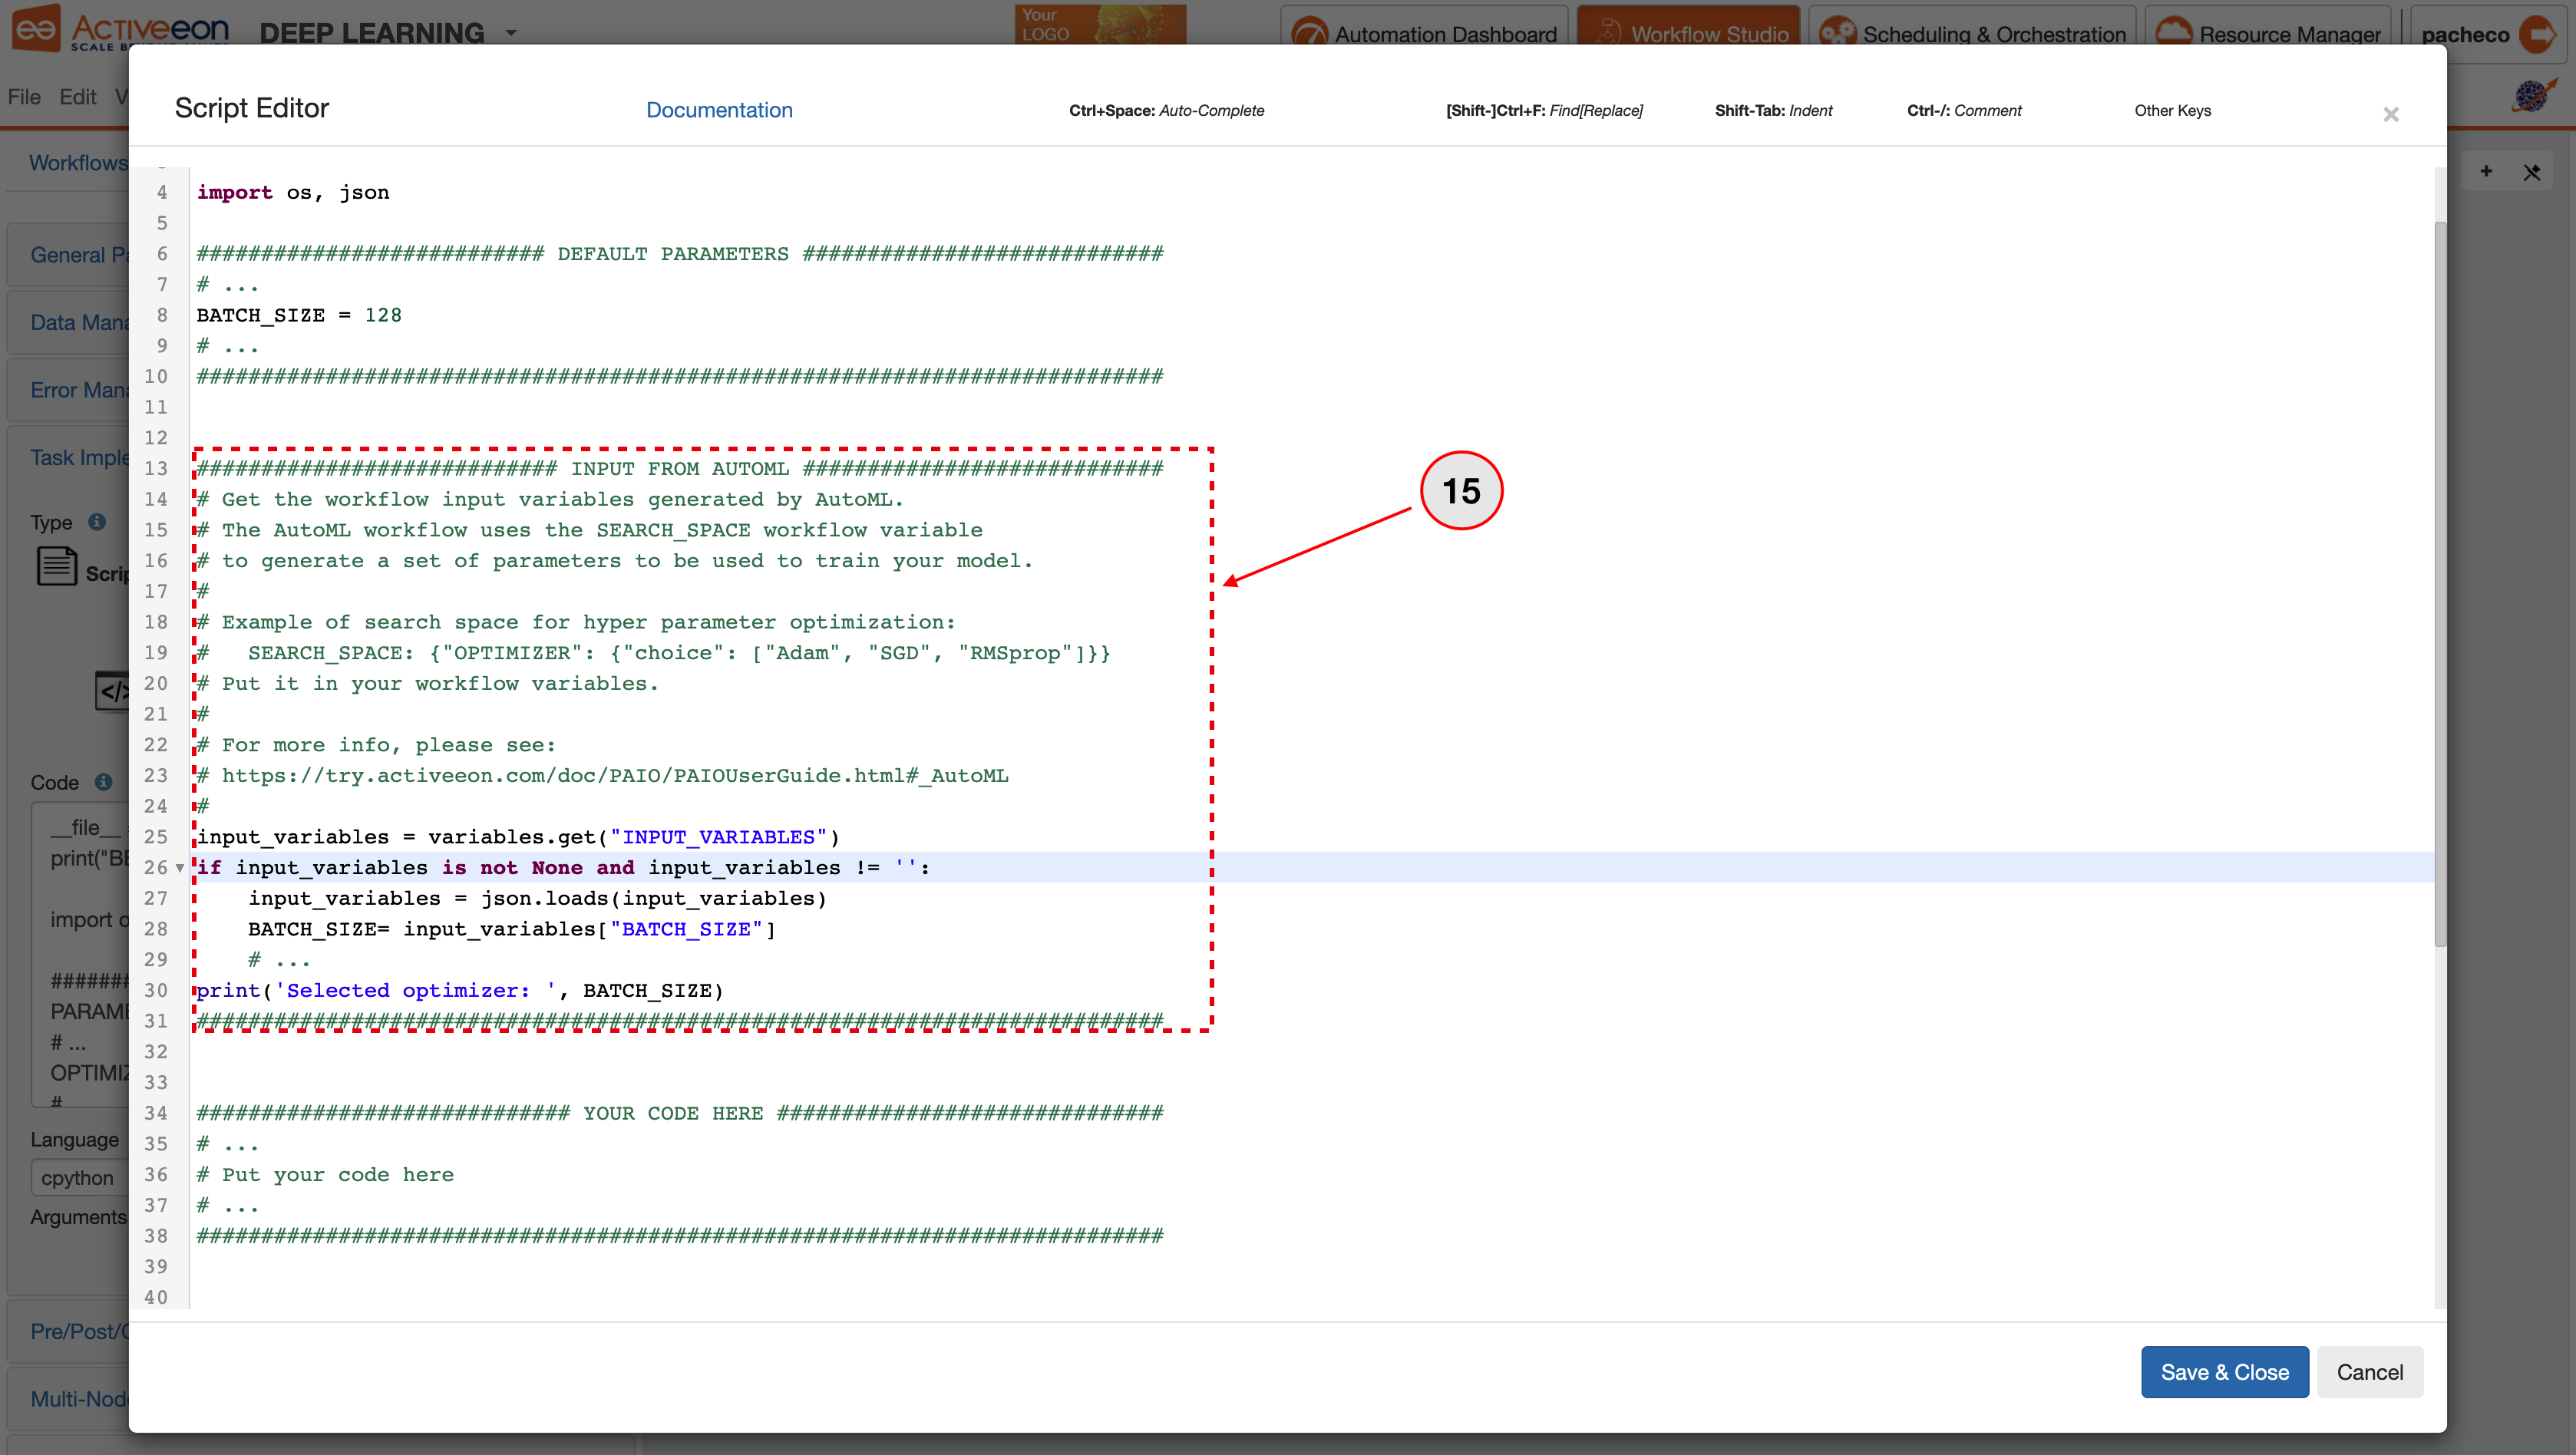
- Go to INPUT FROM AUTOML section in the code.
- Replace OPTIMIZER by BATCH_SIZE.
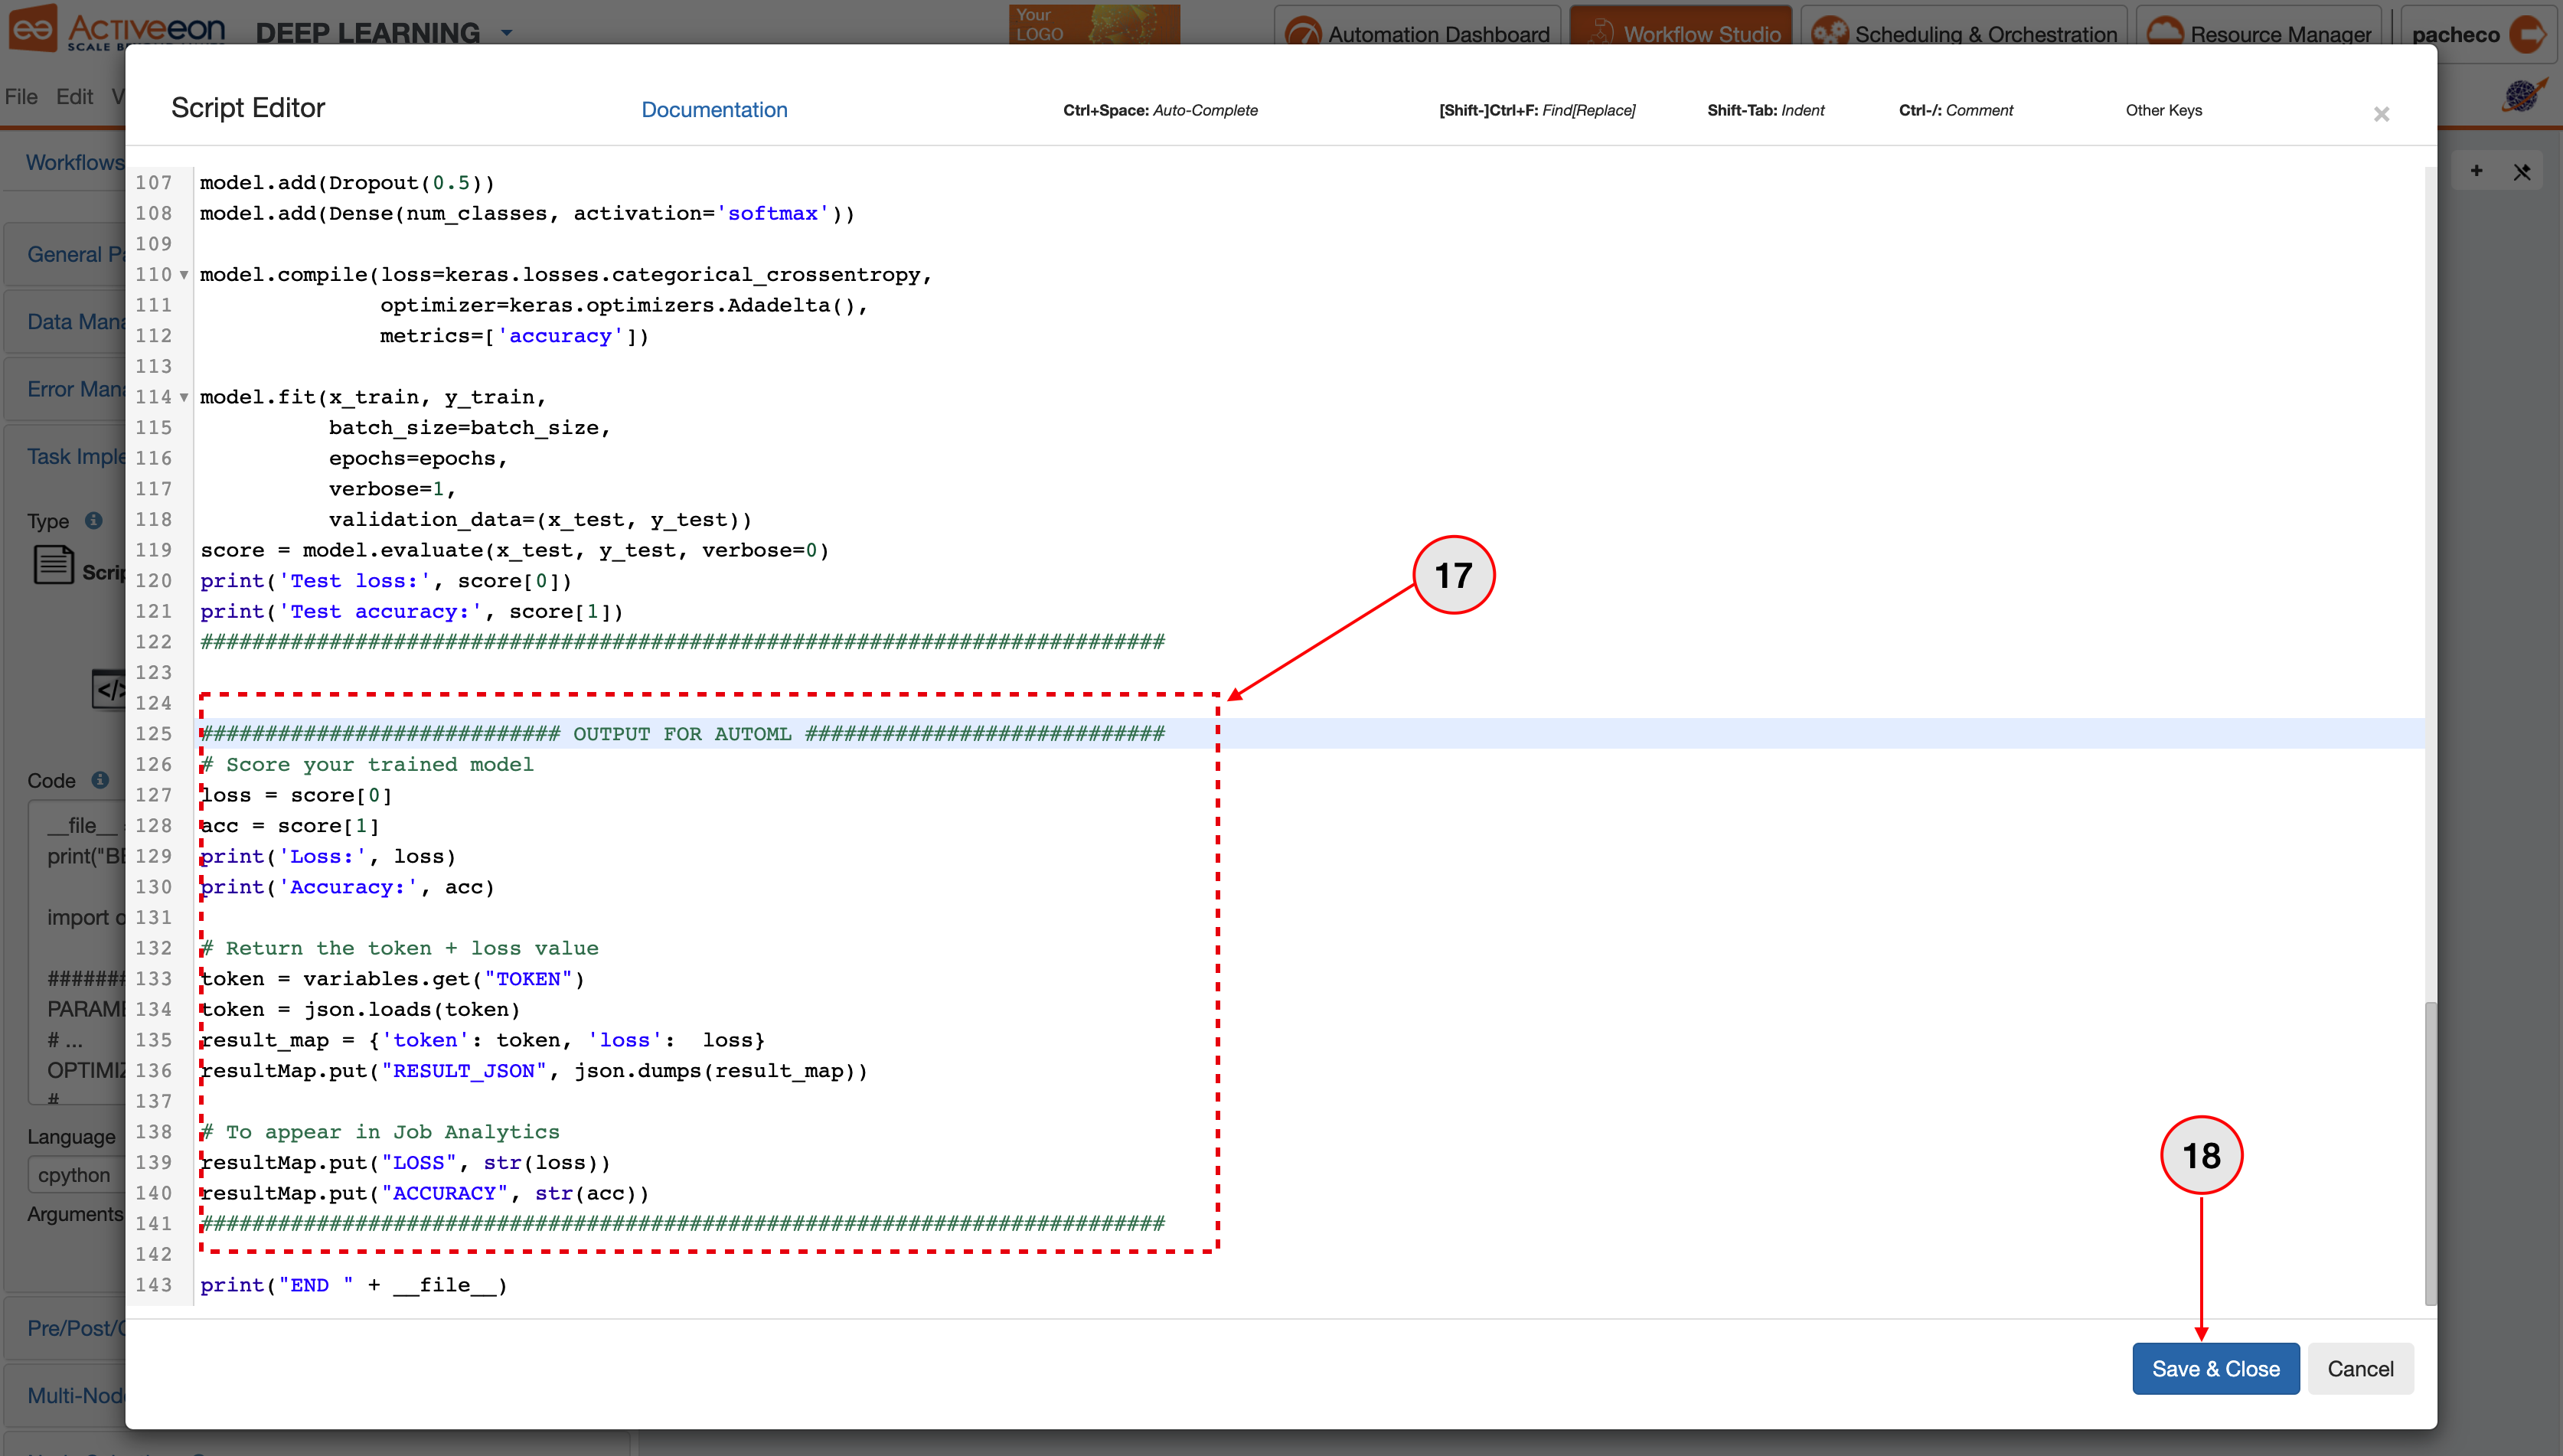
- Go to OUTPUT FROM AUTOML section in the code.
- Find and rename 'loss=score[0]' and 'acc=score[1]'.
- Click on the Save & Close button.
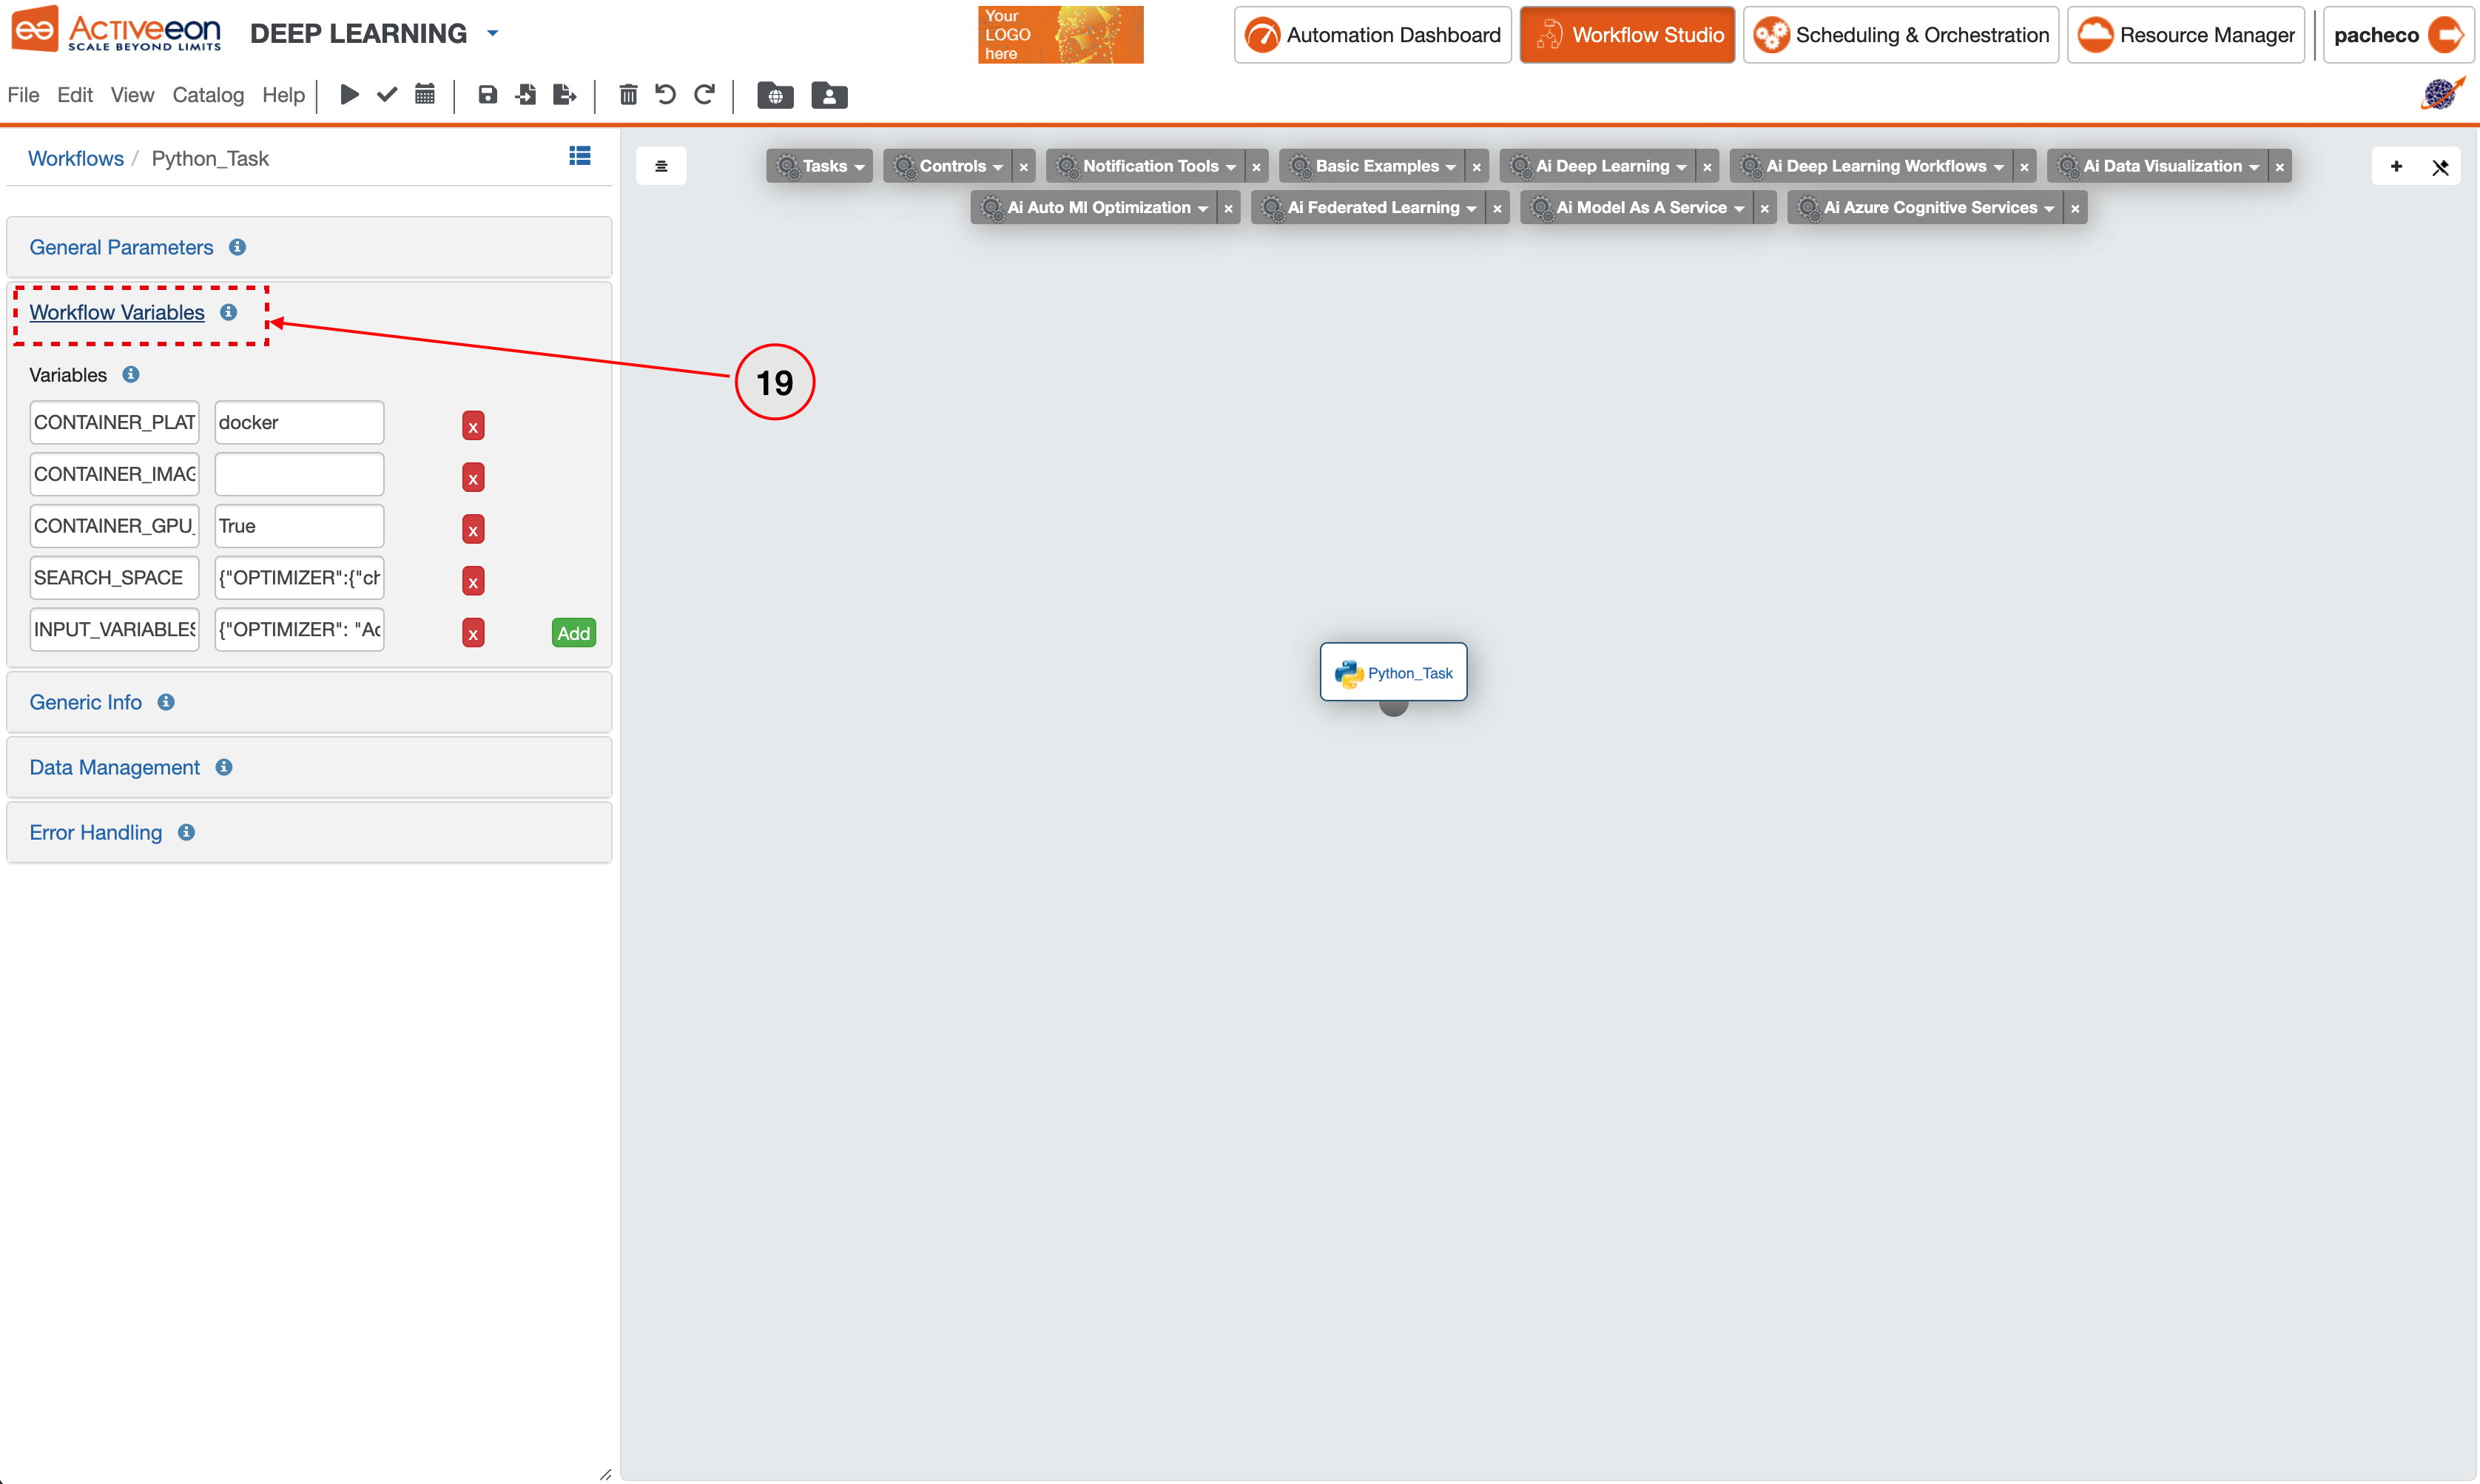
- Find and click on the Workflow Variables menu.
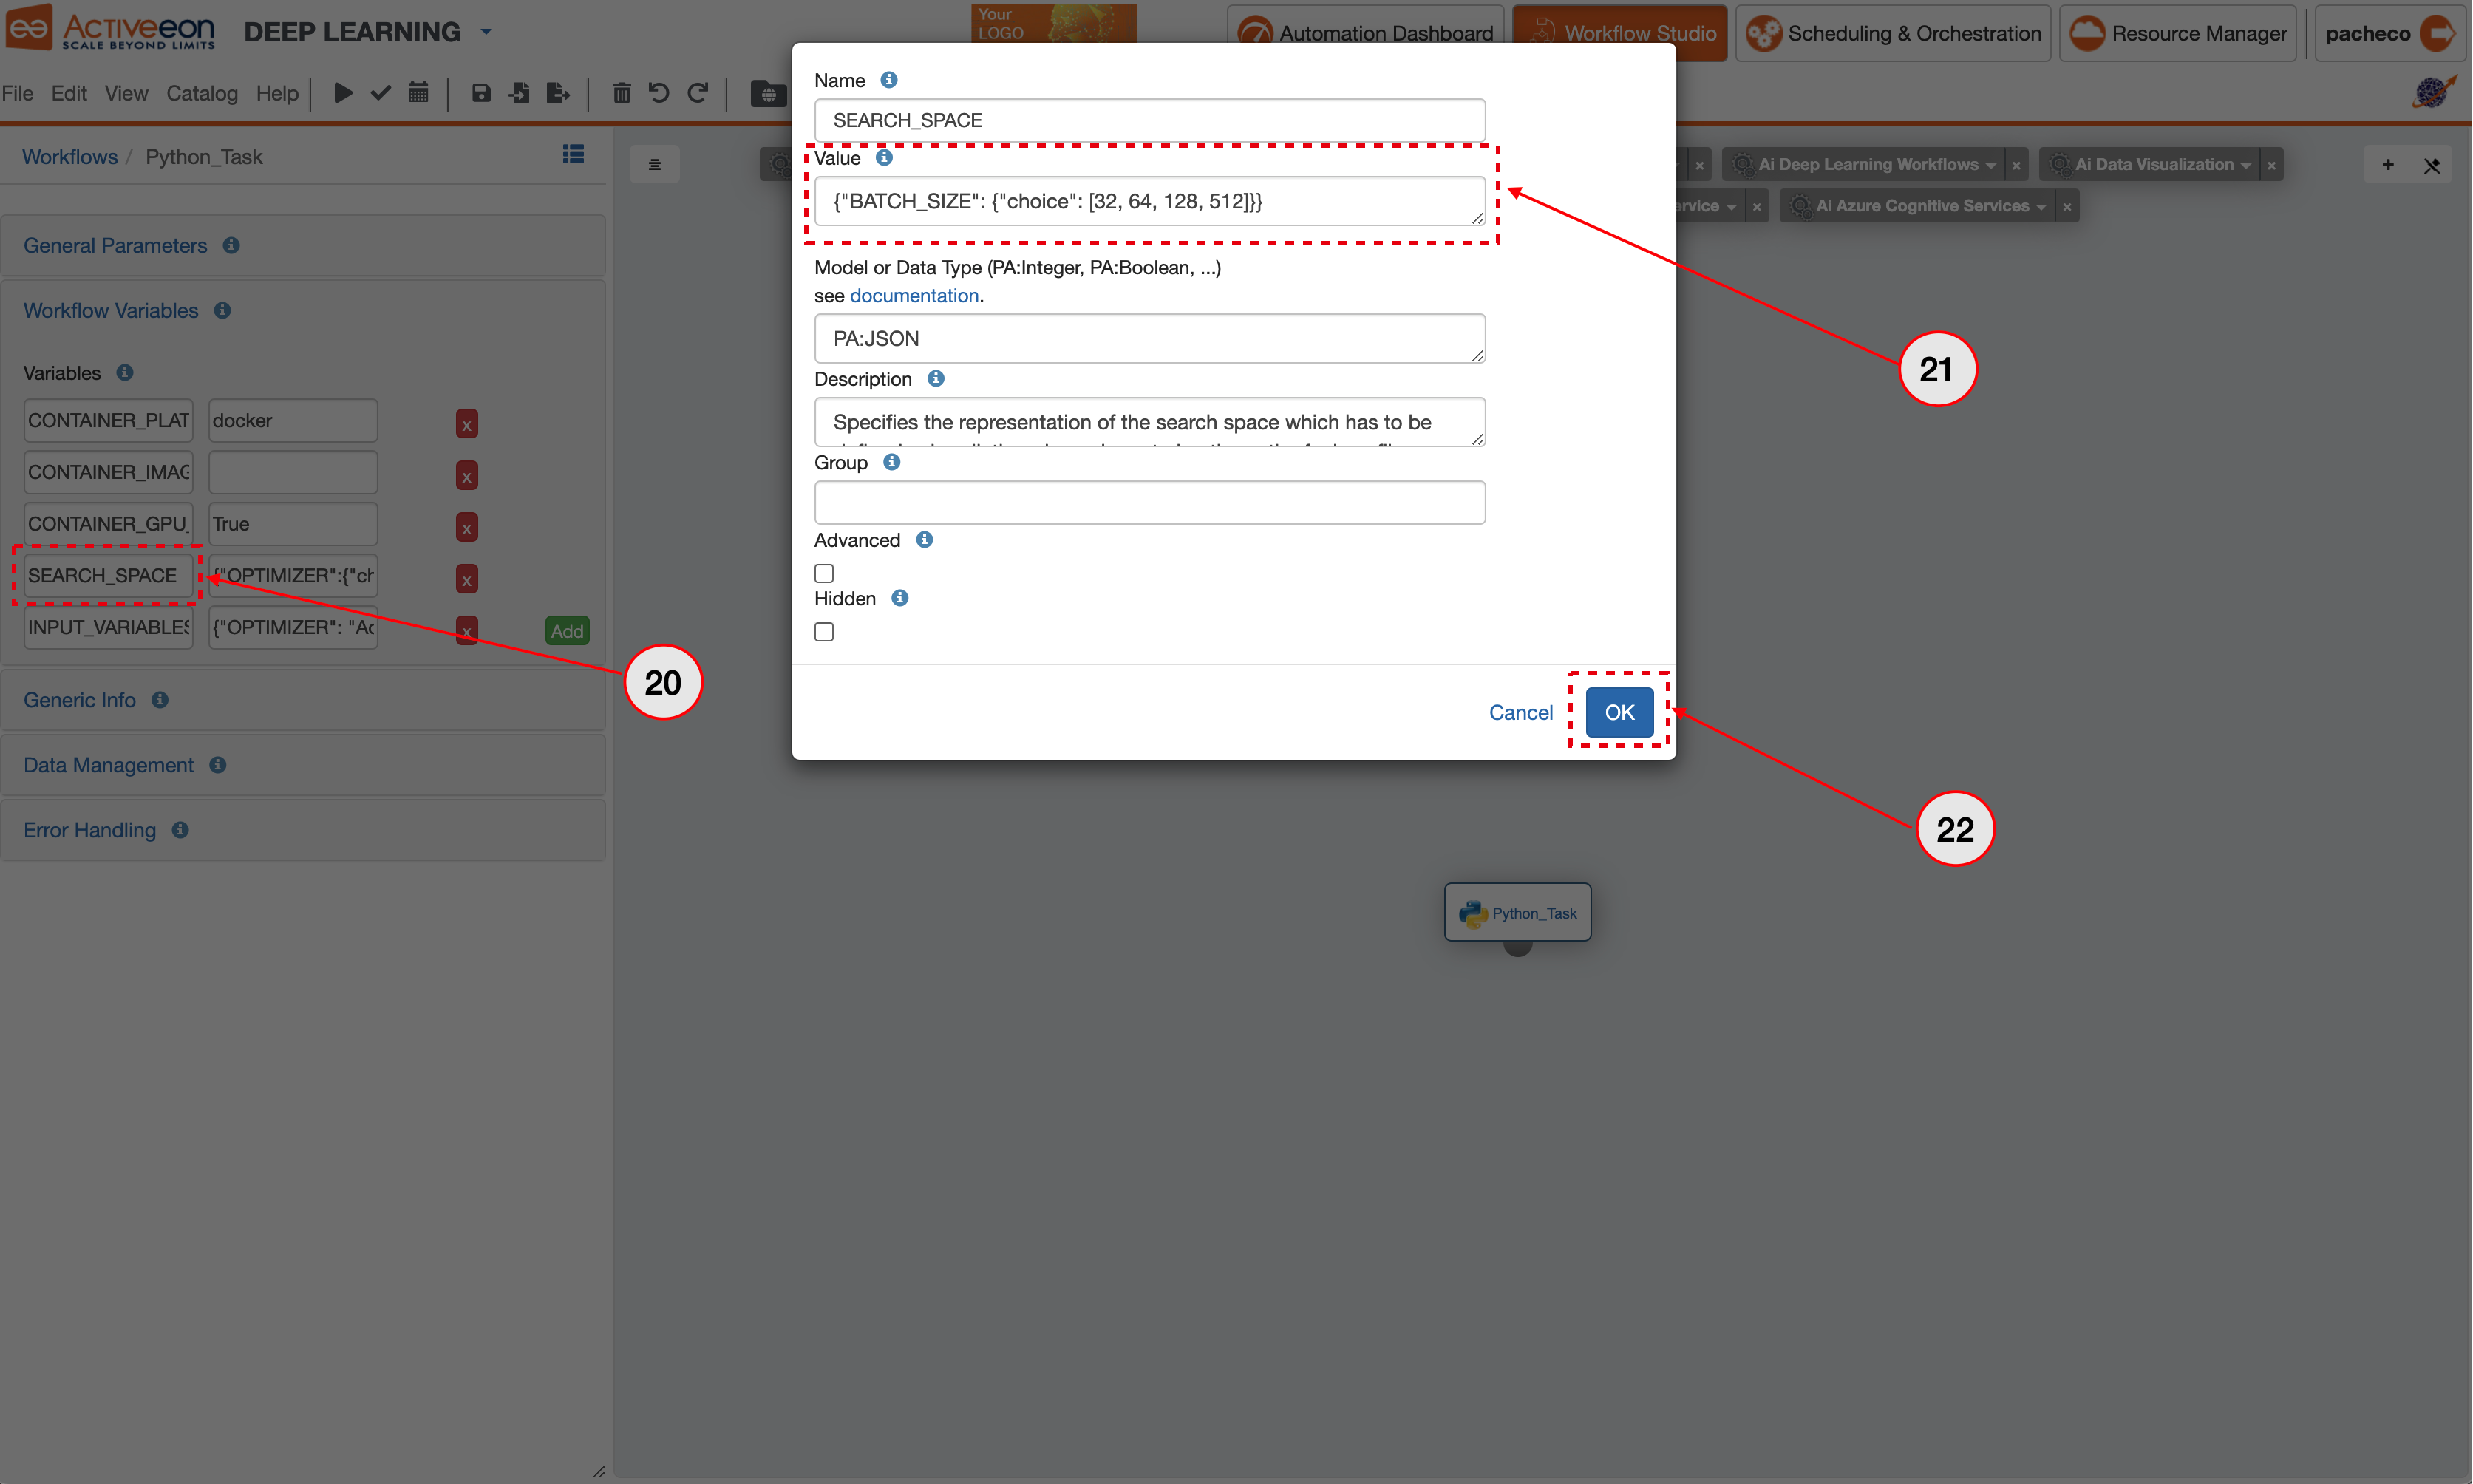
- Click on SEARCH_SPACE.
- Put {"BATCH_SIZE": {"choice": [32, 64, 128, 512]}} in the Value.
- Click on the OK button to close.
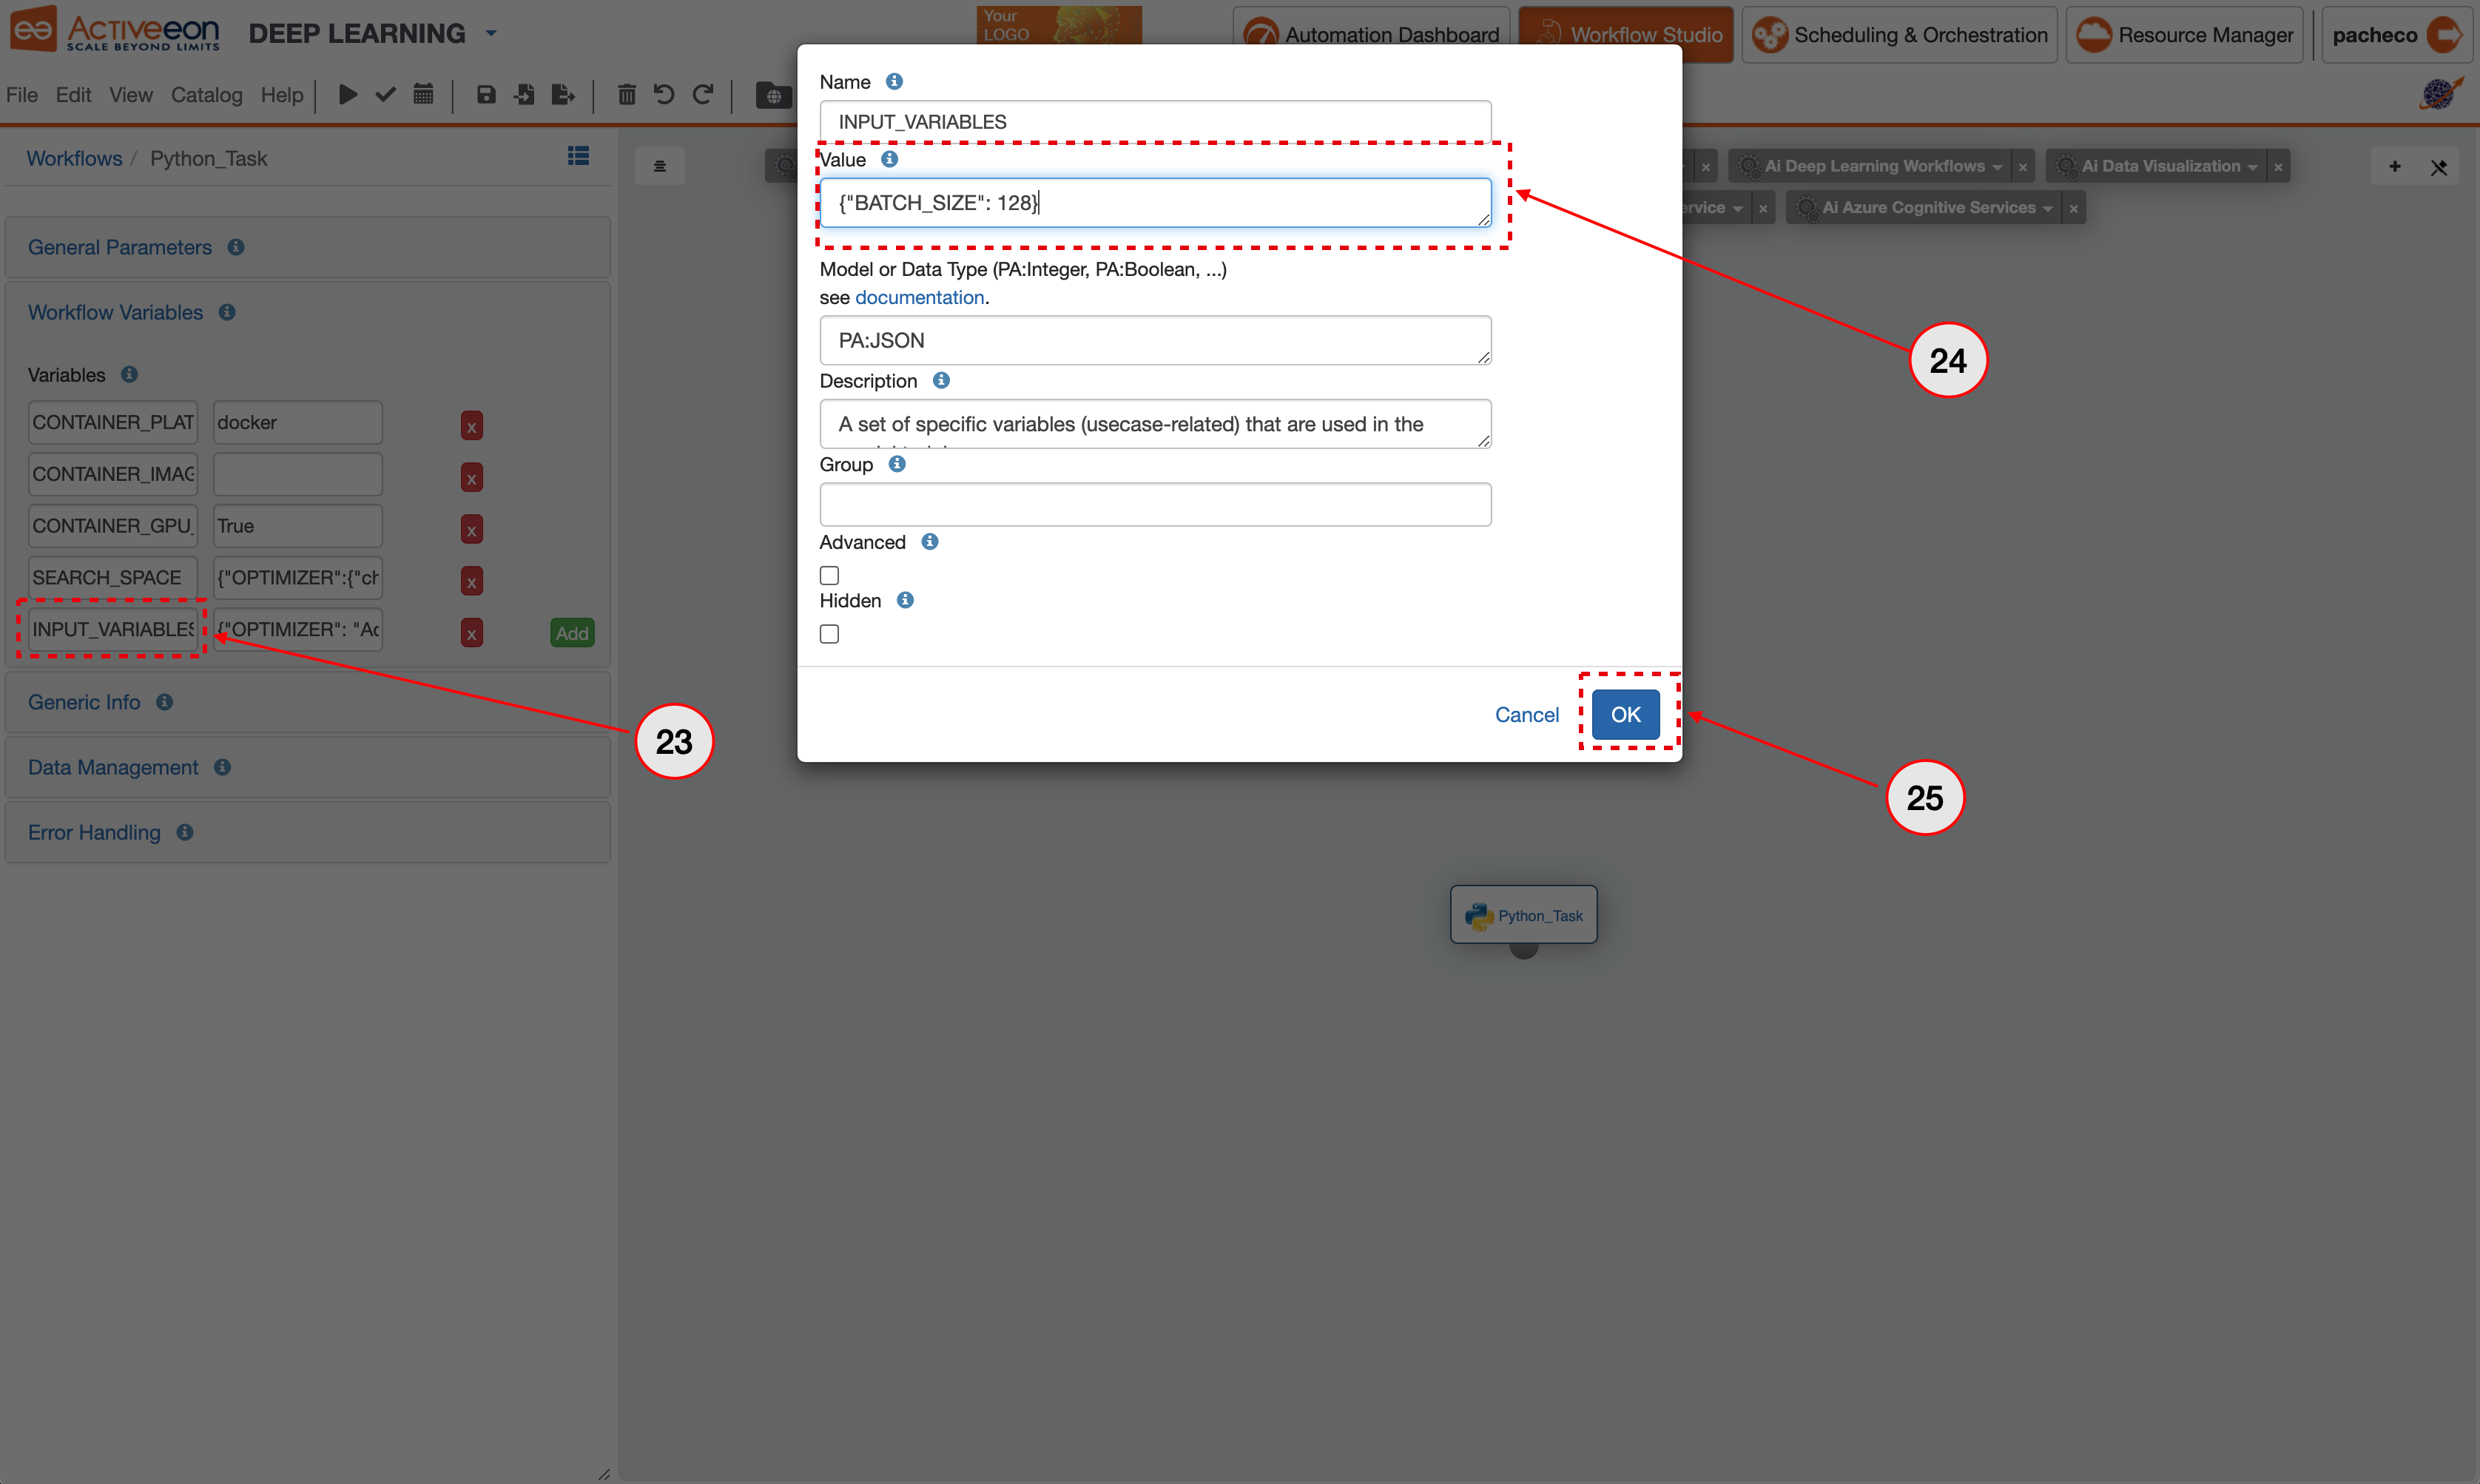
- Click on INPUT_VARIABLES.
- Put {"BATCH_SIZE": 128} in the Value.
- Click on OK button to close.
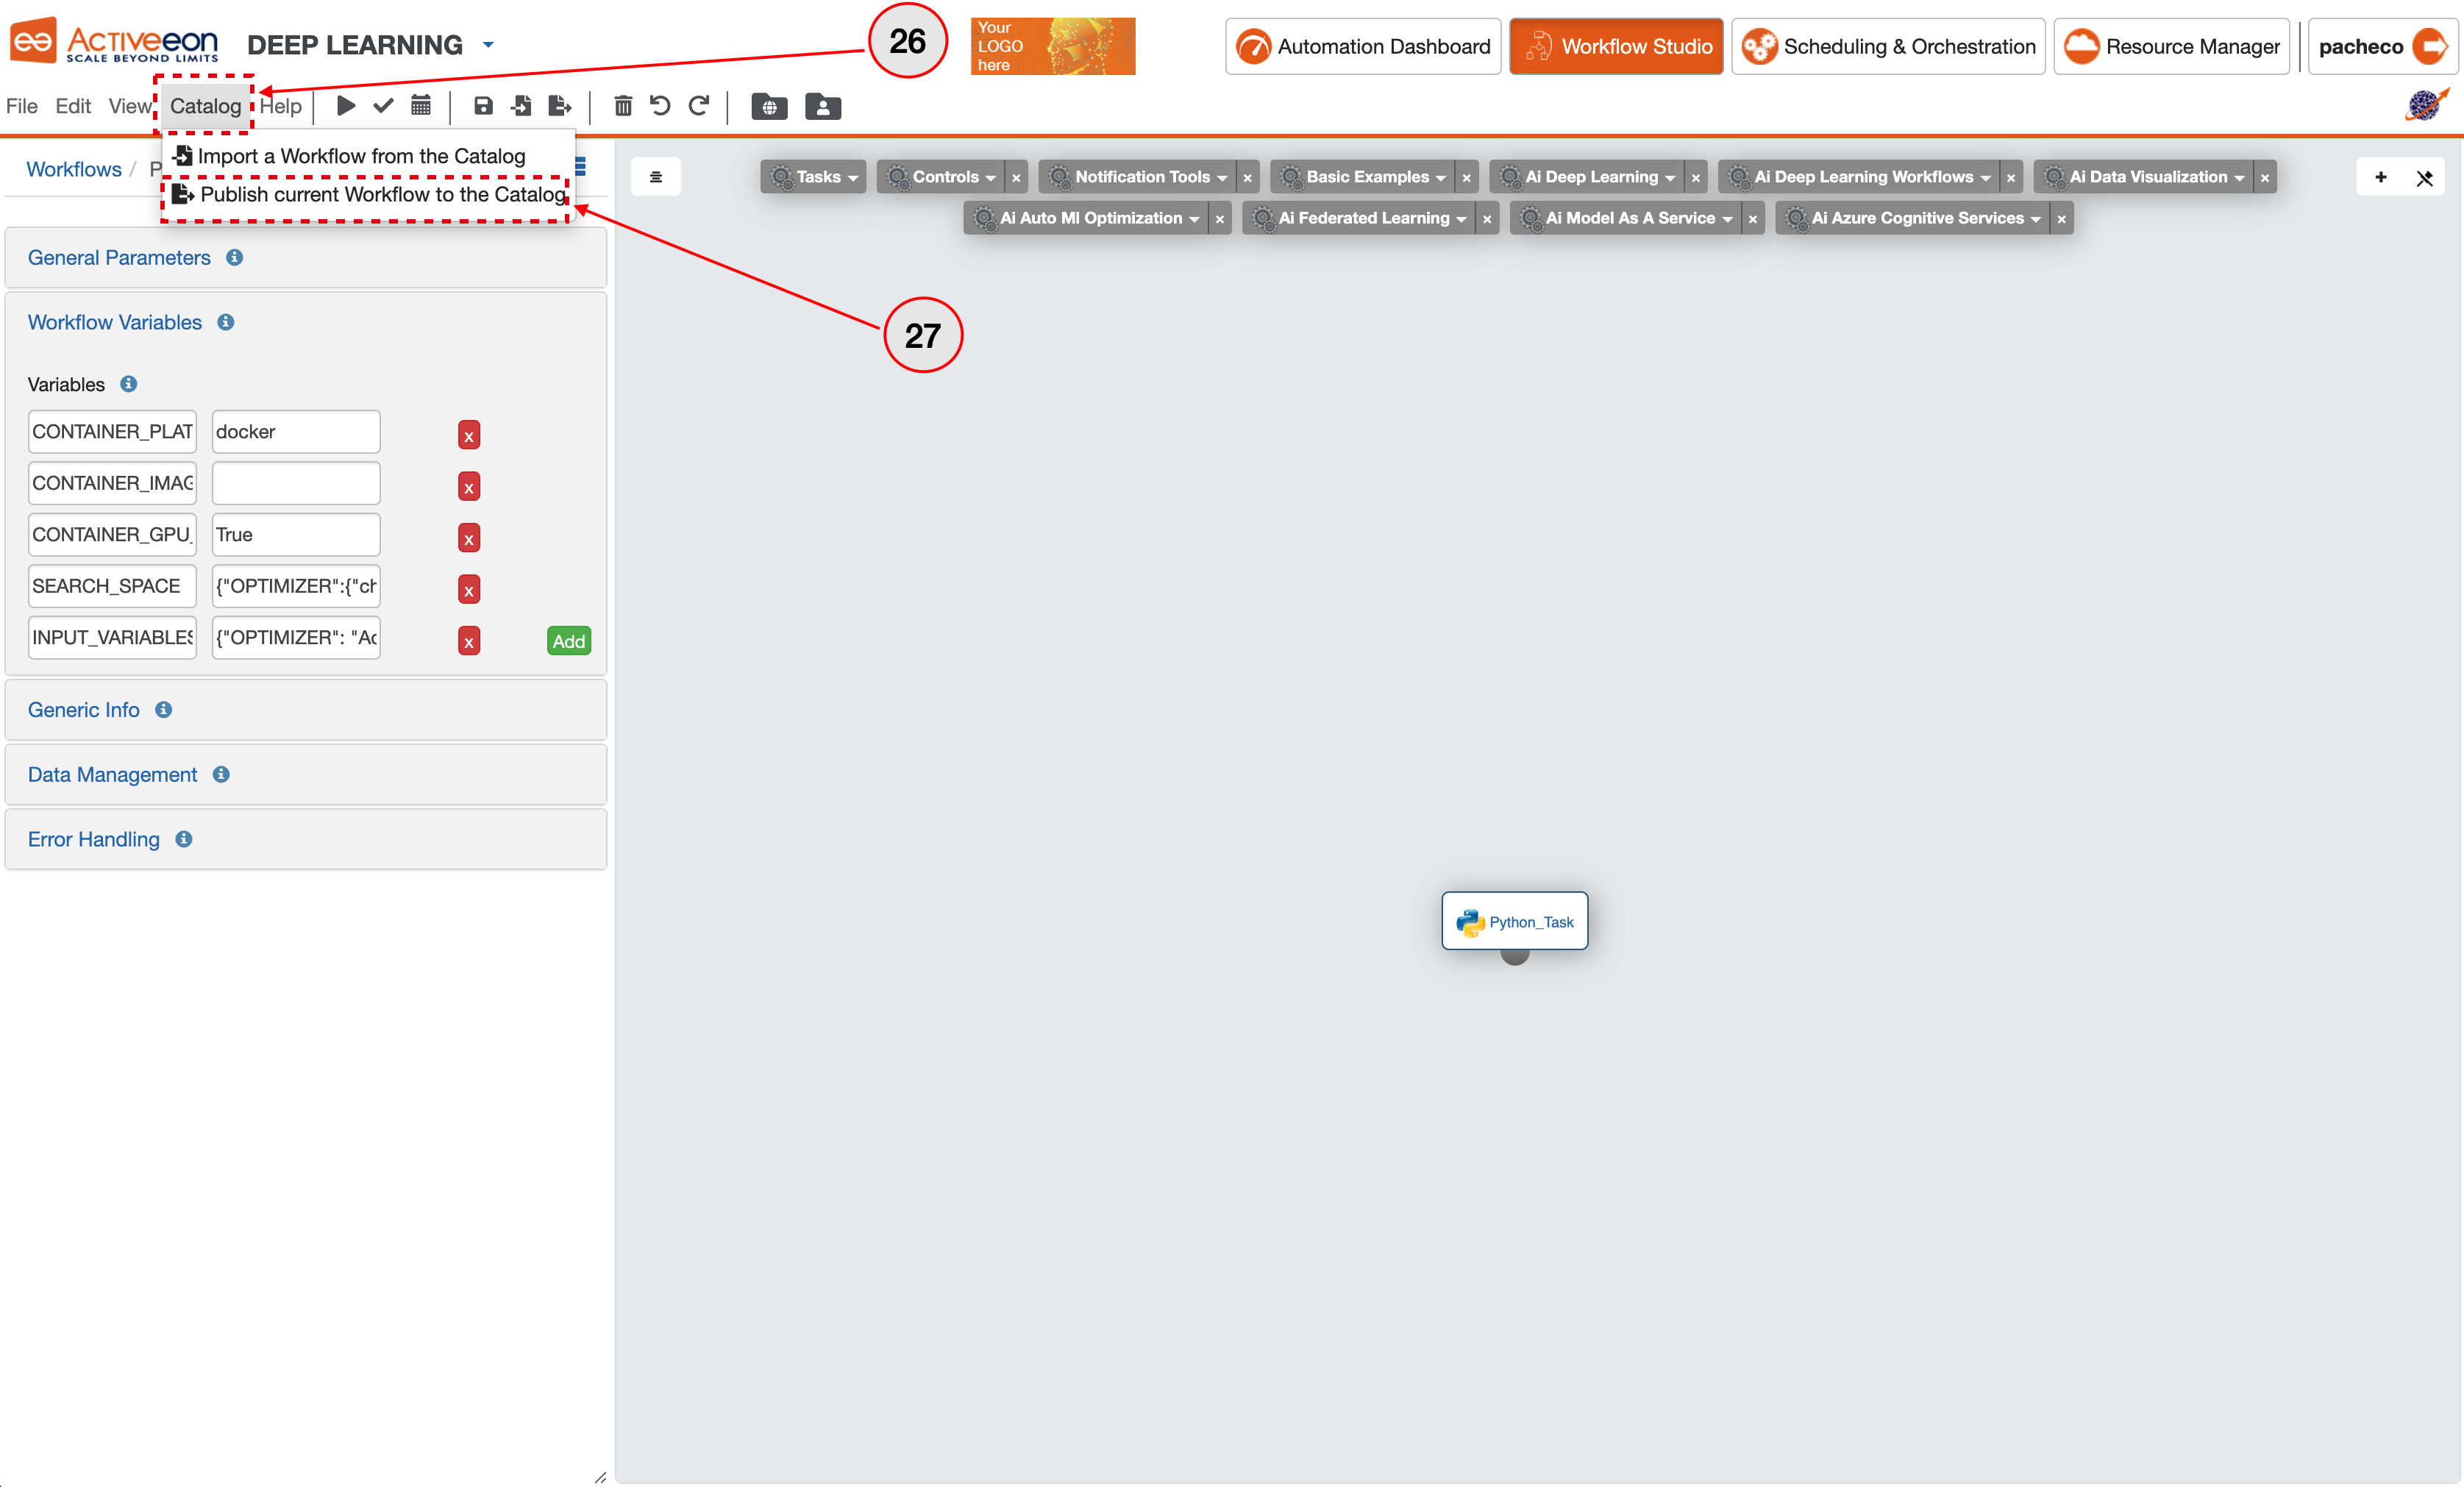
- Click in the Catalog menu.
- Click on the Publish current Workflow to the Catalog button.
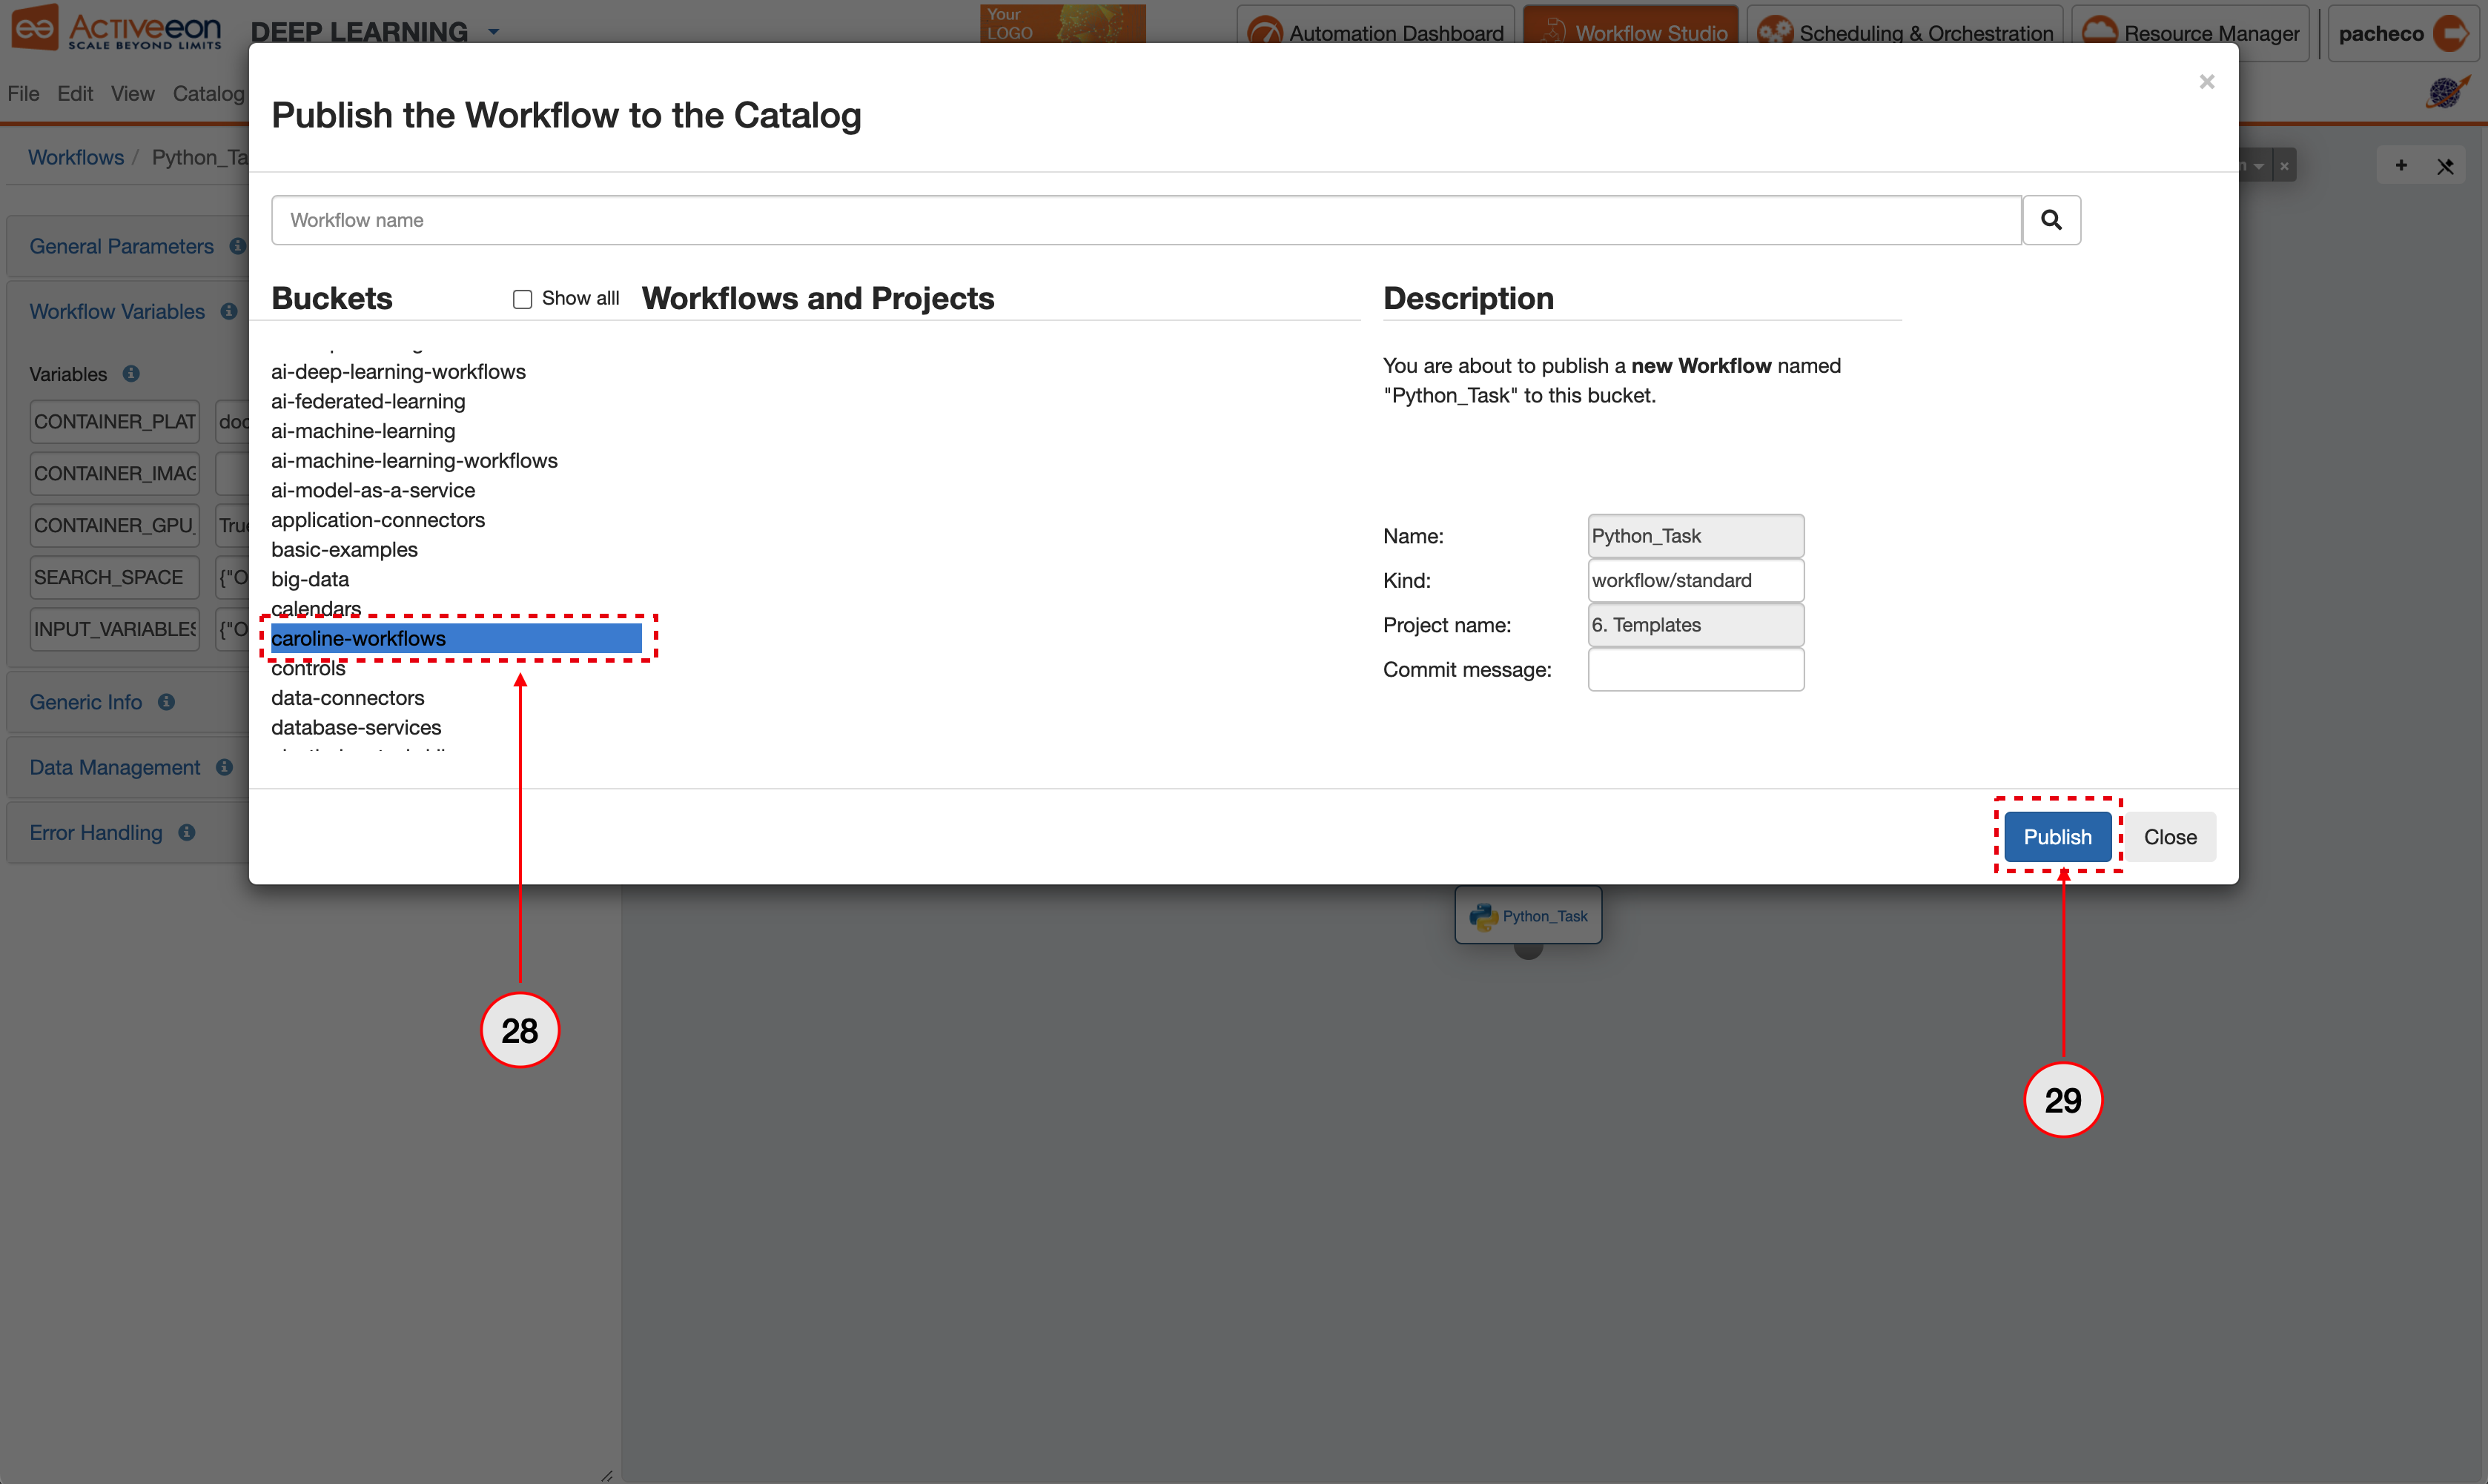
- Click on your bucket name (e.g. firstname_workflows).
- Click on Publish to save your workflow.
2 Execute and Visualize the Job
Following the below instructions, you will be able to execute your workflow and view the results. Slide through the images for the steps illustration.
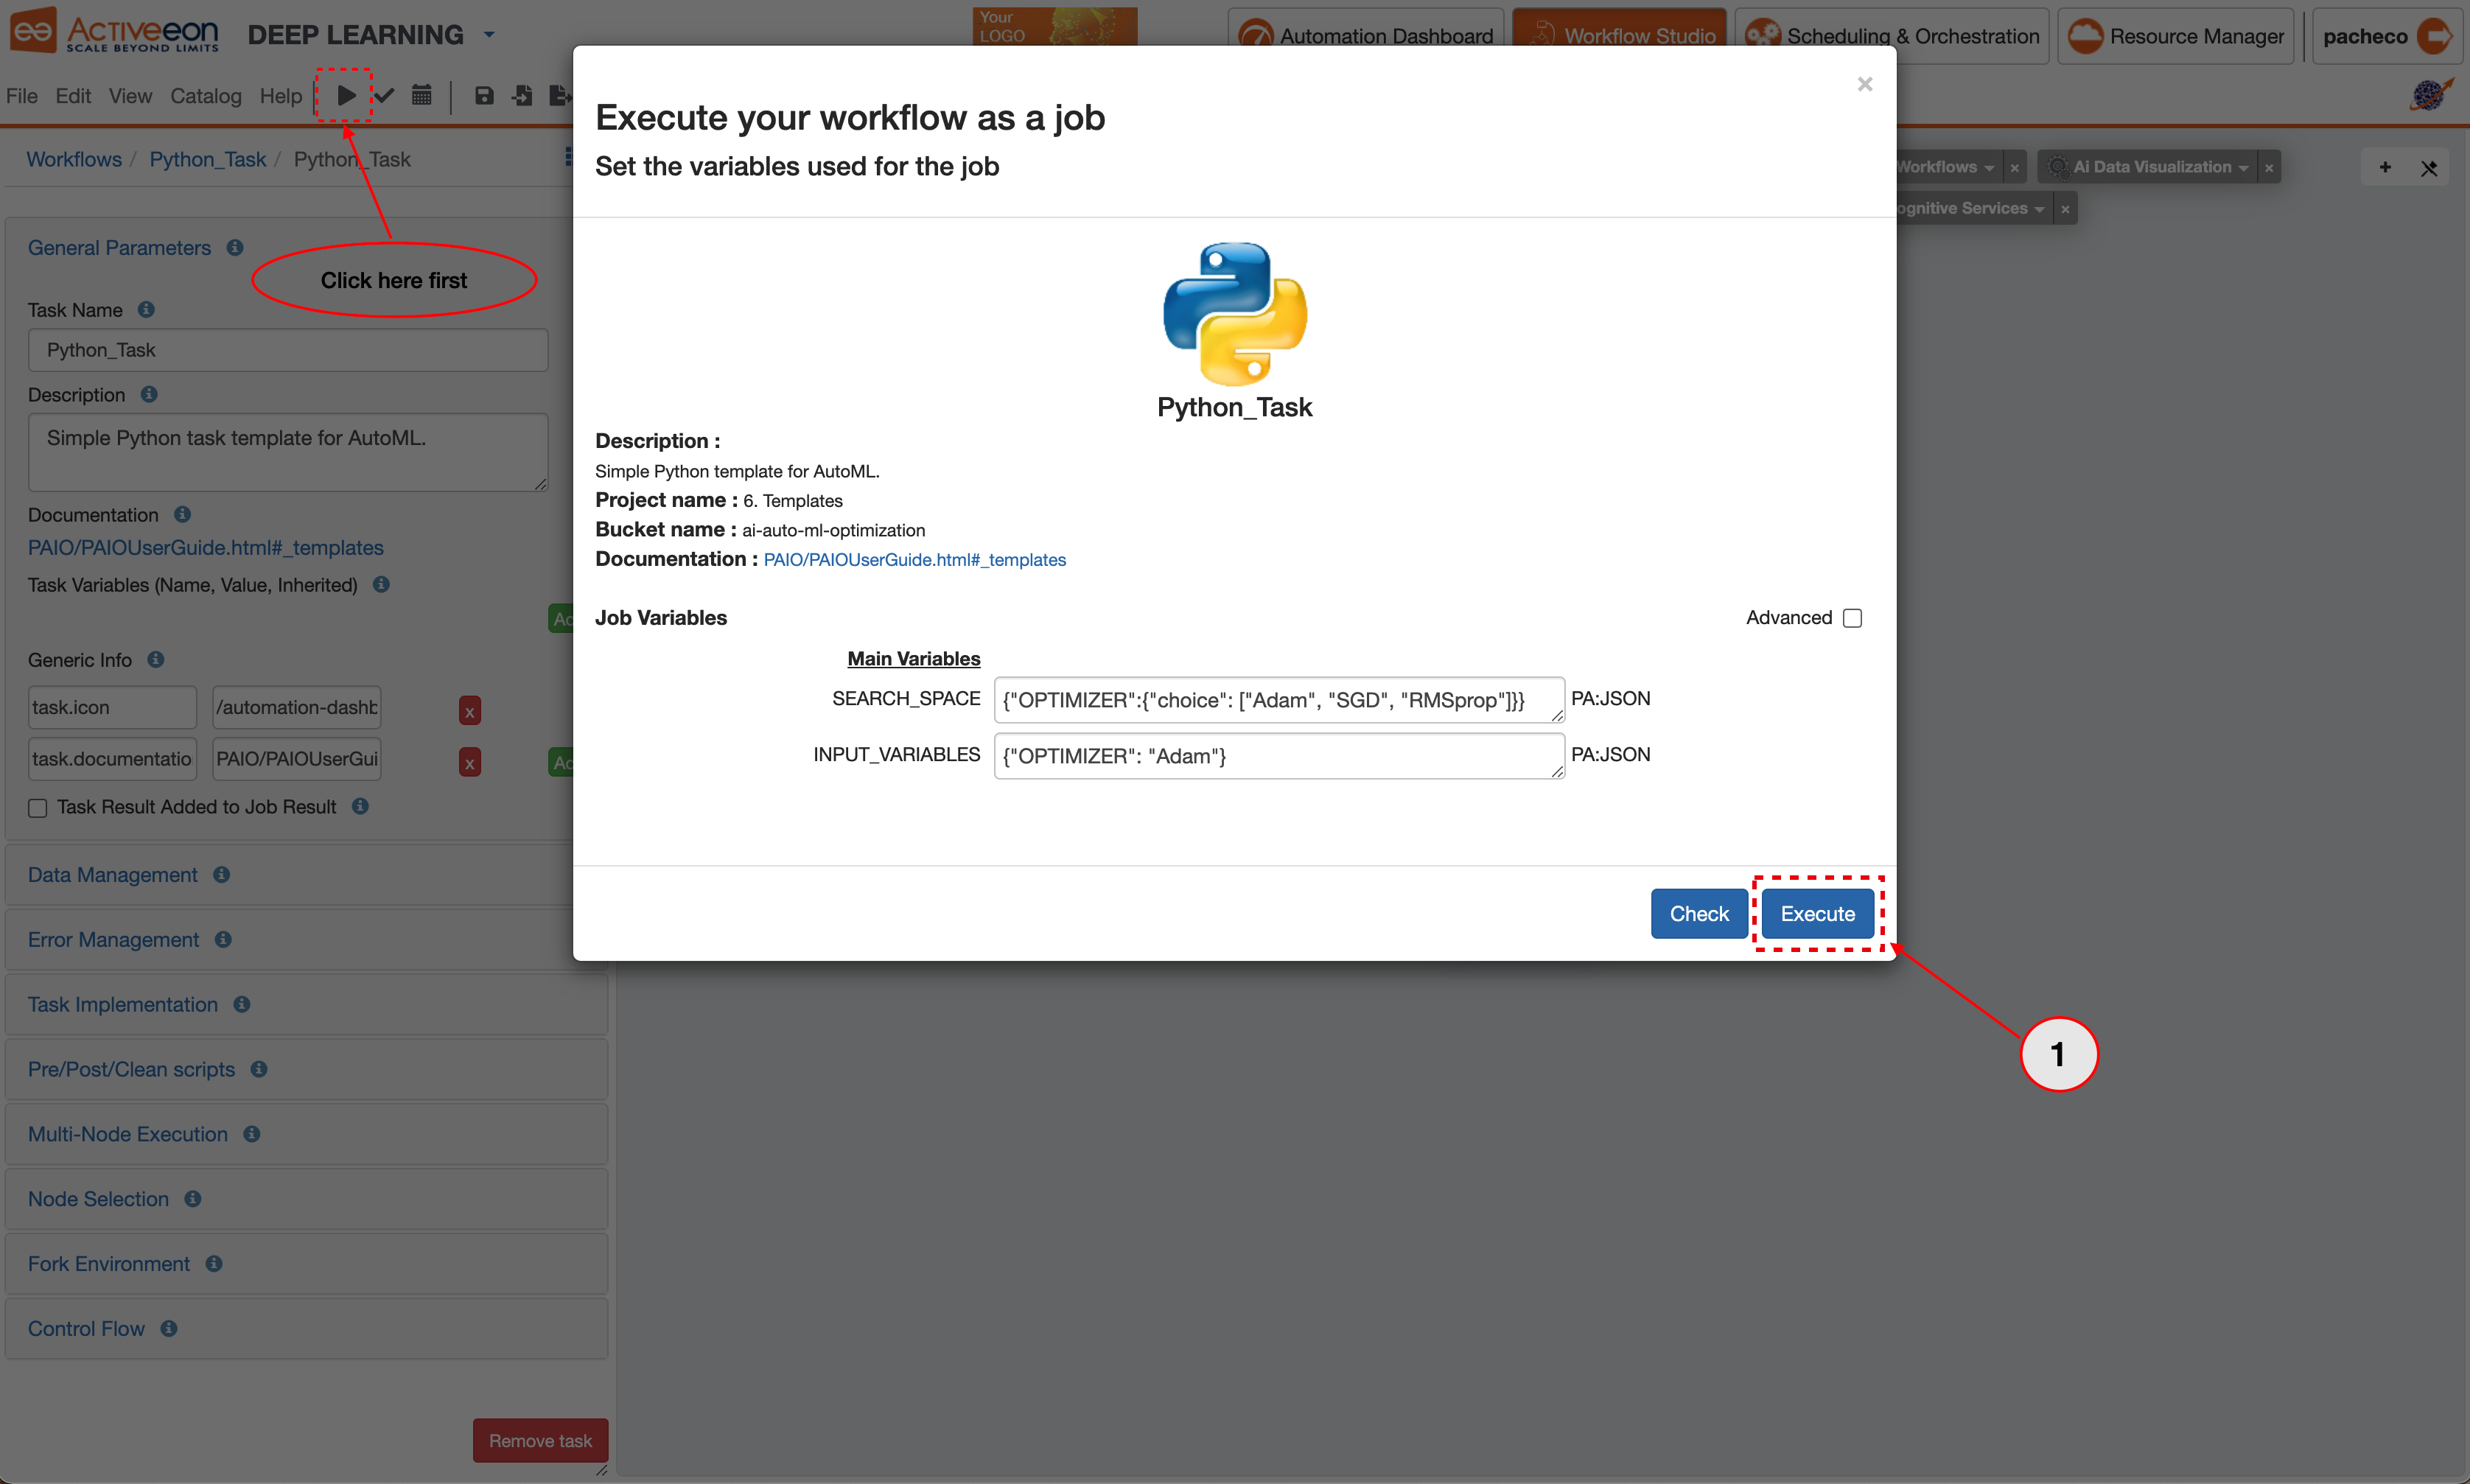
- Click on the Execute button.
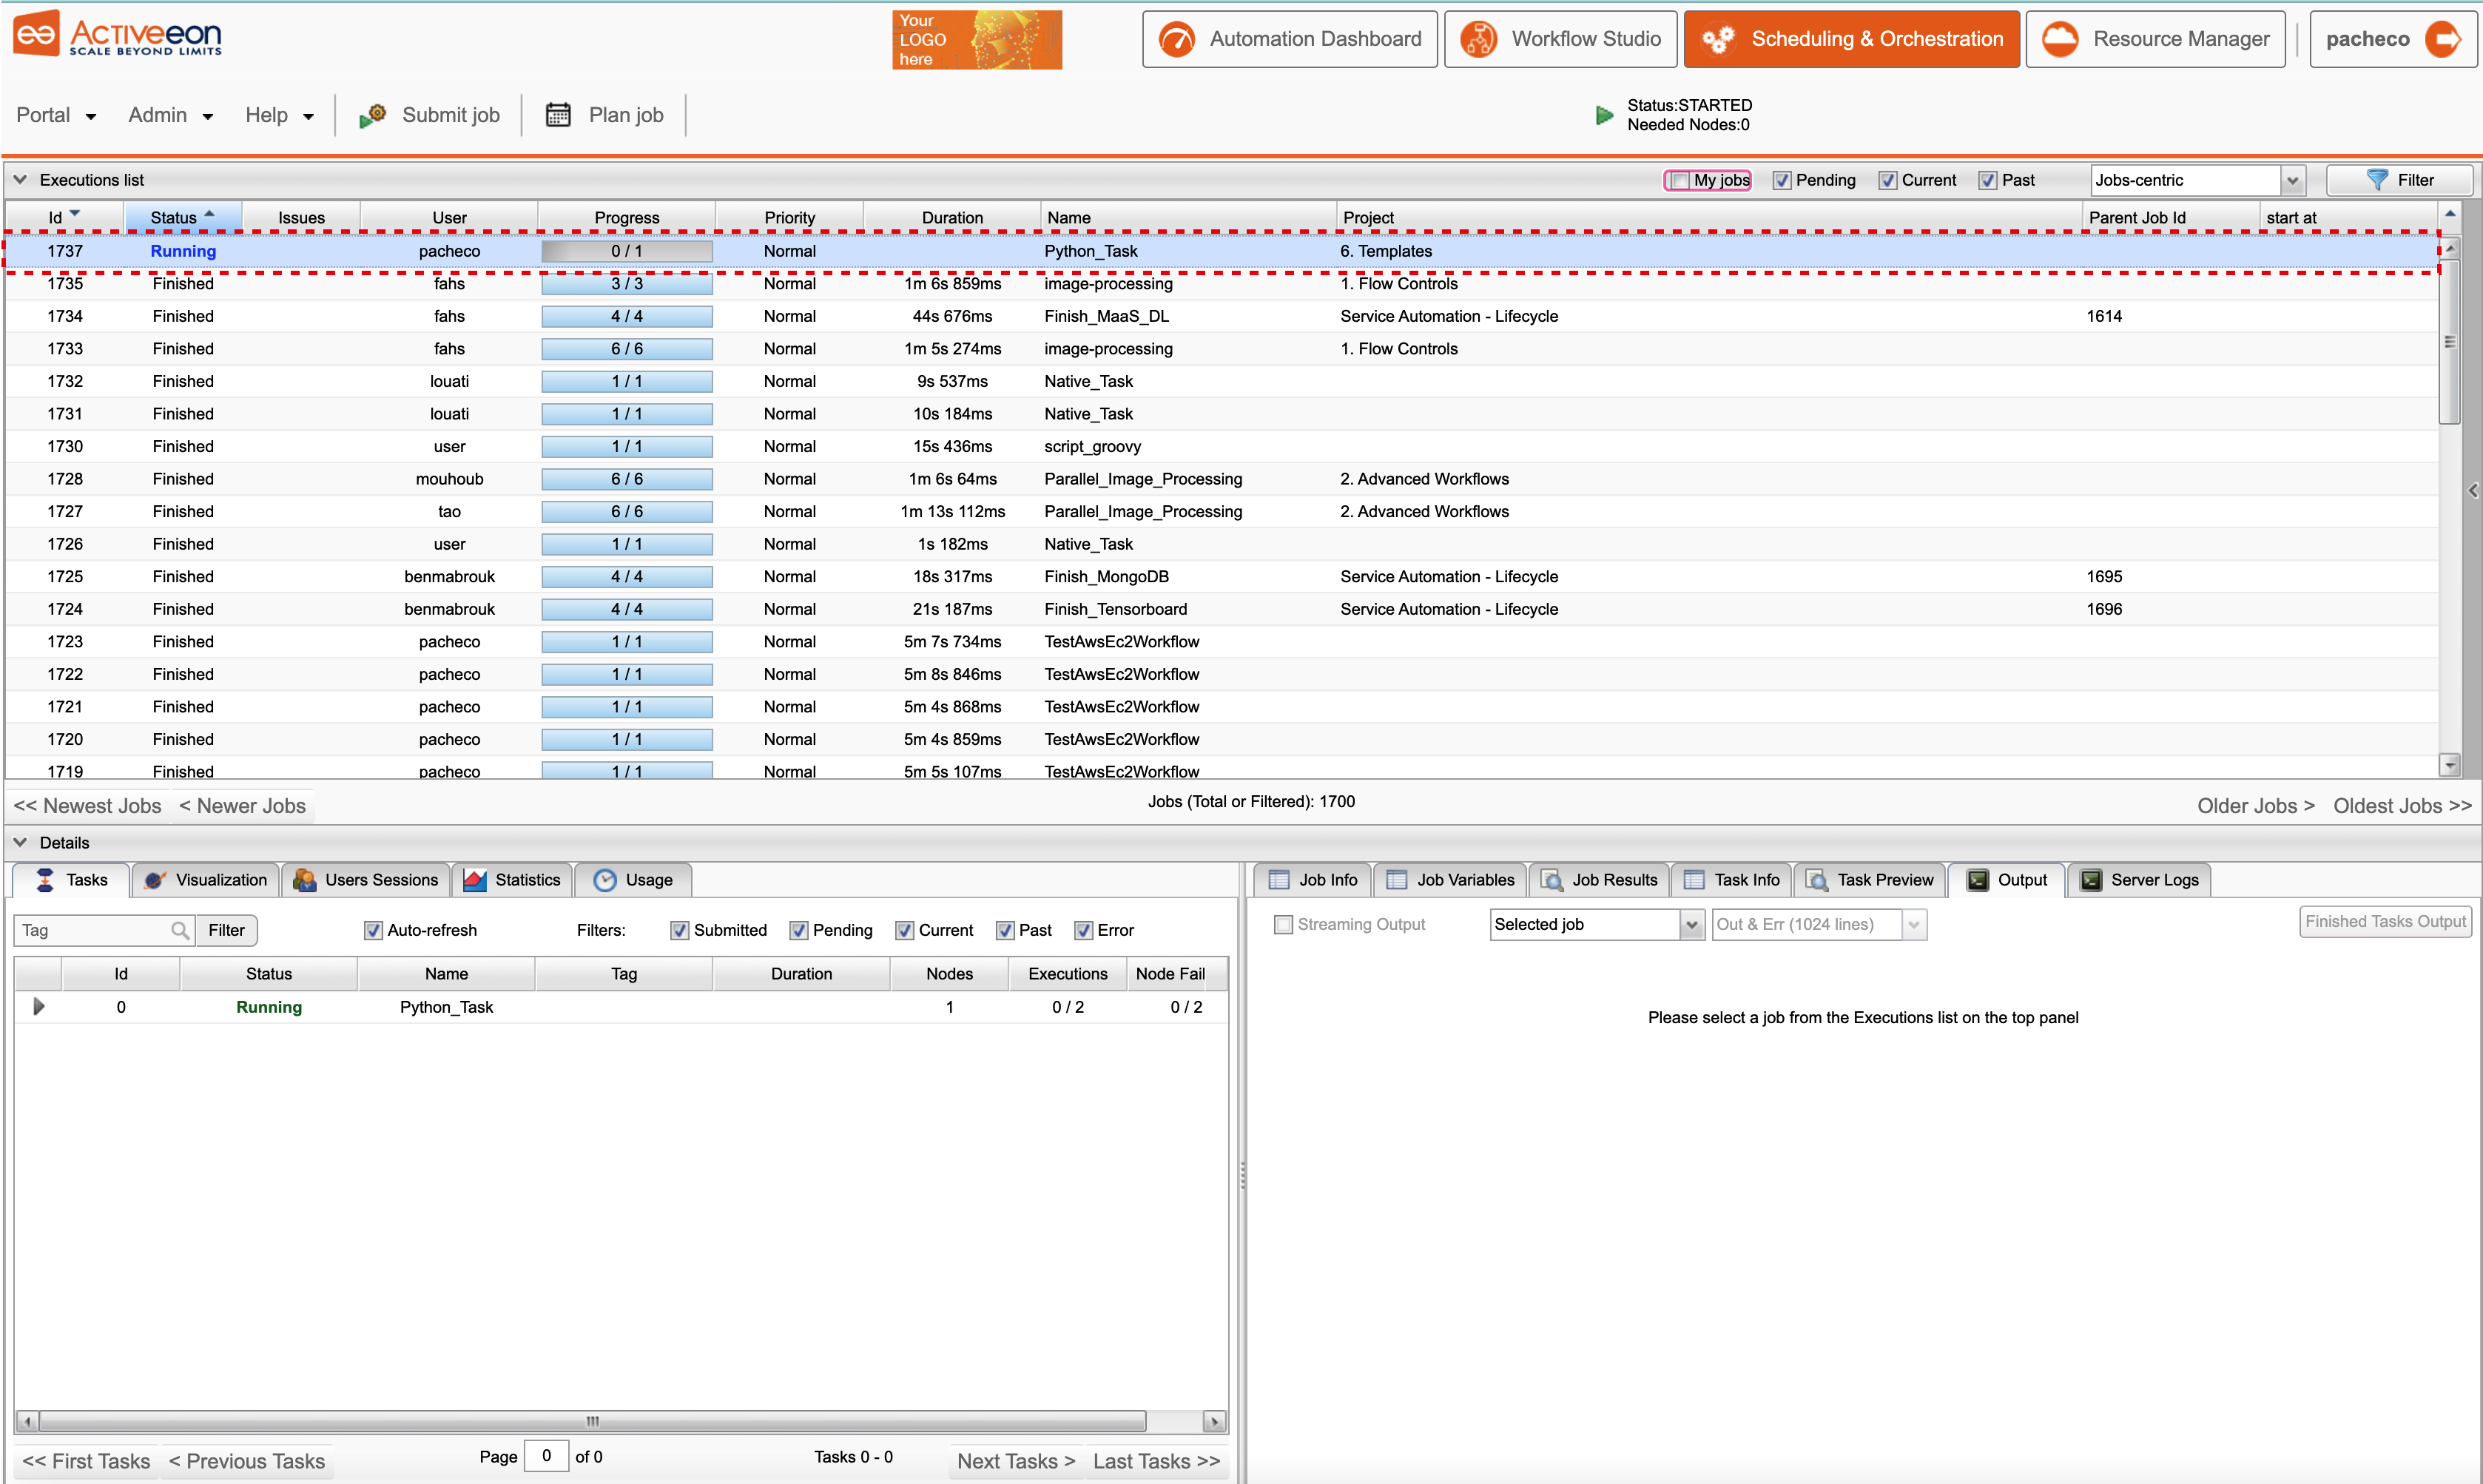
- Click in the Scheduling & Orchestration button to track the workflow execution progress.
- Click on your job id and track the progress of your workflow execution.
3 AutoML with Job Analytics
Following the below instructions, you will be able to tune your workflow and analyze the obtained results using the Job Analytics. Slide through the images for the steps illustration.
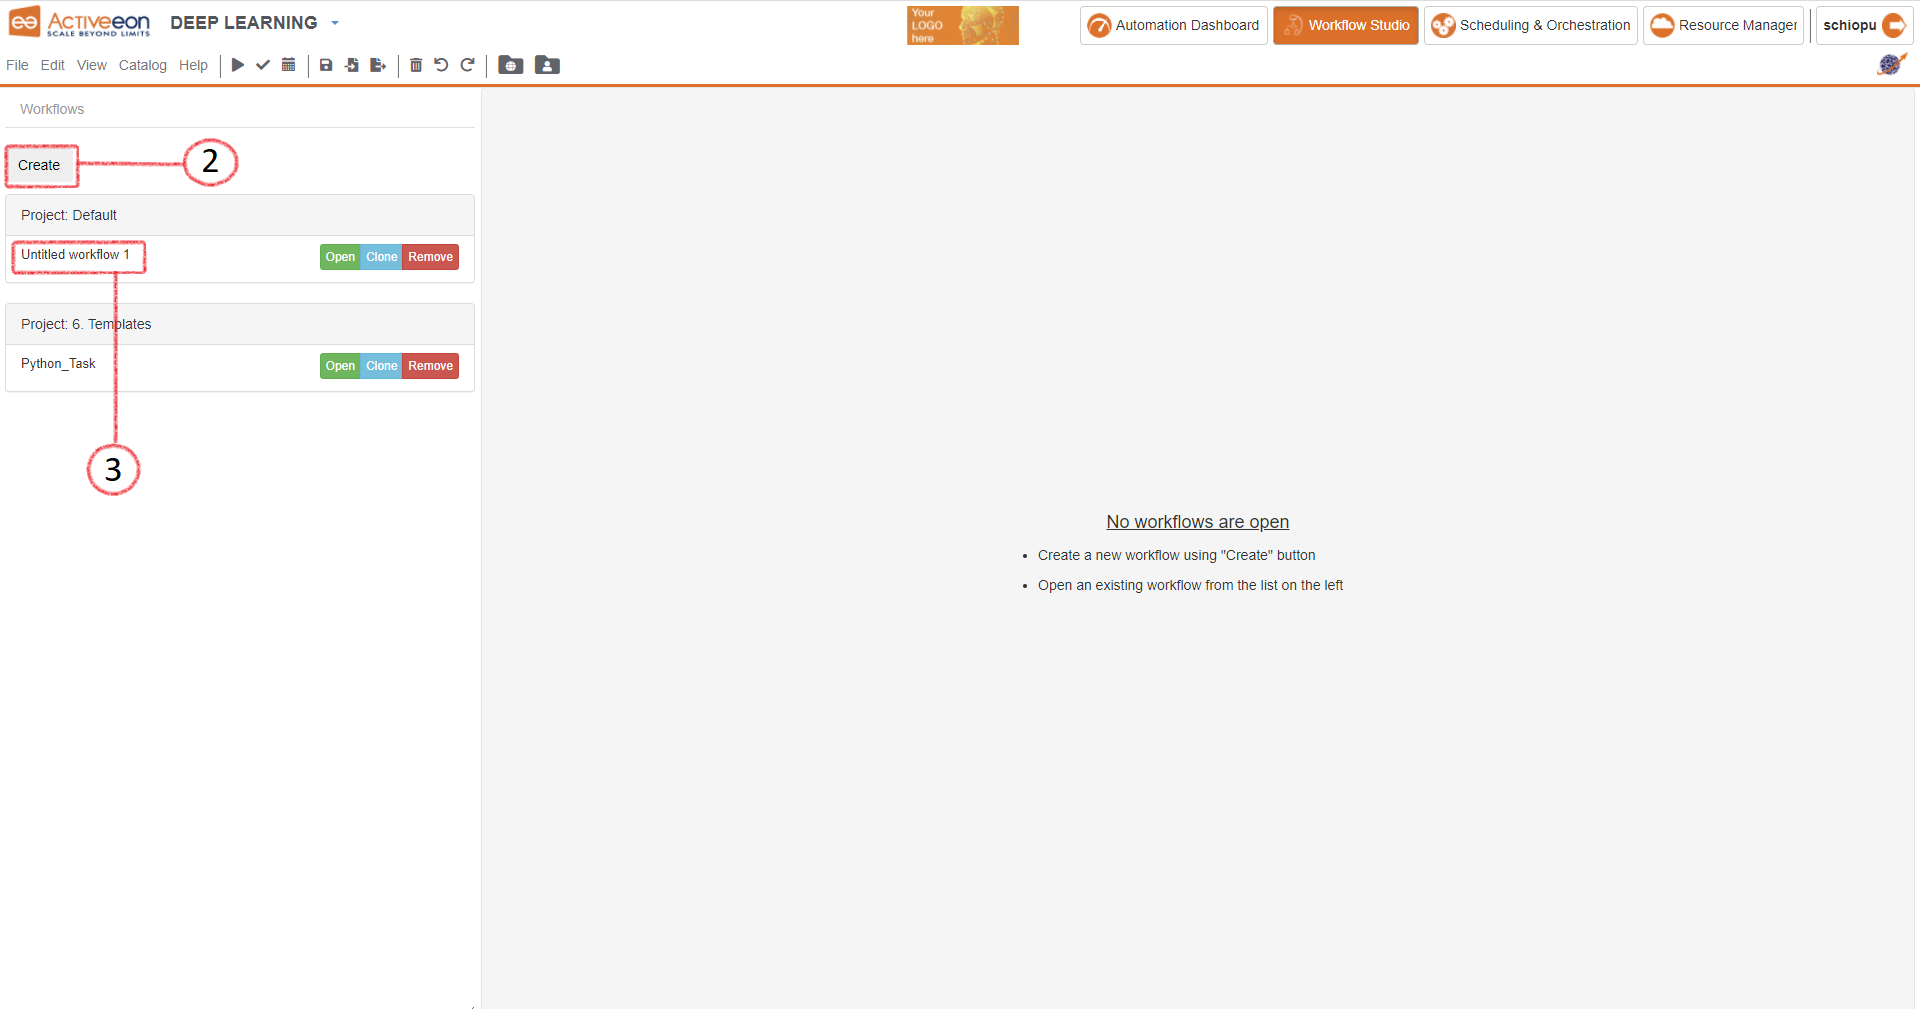
- Go back to ProActive Workflow Studio homepage.
- Create a new workflow using Create button.
- Click on Untitled workflow 1.
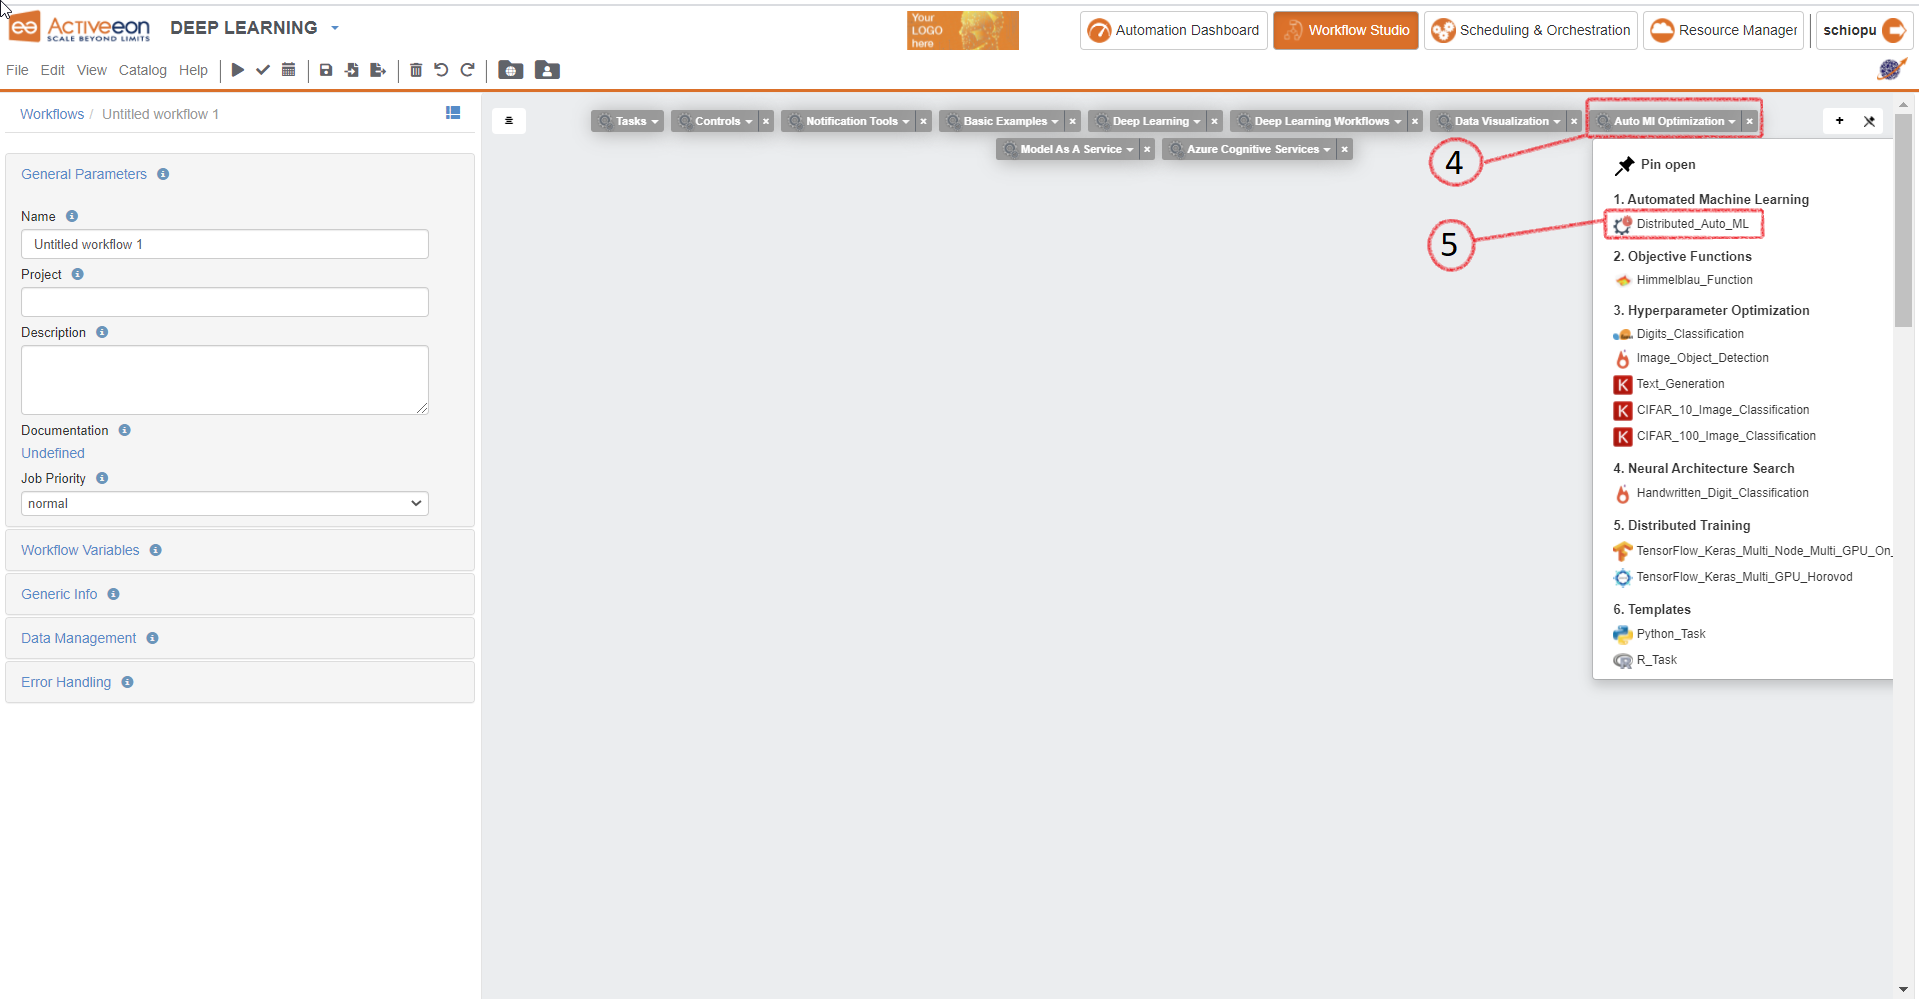
- Go to Ai Auto ML Optimization bucket.
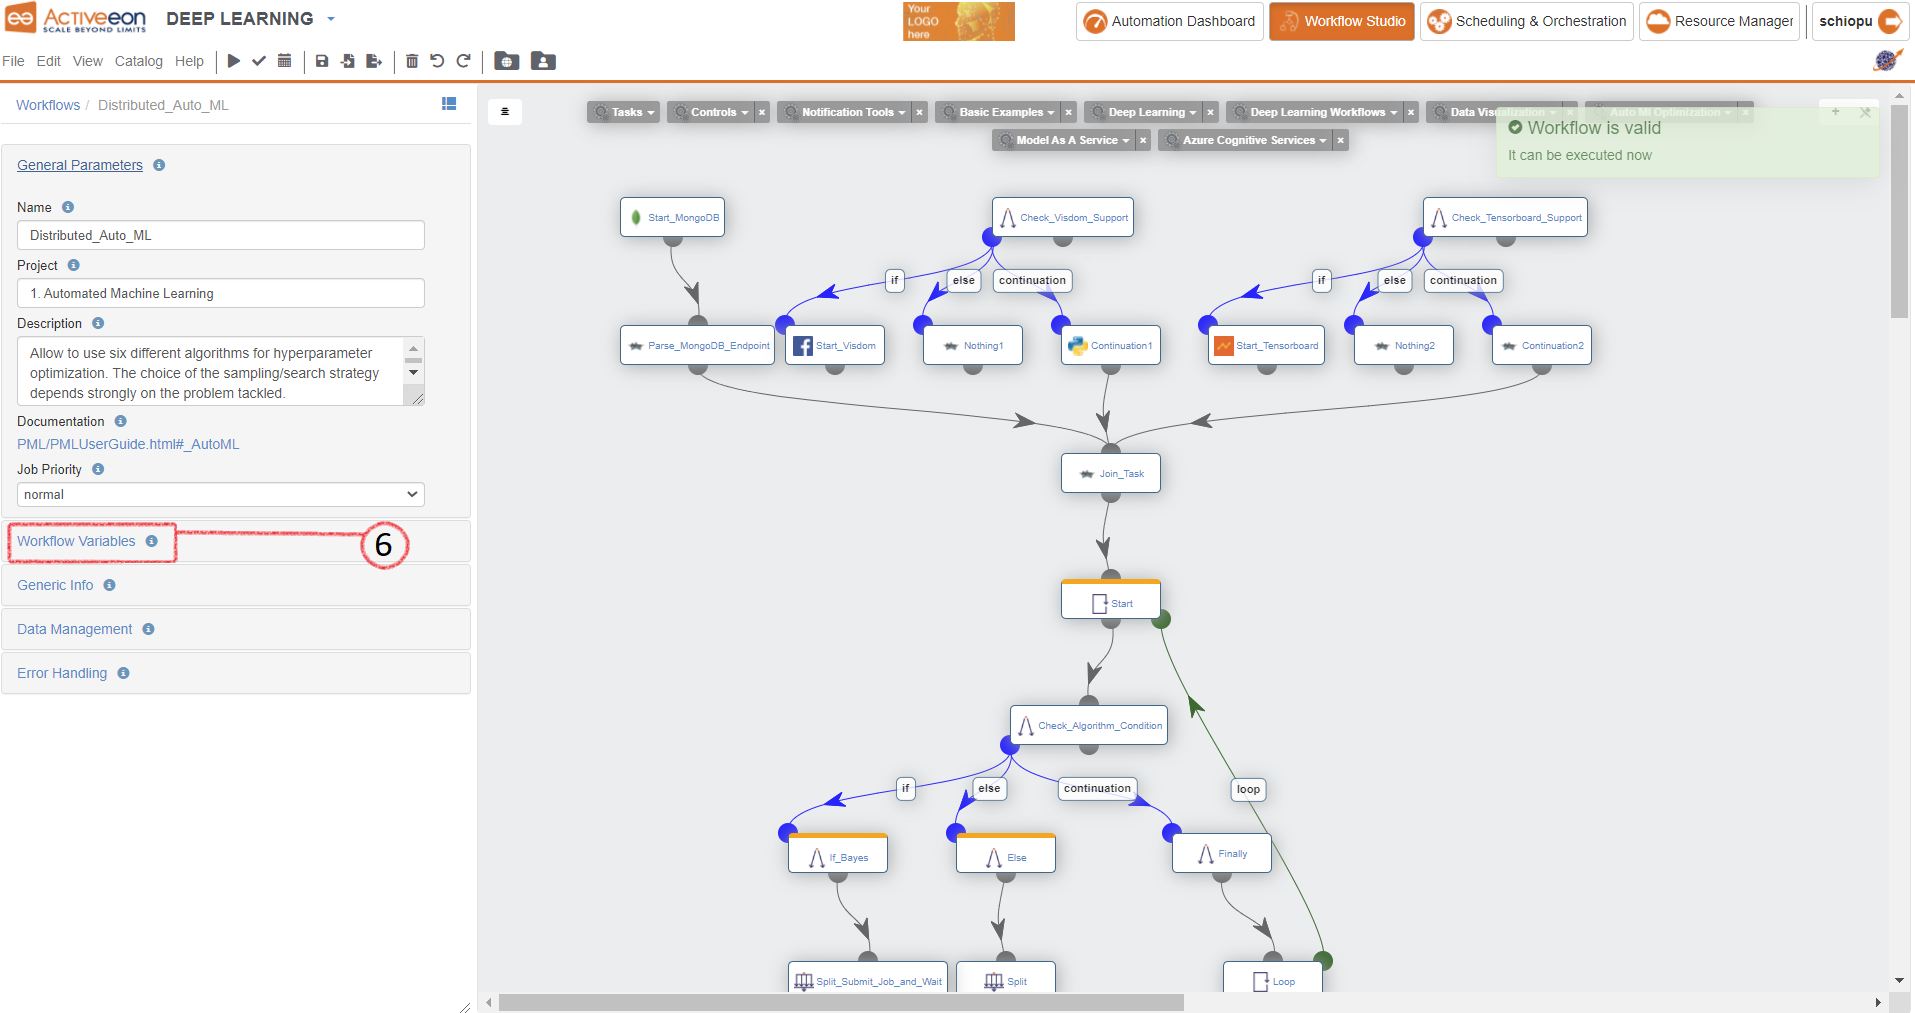
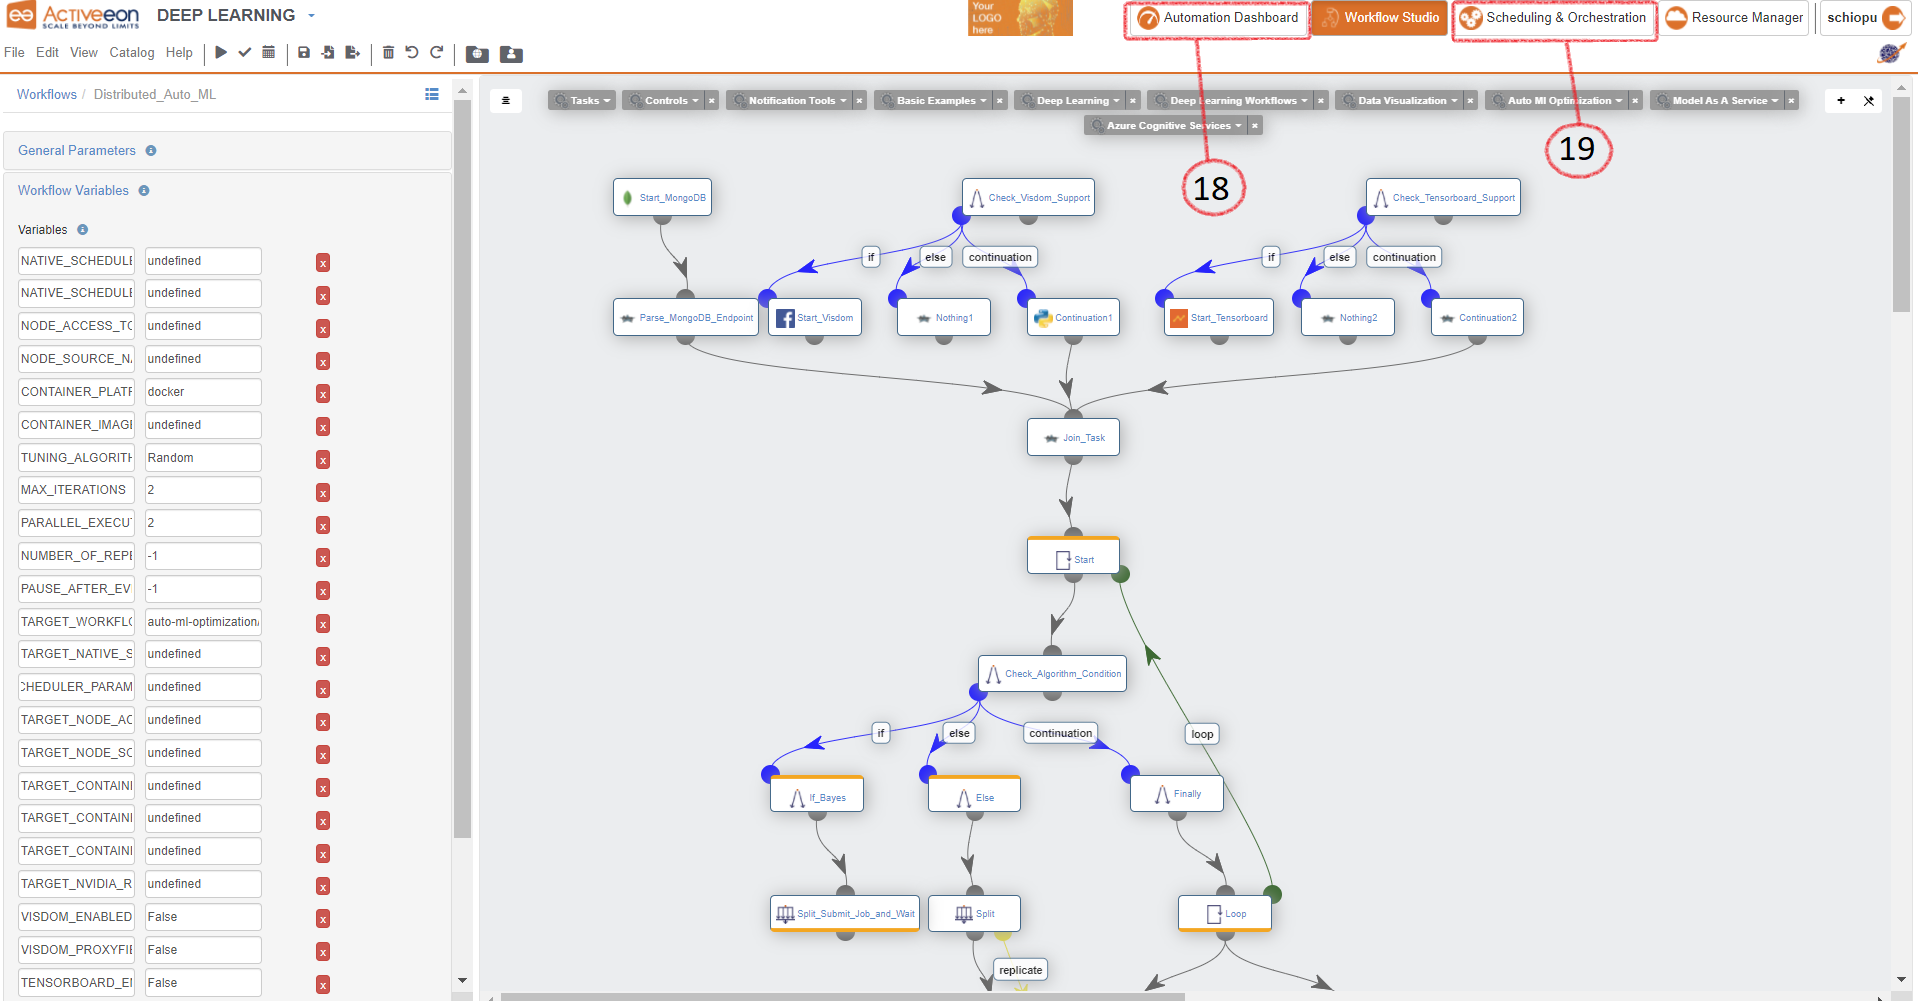
- Drag and drop the Distributed_Auto_ML task.
- Find and click on the Workflow Variables menu.
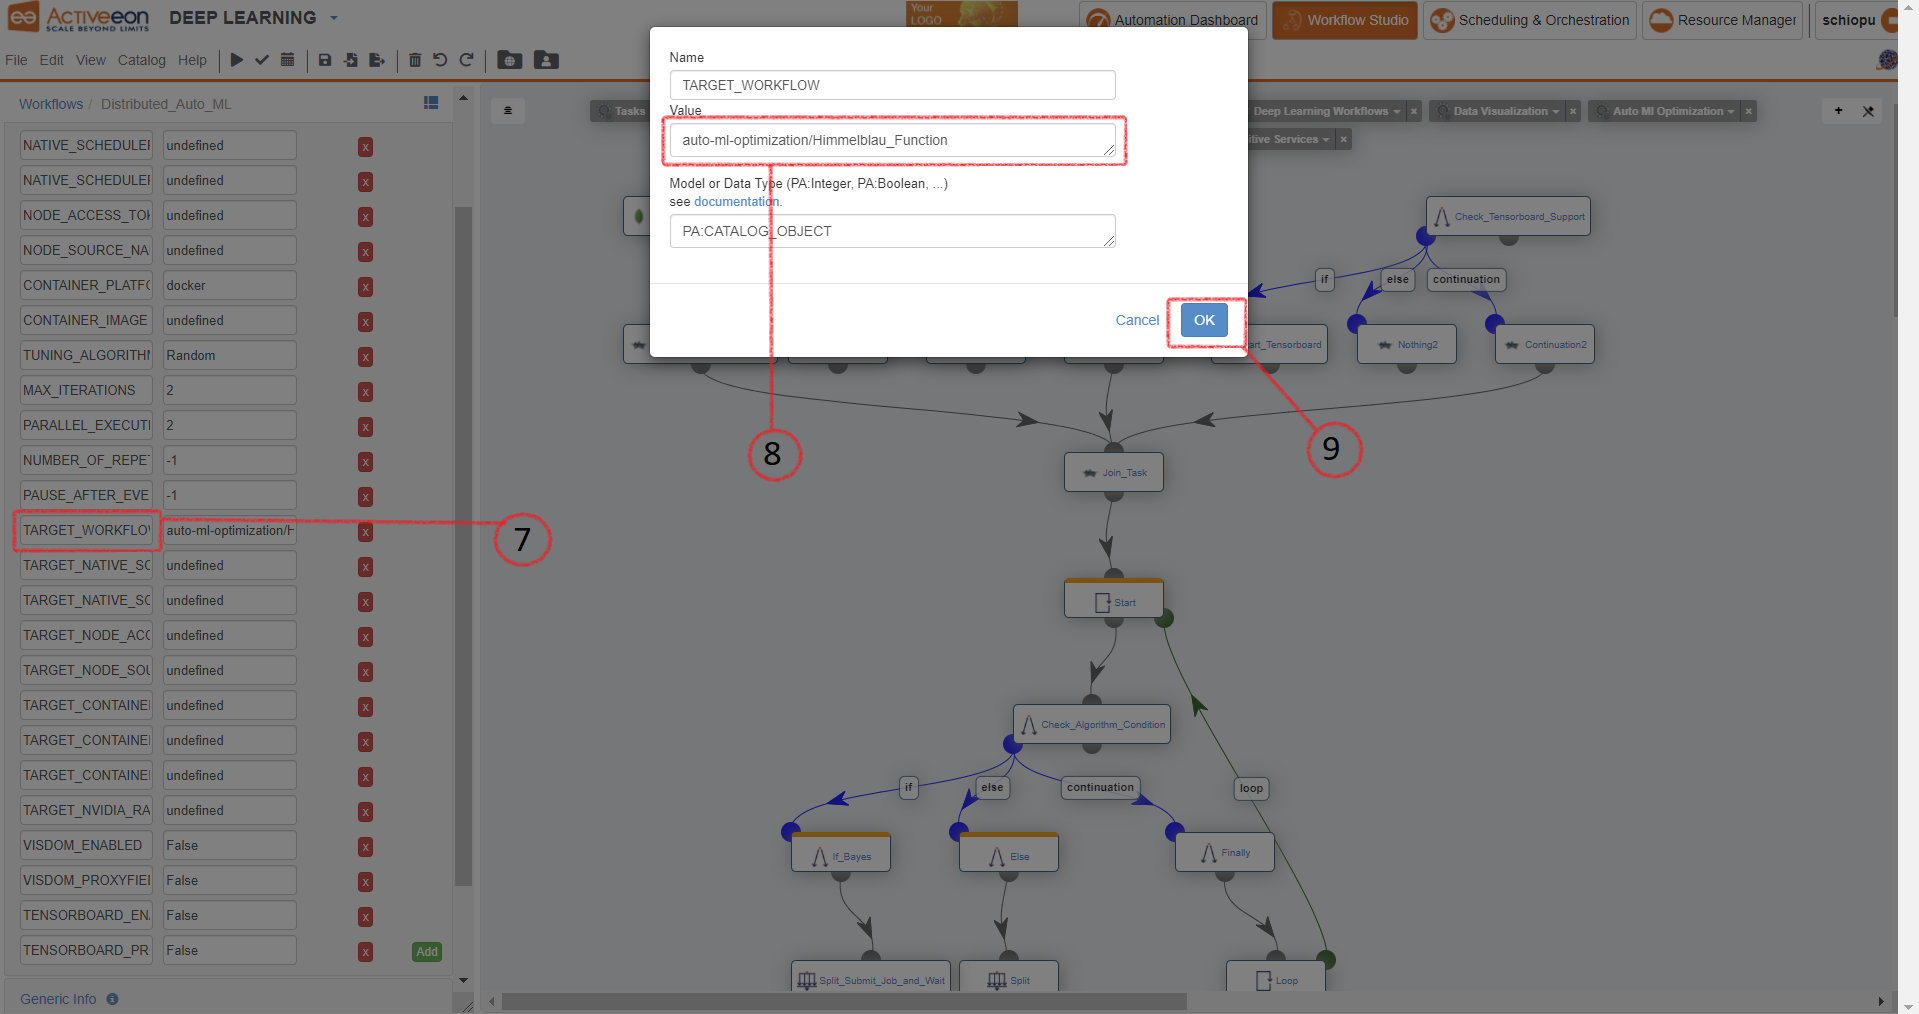
- Click on TARGET_WORKFLOW.
- Put bucket and workflow name in the TARGET_WORKFLOW value (e.g. firstname_workflows/Python_Task).
- Click on the OK button to close.
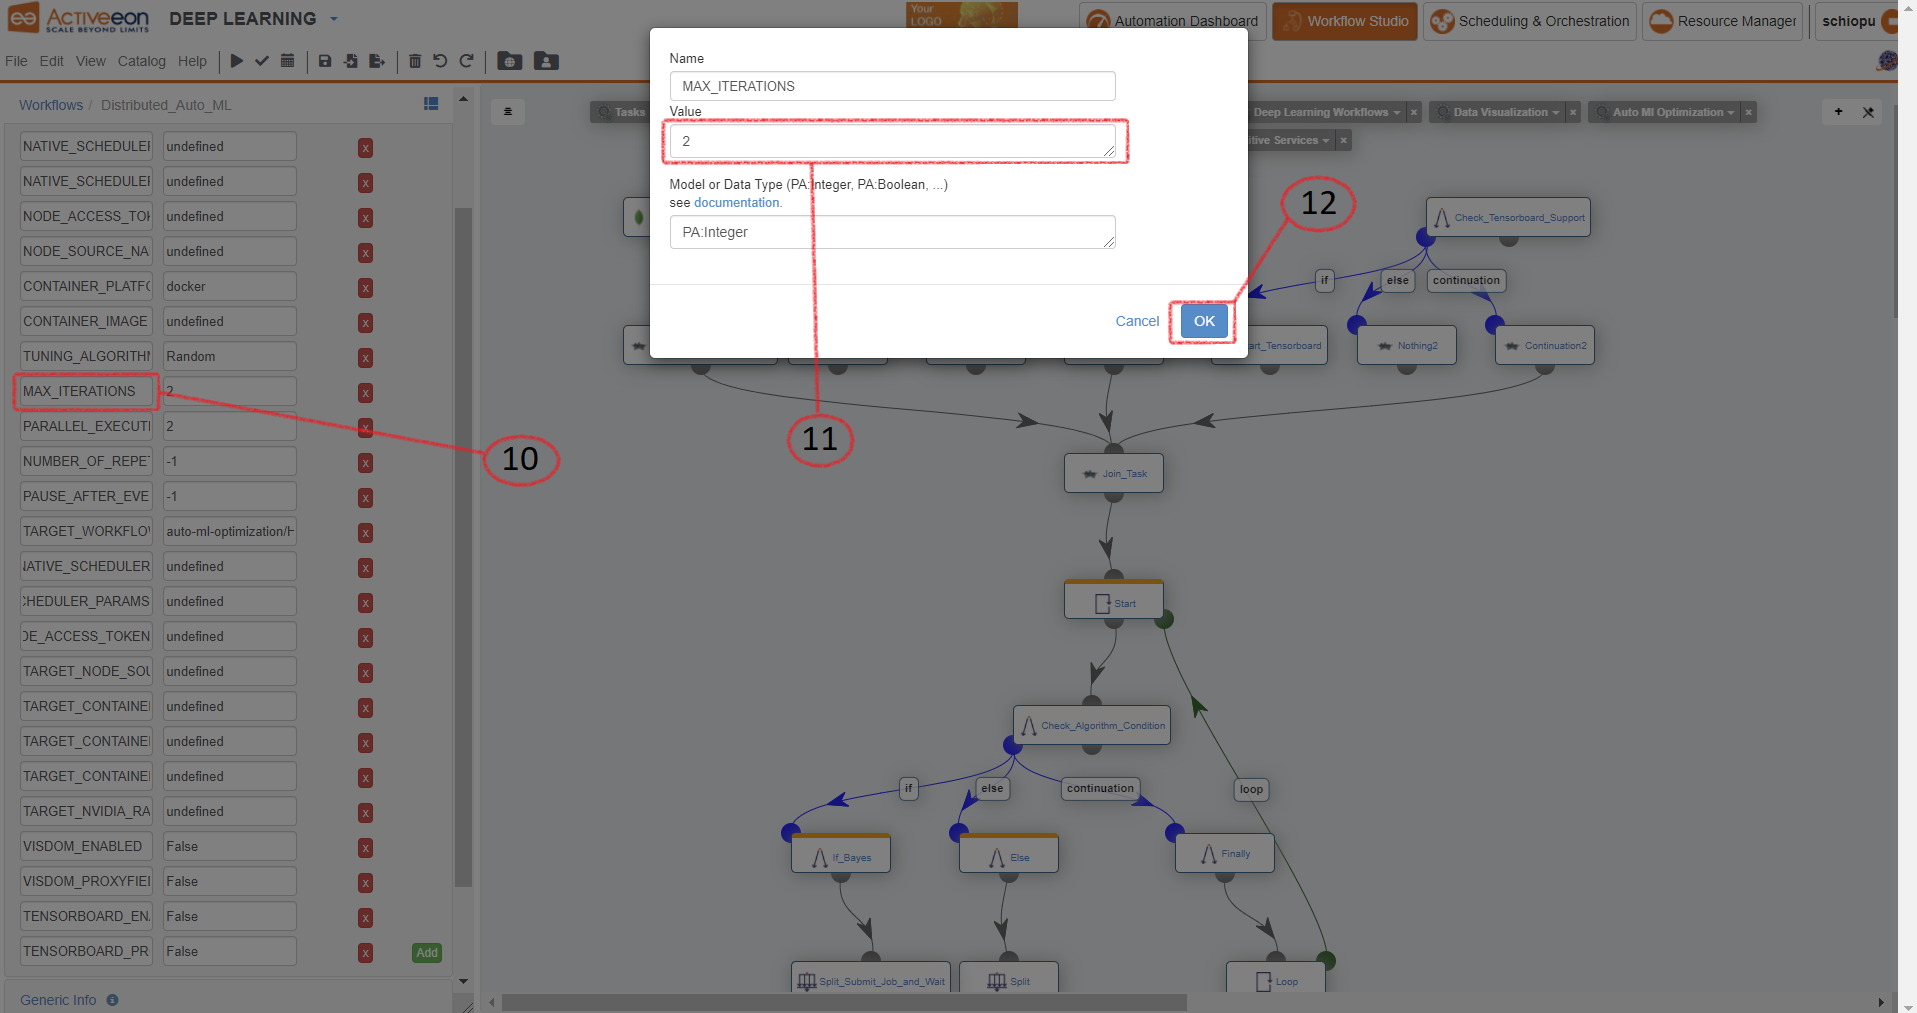
- Click on MAX_ITERATIONS.
- Put the maximum of iterations in the MAX_ITERATIONS value.
- Click on the OK button to close.
- Click on PARALLEL_EXECUTIONS_PER_ITERATION.
- Put the number of parallel samples per loop of iterations PARALLEL_EXECUTIONS_PER_ITERATION value.
- Click on the OK button to close.
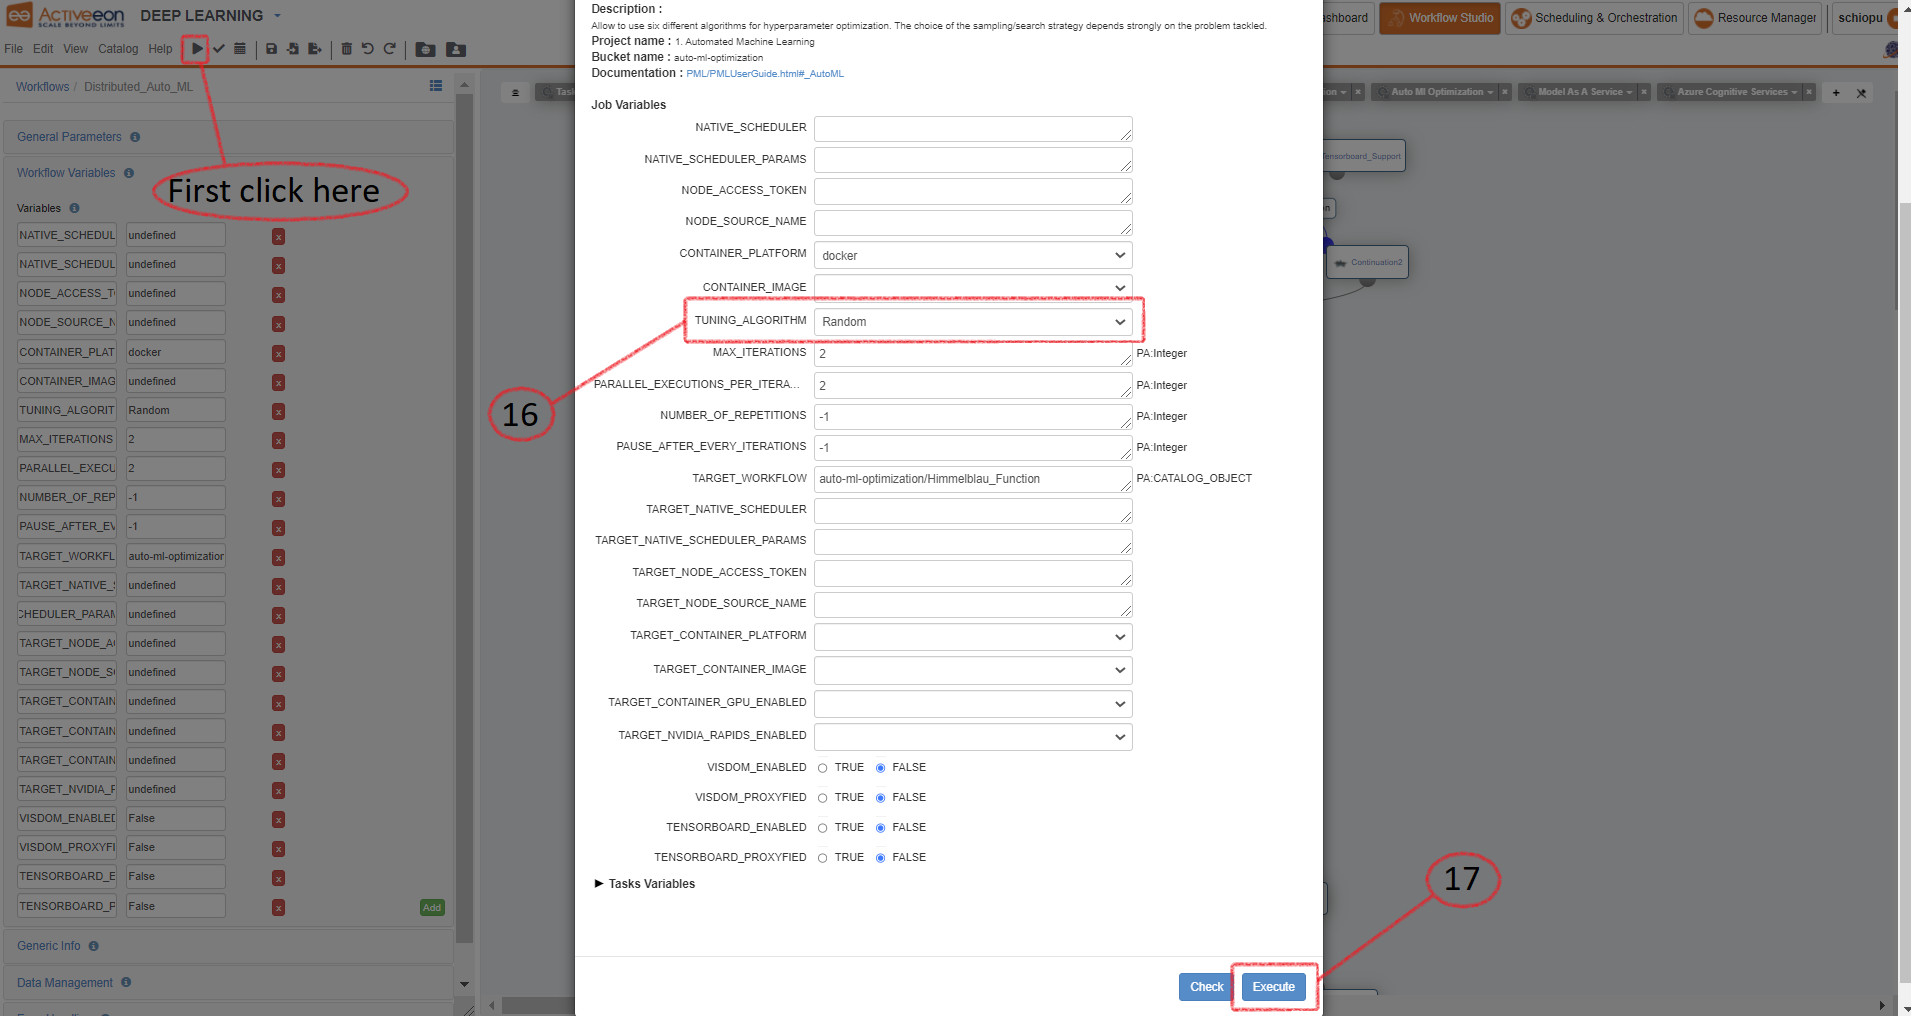
- Choose a TUNING_ALGORITHM (e.g. Random).
- Click on the Execute button.
- Click on the Automation Dashboard button to track the workflow execution progress.
- Click on the Scheduling & Orchestration menu.
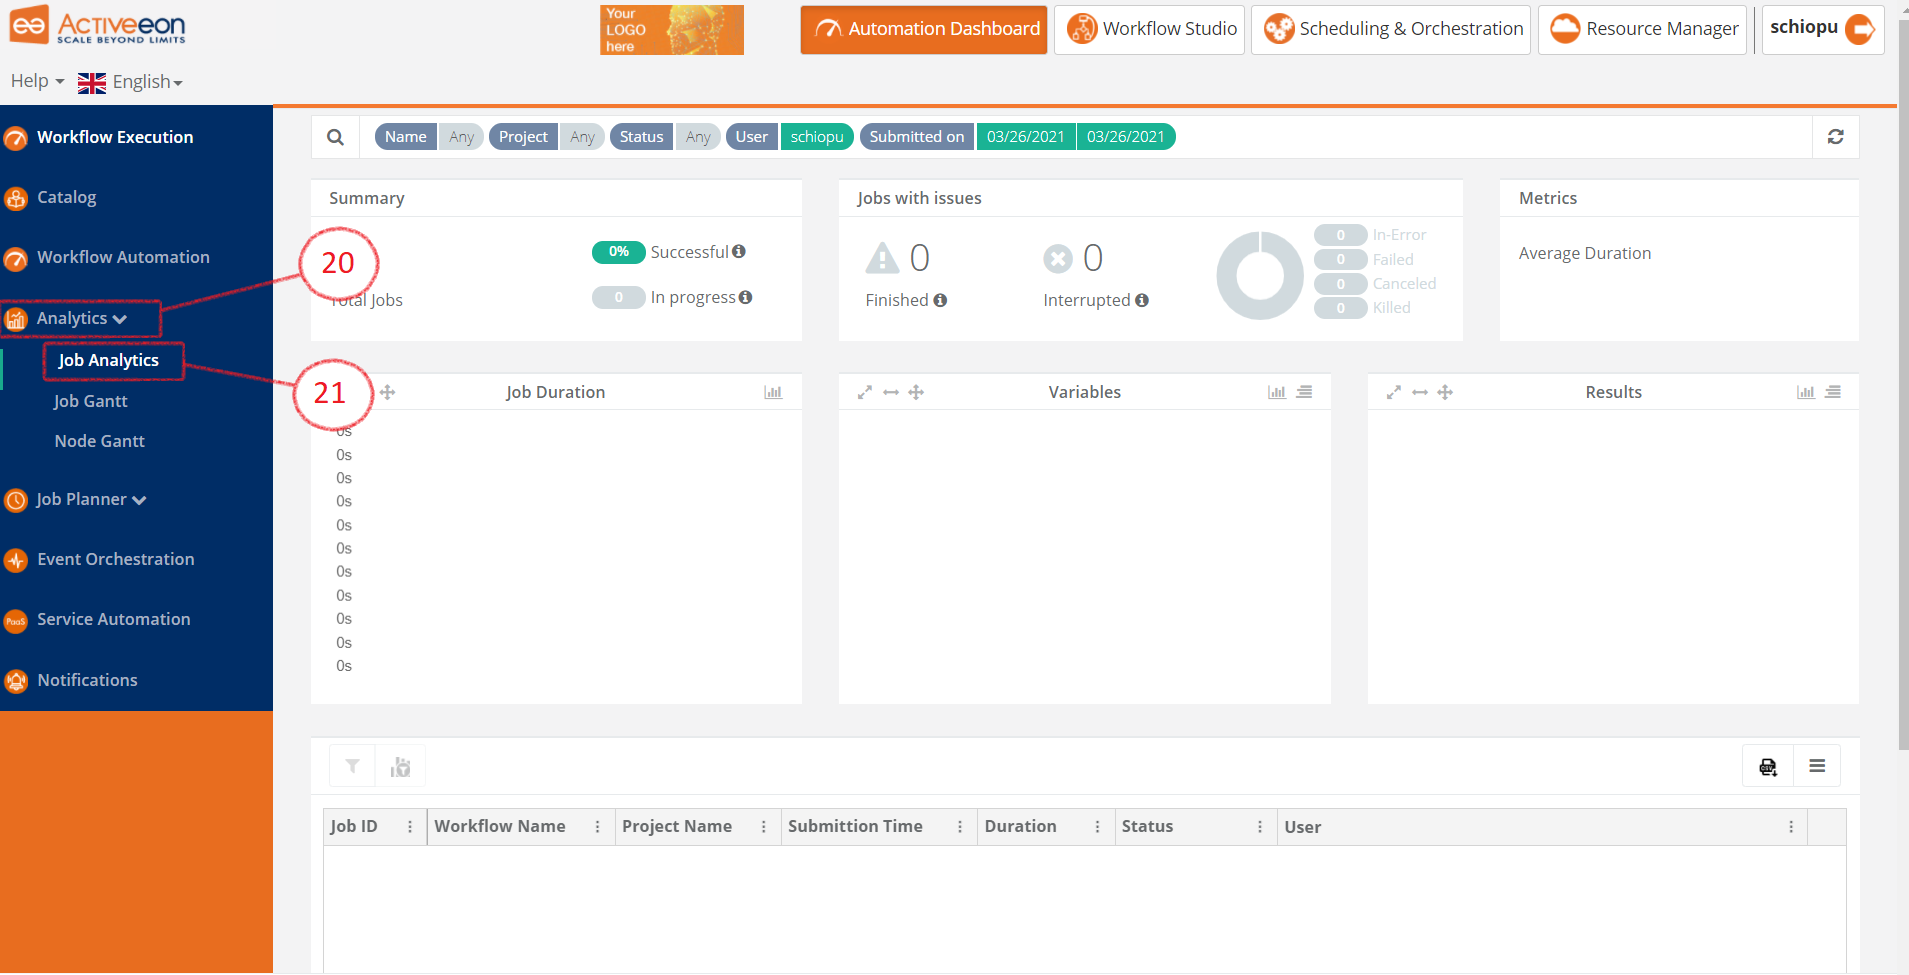
- Click on the Analytics menu.
- Click on the Job Analytics menu.
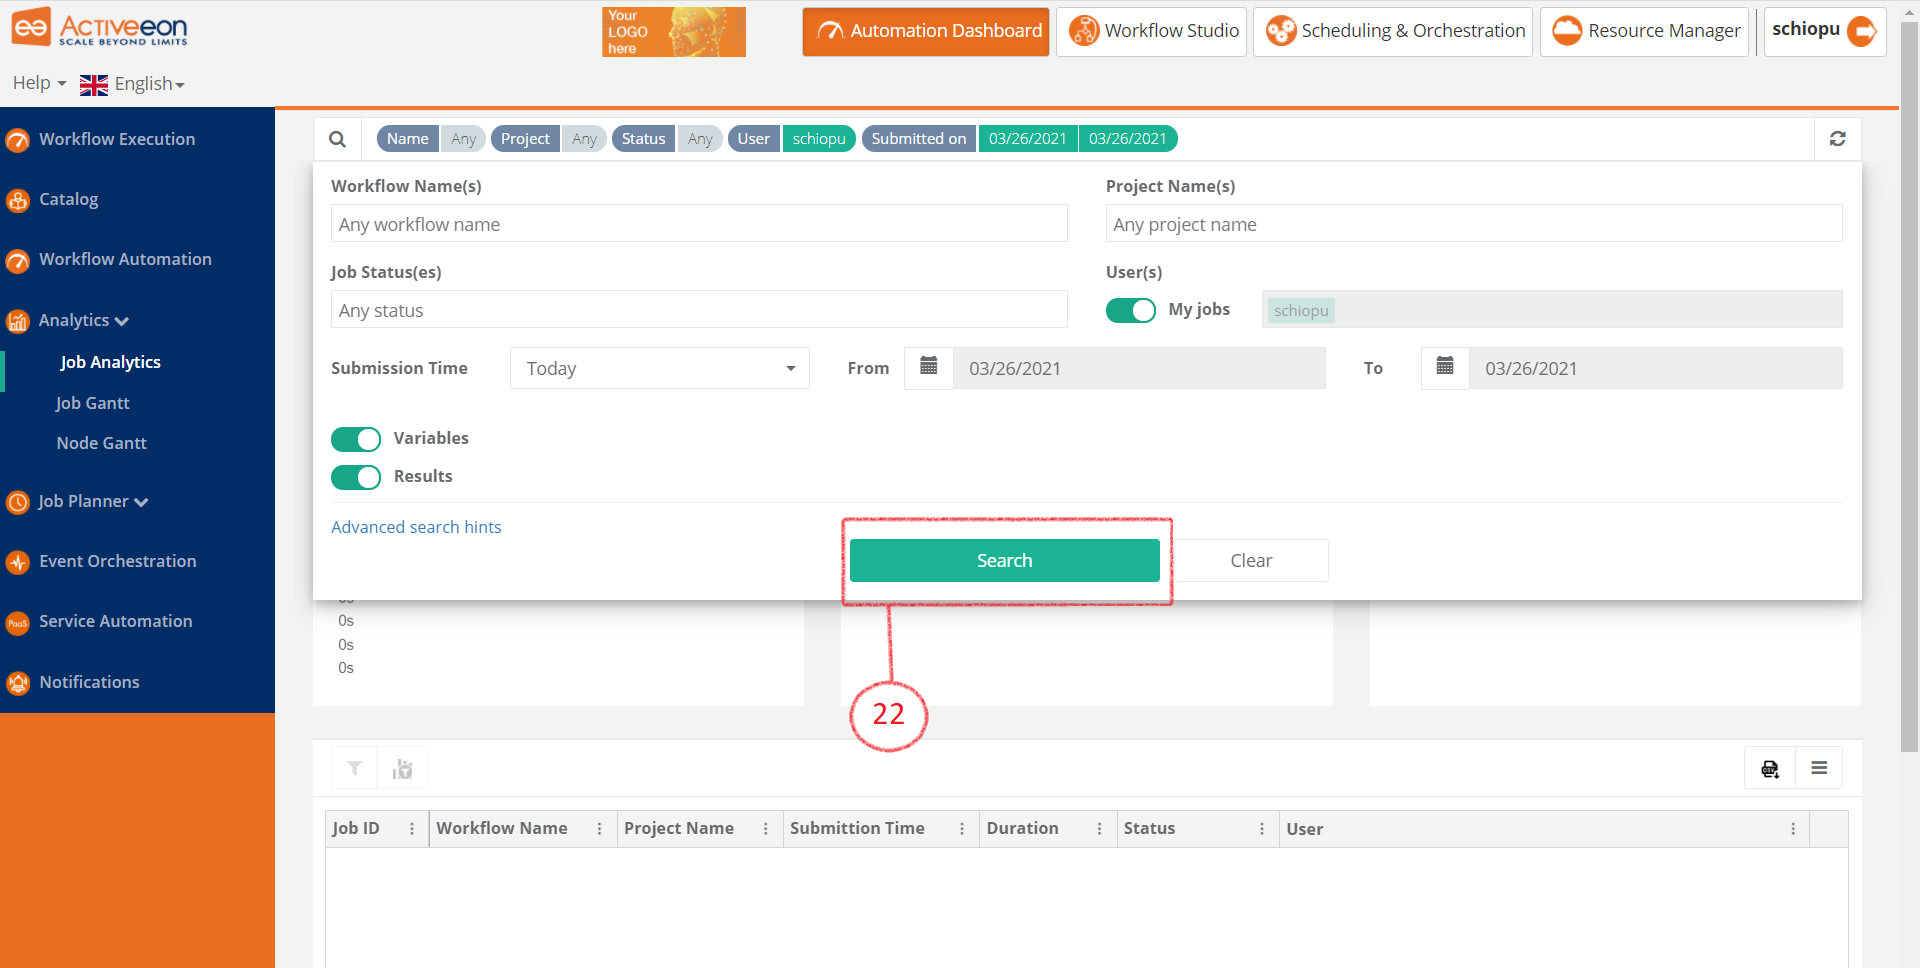
- Click on the Search button.
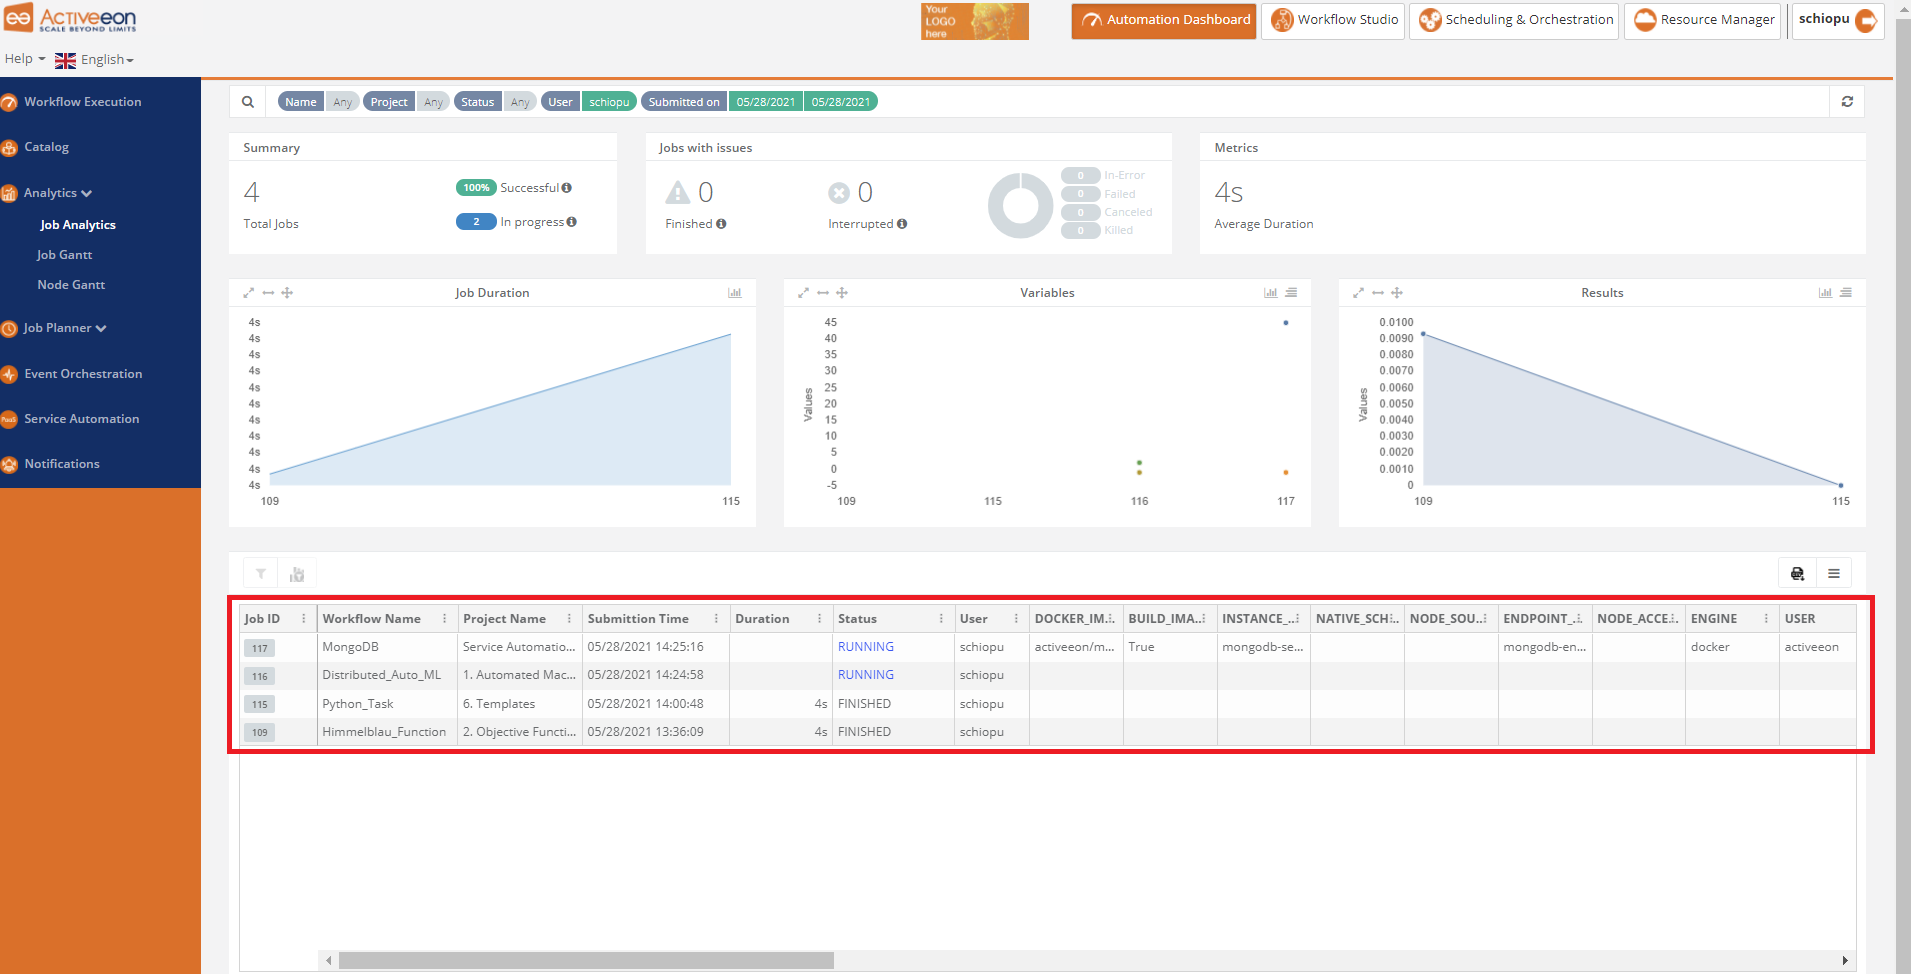
- Visualize jobs progress and result.

- watch PAIO demo video
- the tutorial on data visualization with visdom and tensorboard
- go through our documentation for more details