ProActive Quickstart - Jupyter ProActive Kernel
The Jupyter ProActive Kernel adds a kernel backend to Jupyter. This kernel interfaces directly with the ProActive scheduler and constructs tasks and workflows to execute them on the fly. With this interface, users can run their code locally and test it using a native python kernel, and by a simple switch to ProActive kernel, run it on remote public or private infrastructures without having to modify the code.
This tutorial will show you how to:
- Install the Jupyter ProActive Kernel.
- Create a job through a notebook.
- Submit to the scheduler and visualize results.
1 Install the Jupyter ProActive Kernel
Follow these steps to install the required Python environment:
- Go to Anaconda
- Download the Anaconda3 distribution related to your OS
- Double click on the saved file and follow the steps
To install the Jupyter ProActive Kernel, open a terminal and run:
$ pip install proactive proactive-jupyter-kernel --upgrade
$ python -m proactive-jupyter-kernel.install
If you have a Python environment installed on your machine, to be able to install and use the ProActive Kernel please make sure you install also the following required libraries:
- pexpect (version >=4.0)
- proactive
- jupyter_client
- IPython
- traitlets
- ipykernel
- notebook
- configparser
- matplotlib
- networkx
- pygraphviz
- tornado
To install the Jupyter ProActive Kernel, open a terminal and run:
$ pip install proactive proactive-jupyter-kernel --upgrade
$ python -m proactive-jupyter-kernel.install
In case you want to test the jupyter kernel without installing any library, please use our jupyterlab docker image with the conda tag. To do so, please follow these steps:
- Pull the docker image:
- Run the docker image by running:
- Get access to Jupyther via the following address: http://localhost:8888.
$ docker pull activeeon/jupyterlab
$ docker run -it -p 8888:8888 activeeon/jupyterlab
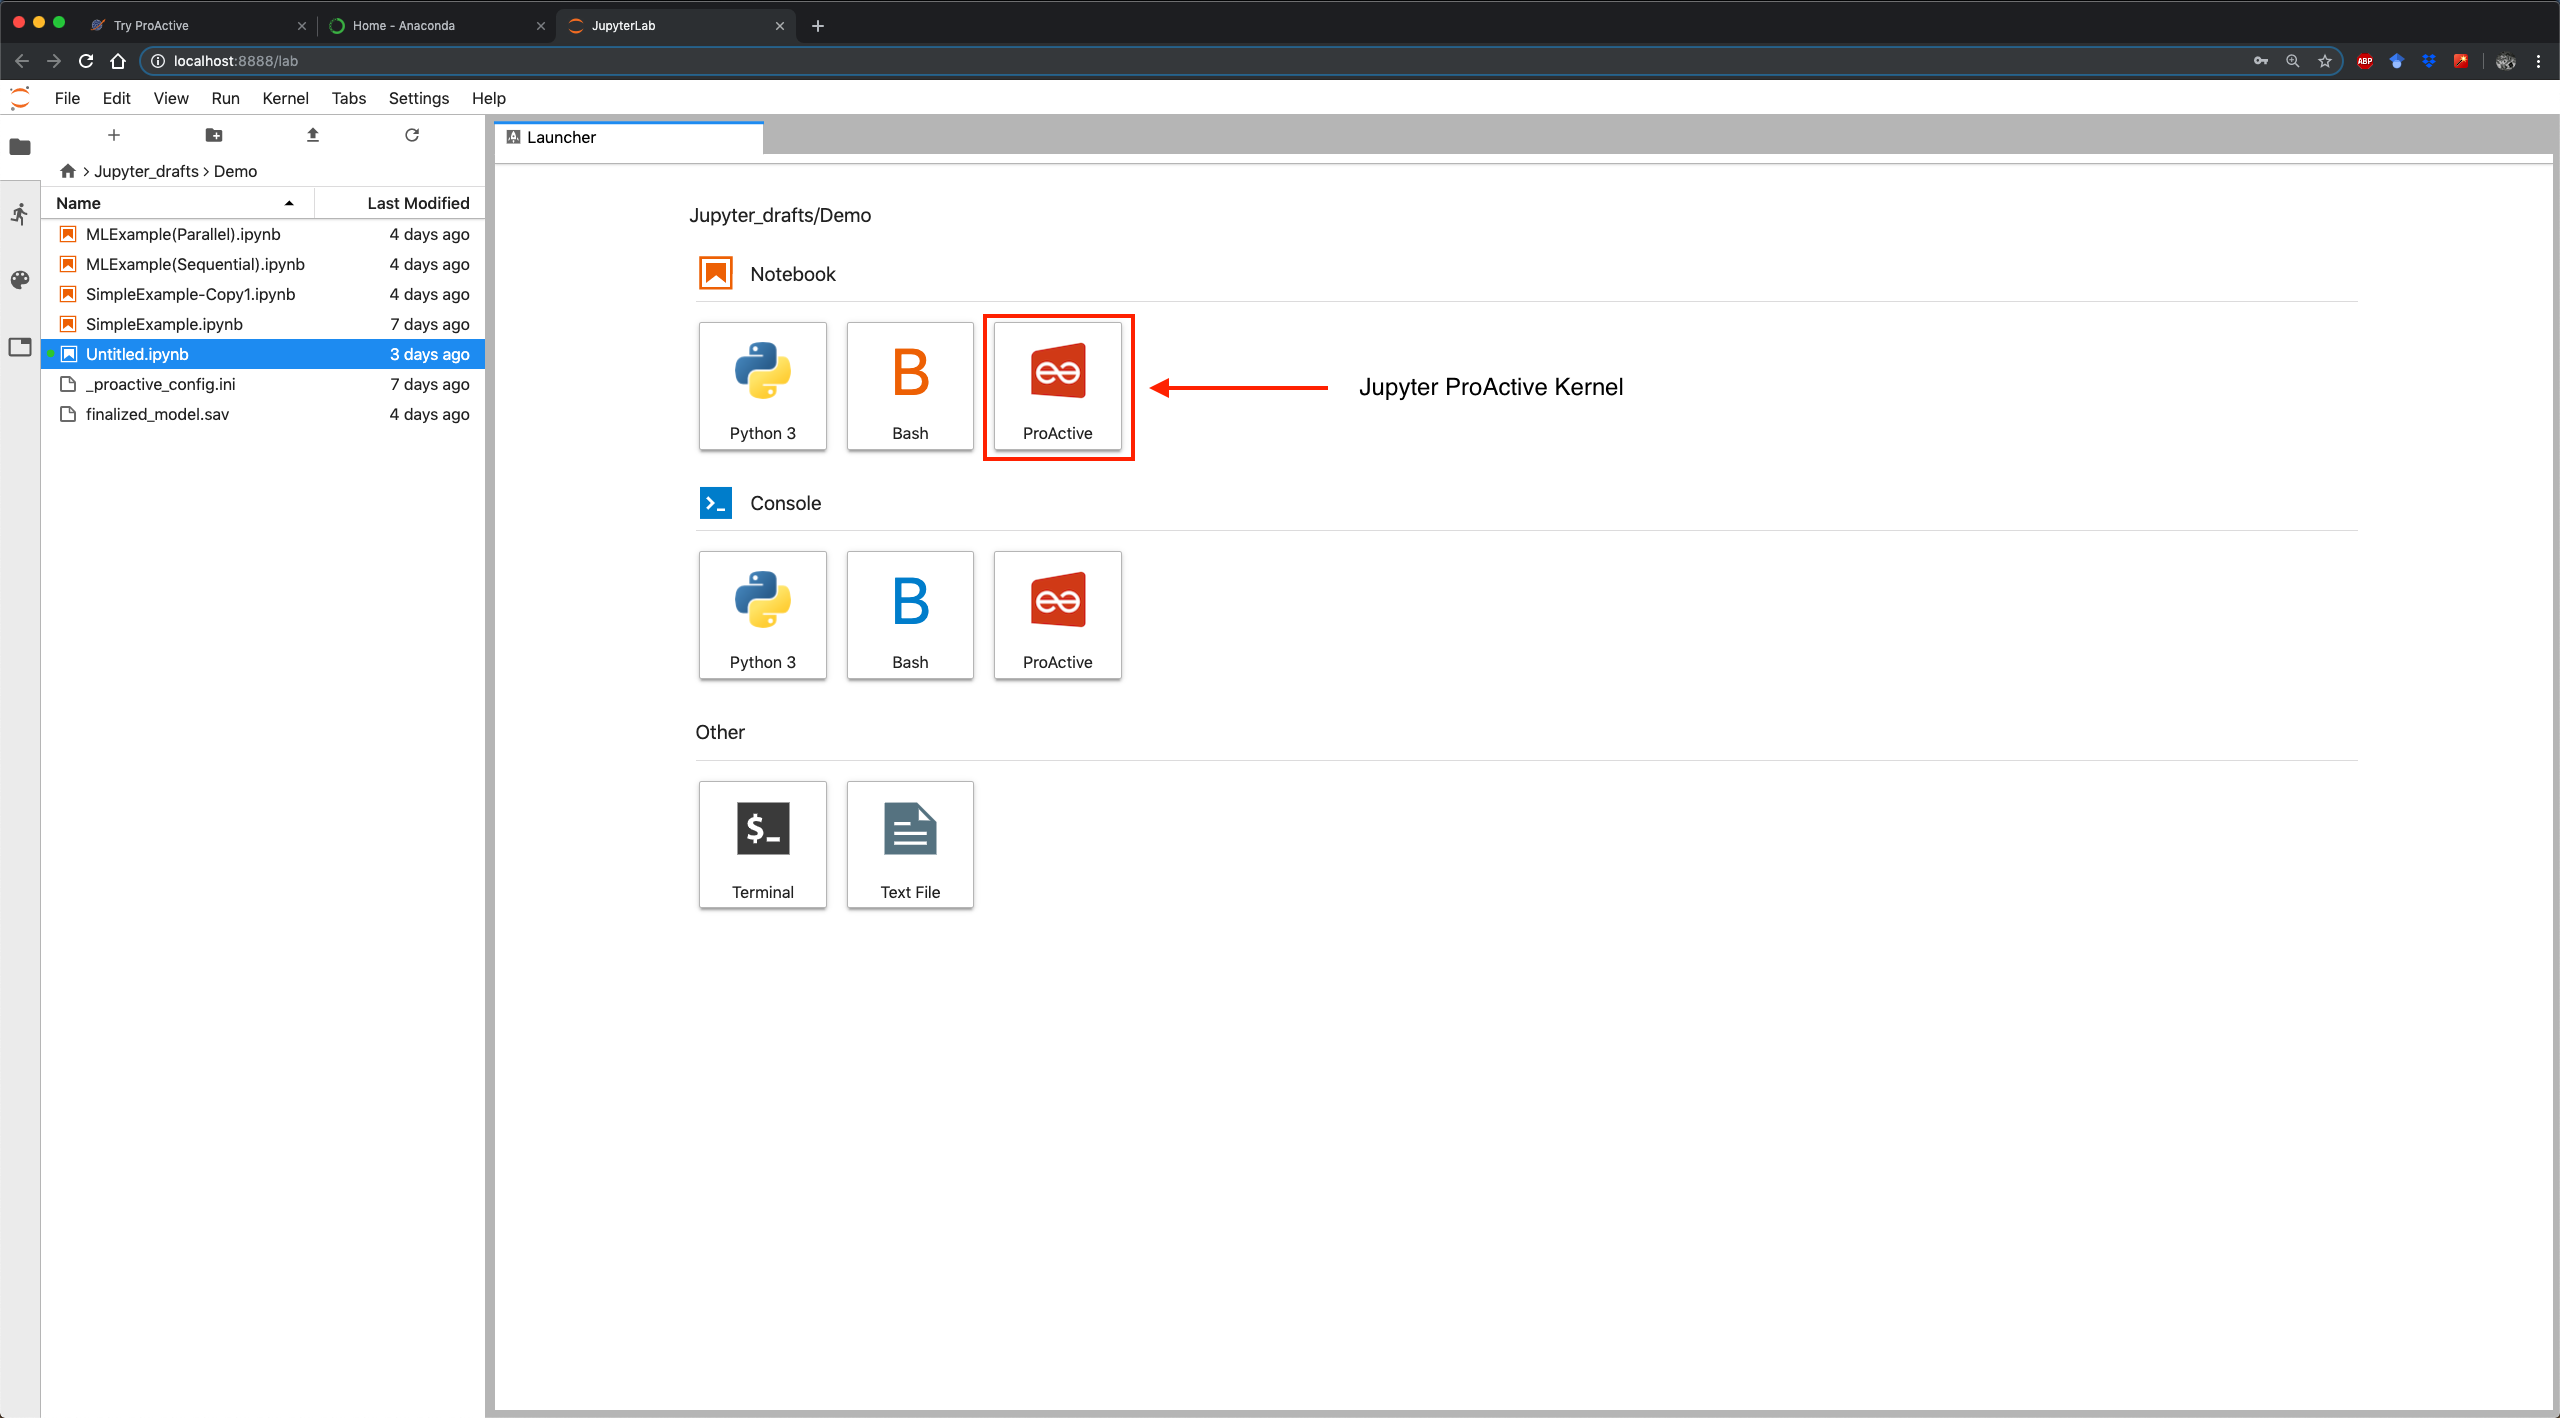
To create a Jupyter notebook:
- Open Jupyter
lab
by running on your terminal:
$ jupyter lab
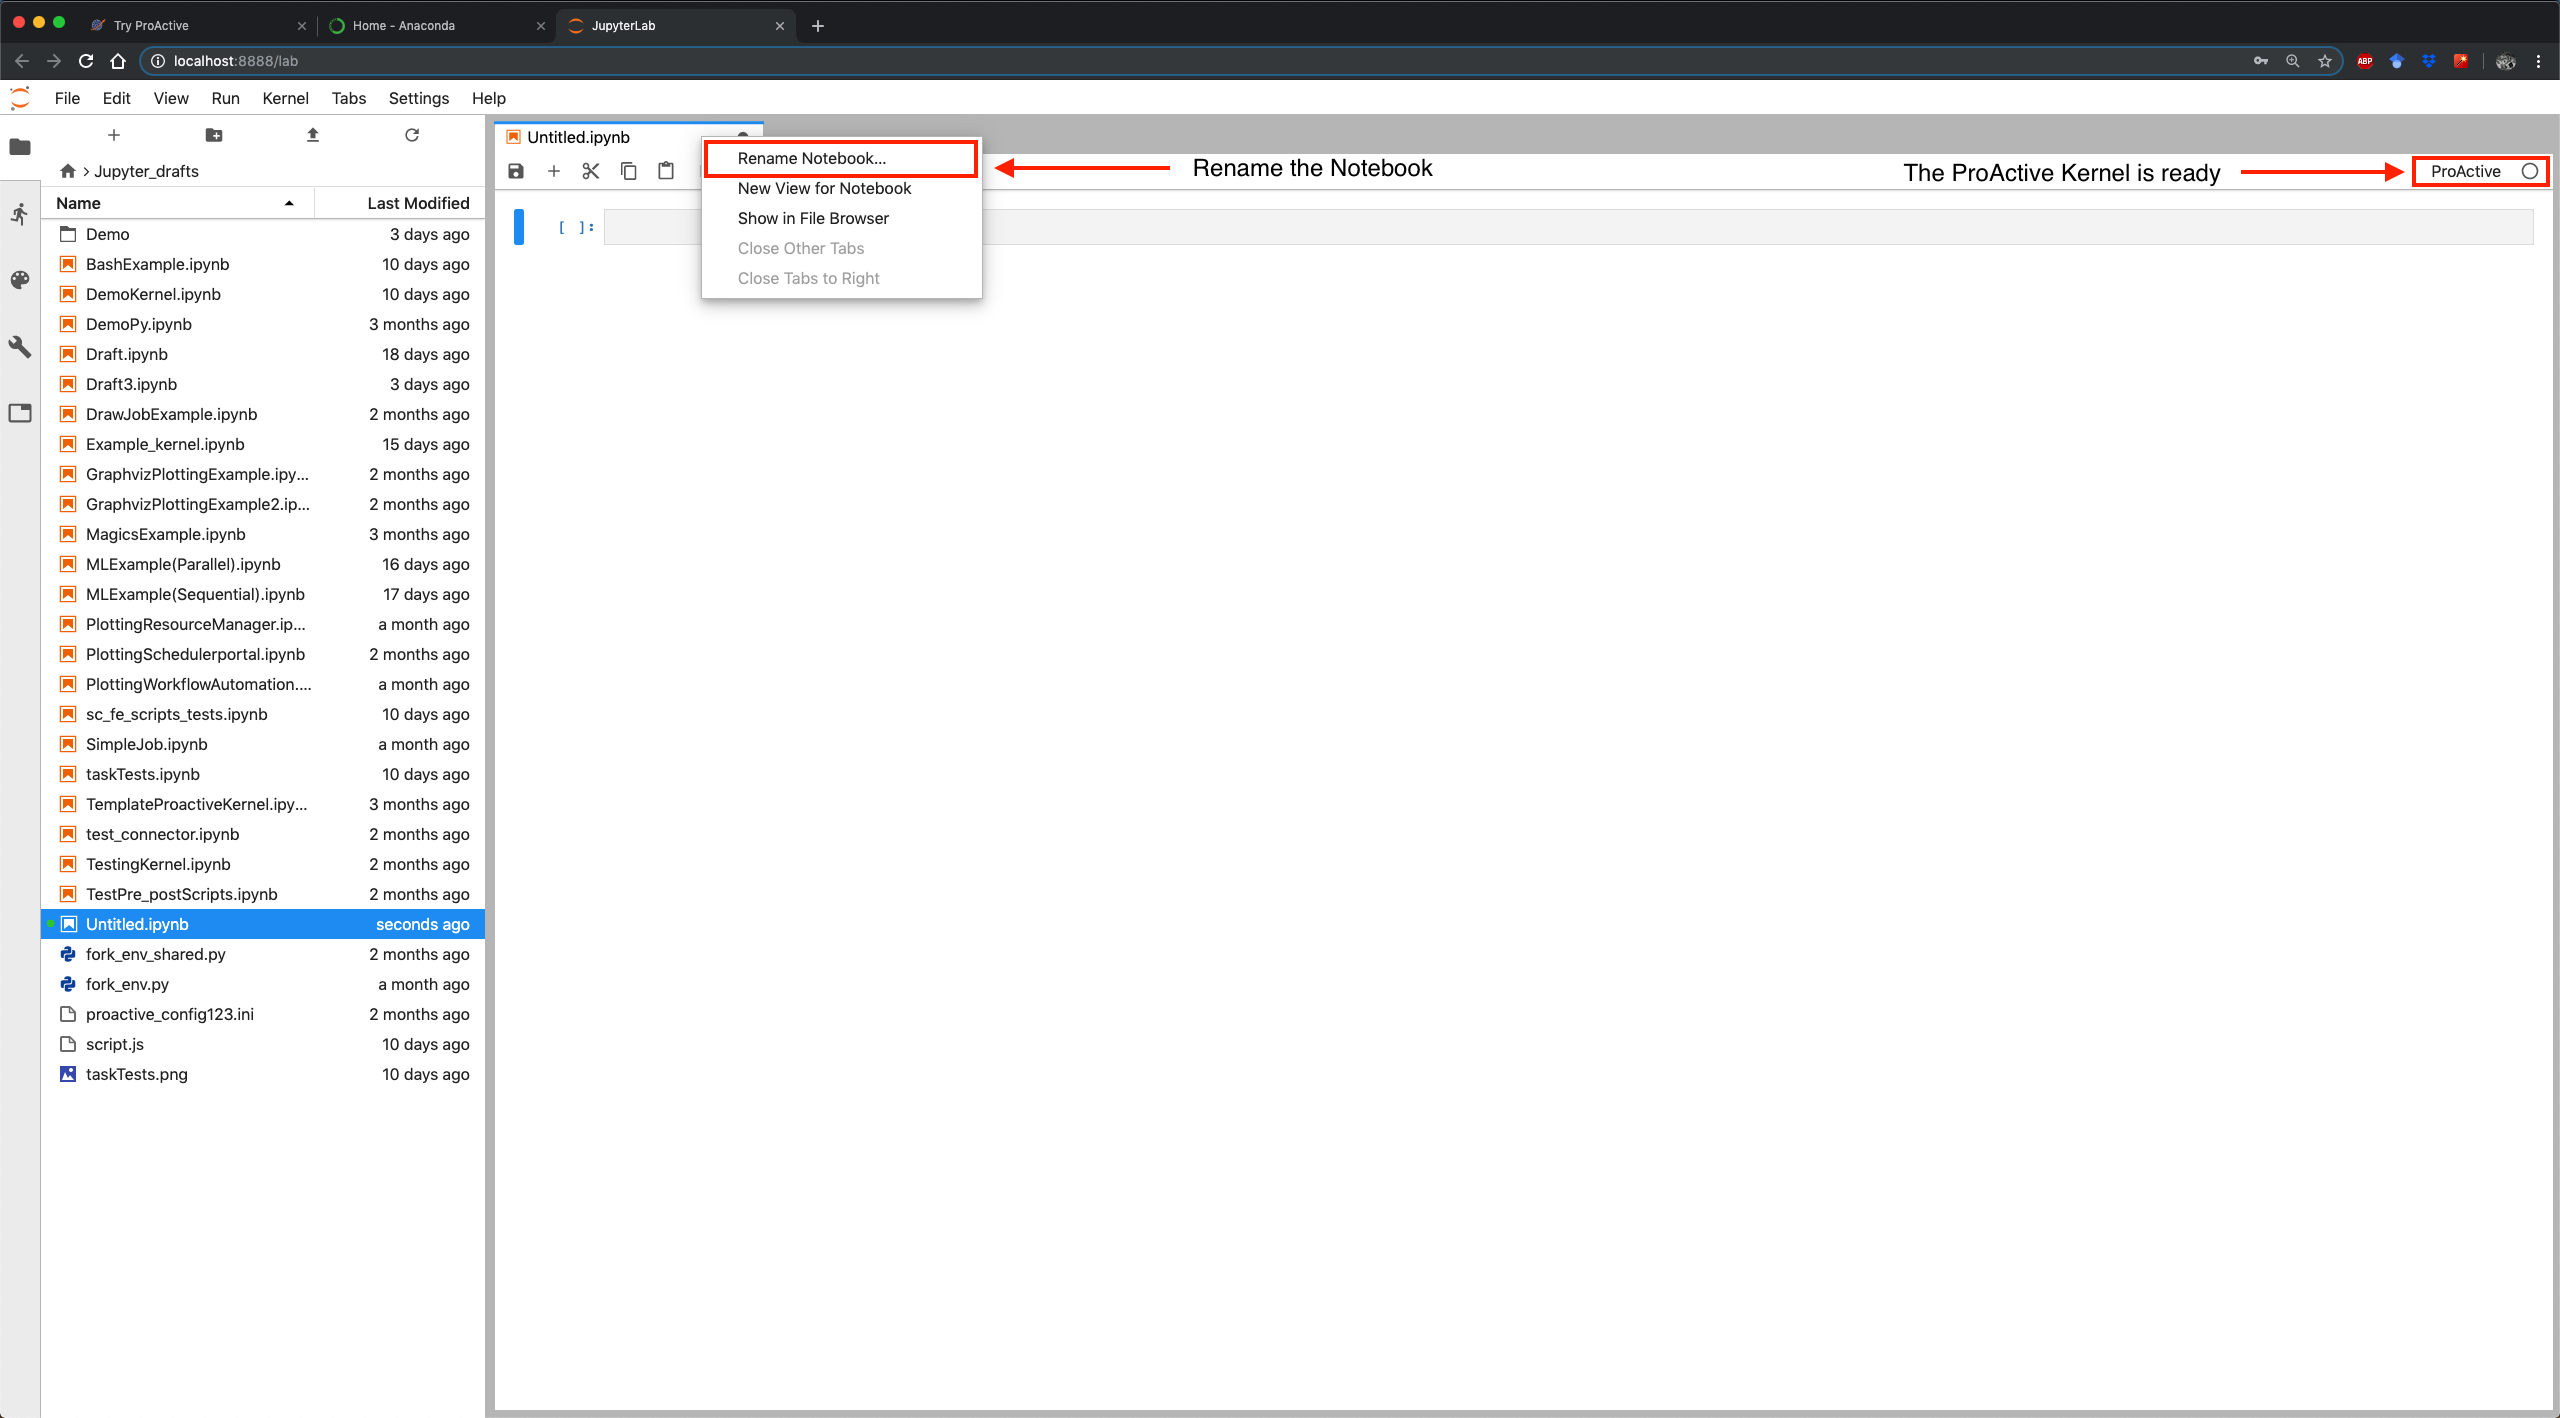
- Click on the ProActive icon.
- Rename your notebook.
2 Create a job through a notebook
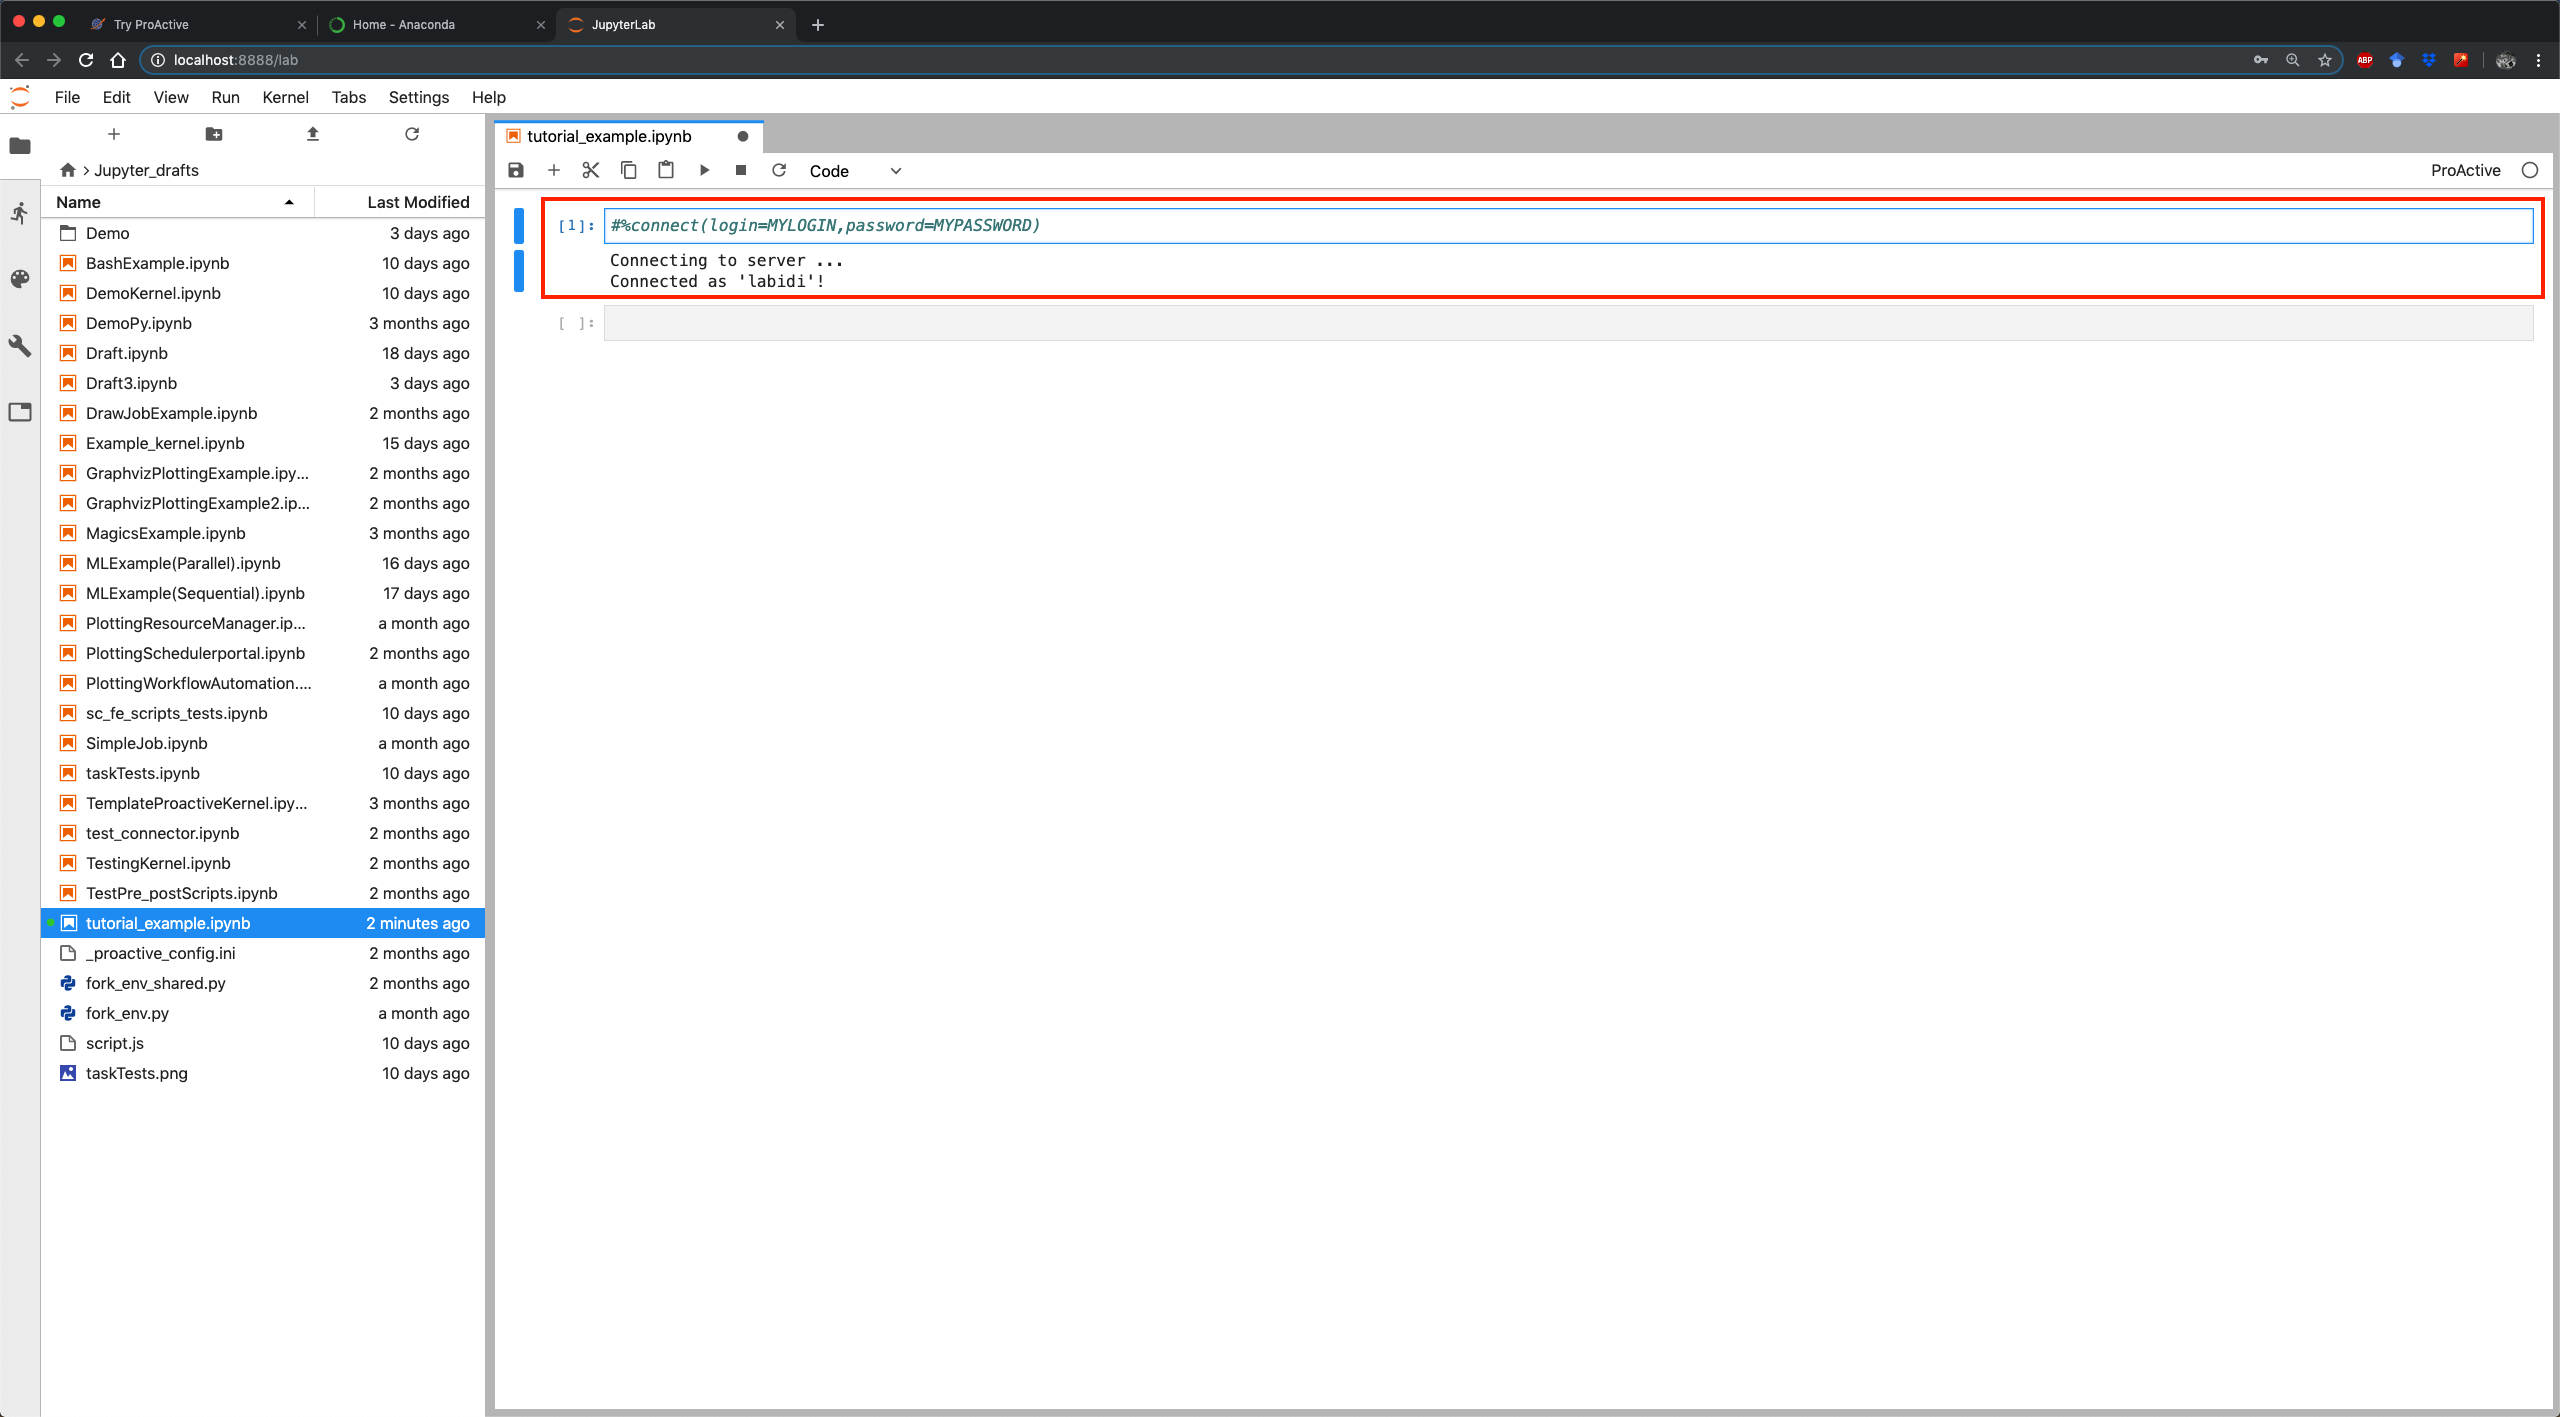
To create a ProActive job, fill the coding blocks of your notebook according to the following instructions:
- 1st block:
#%connect(login=YOUR_LOGIN,password=YOUR_PASSWORD)If you do not have yet an ActiveEon account, please sign up on the try platform. It's free!
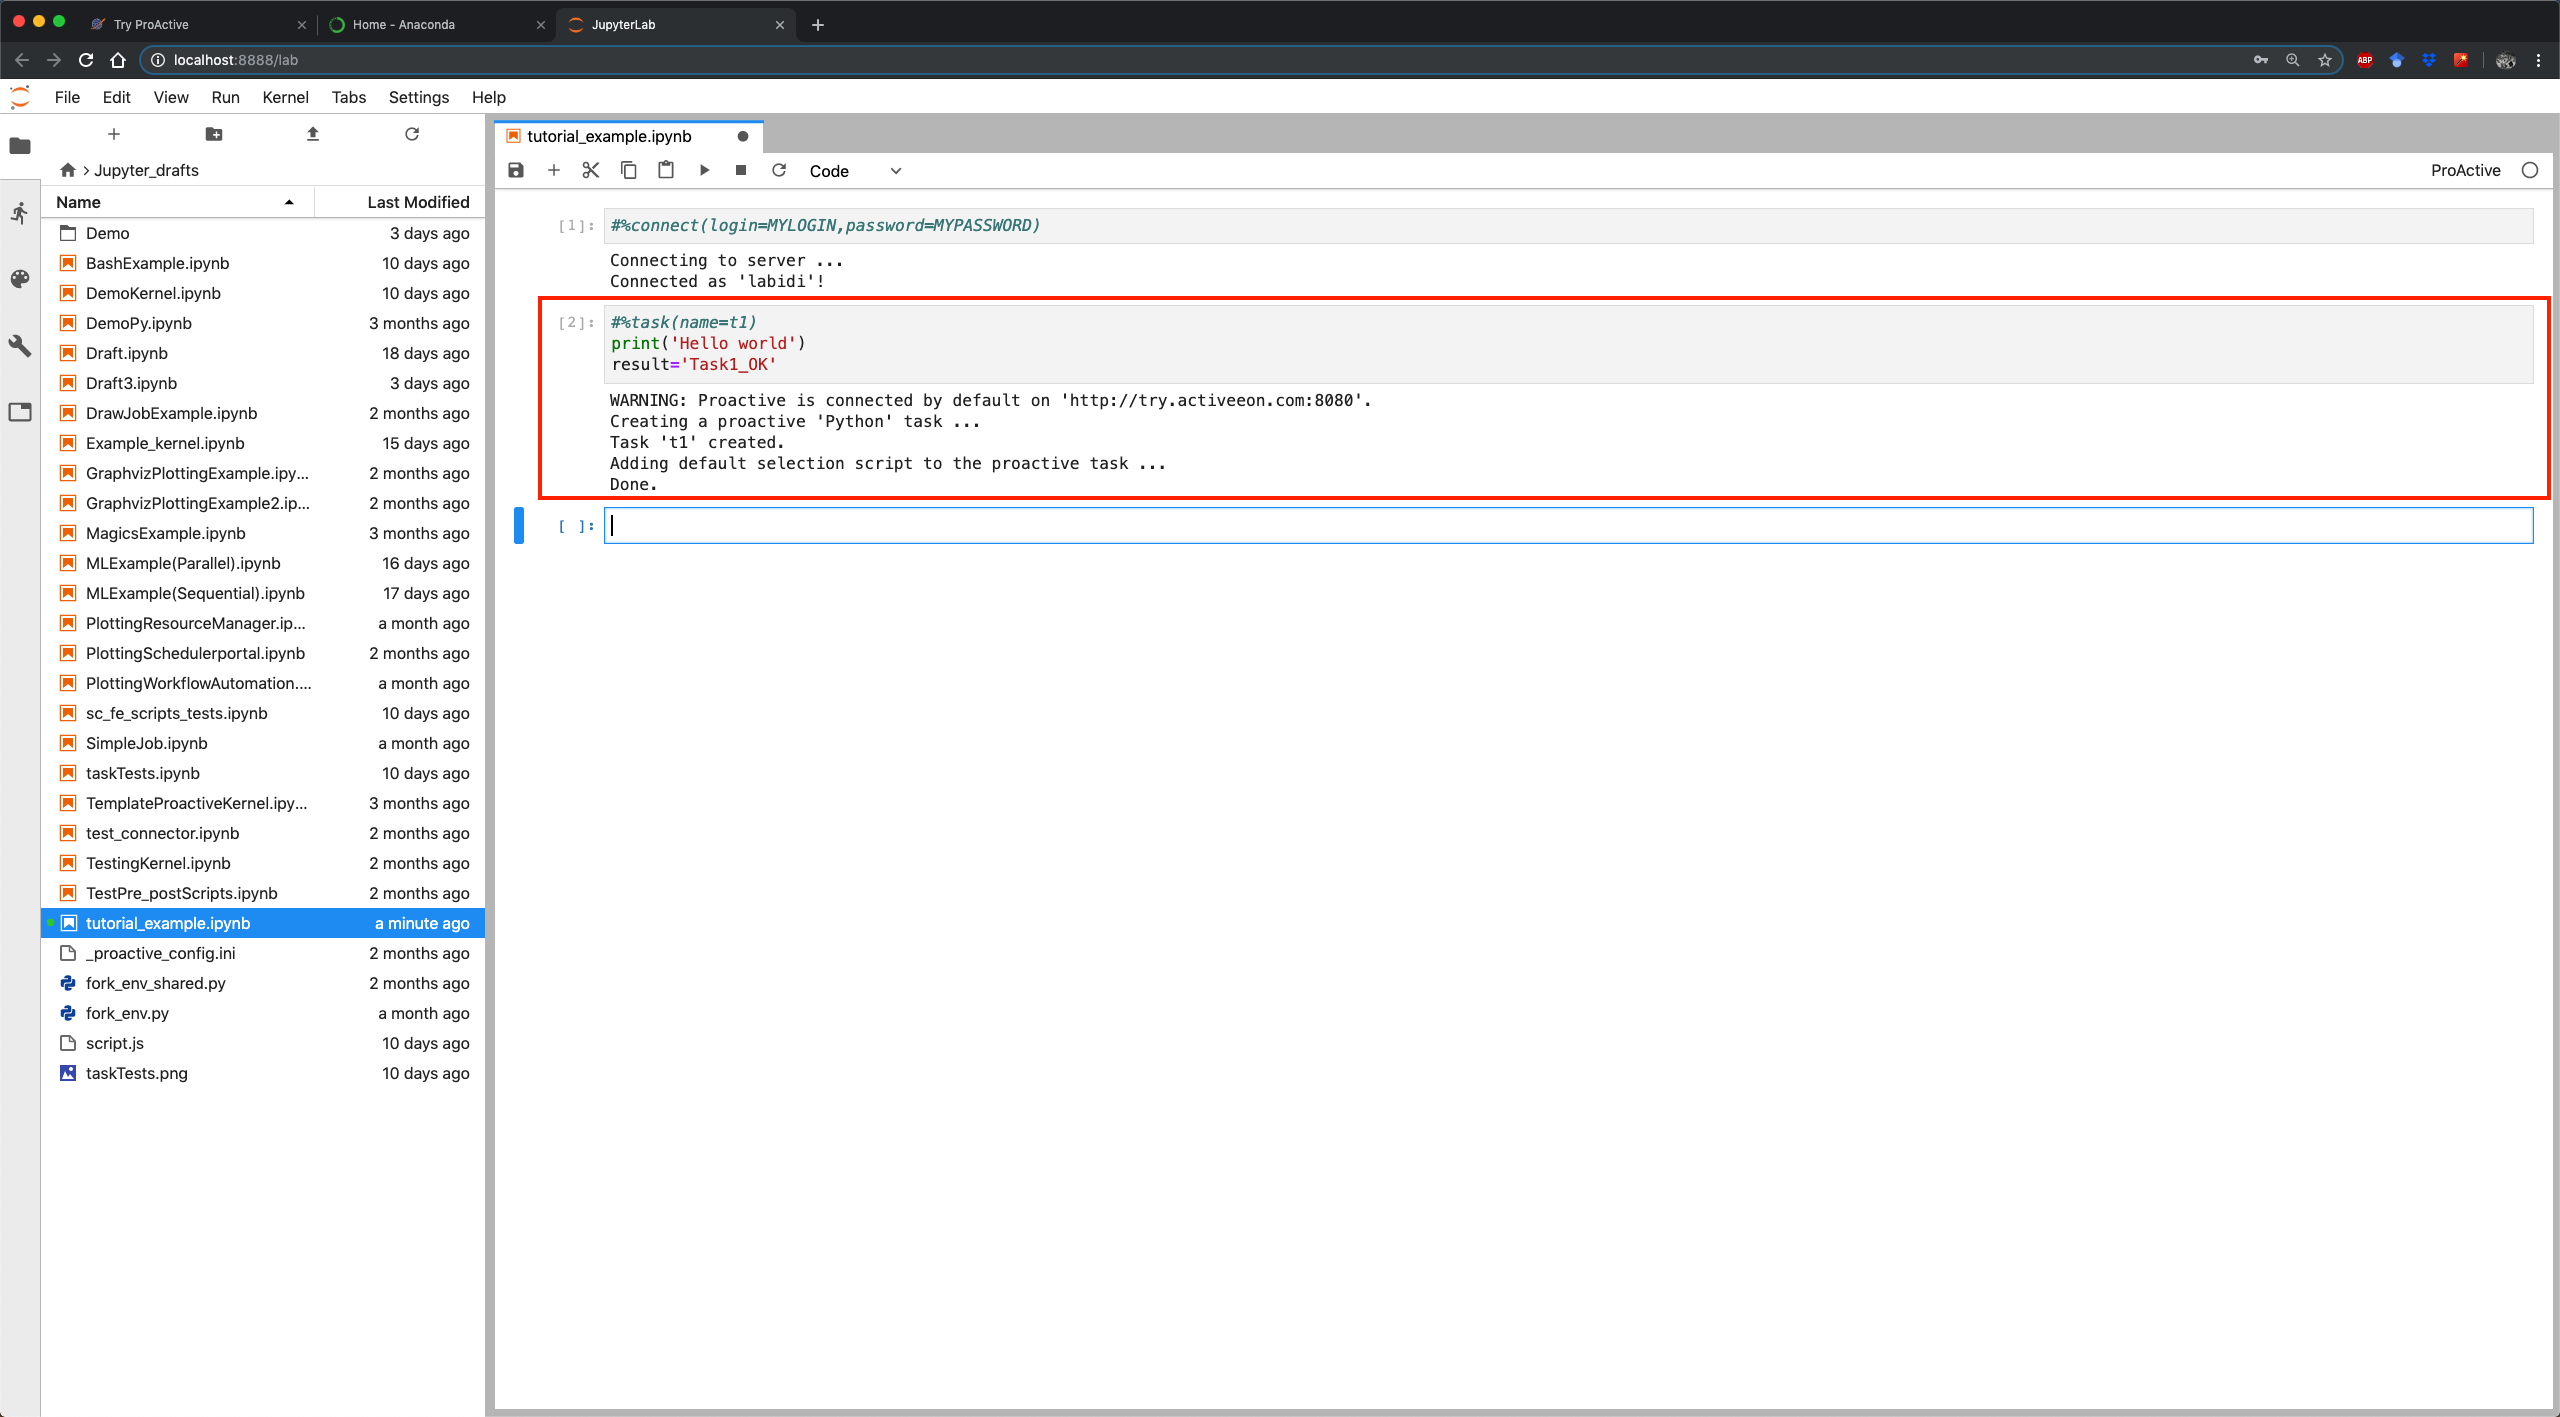
#%task(name=t1)
print('Hello world')
result='Task1_OK'
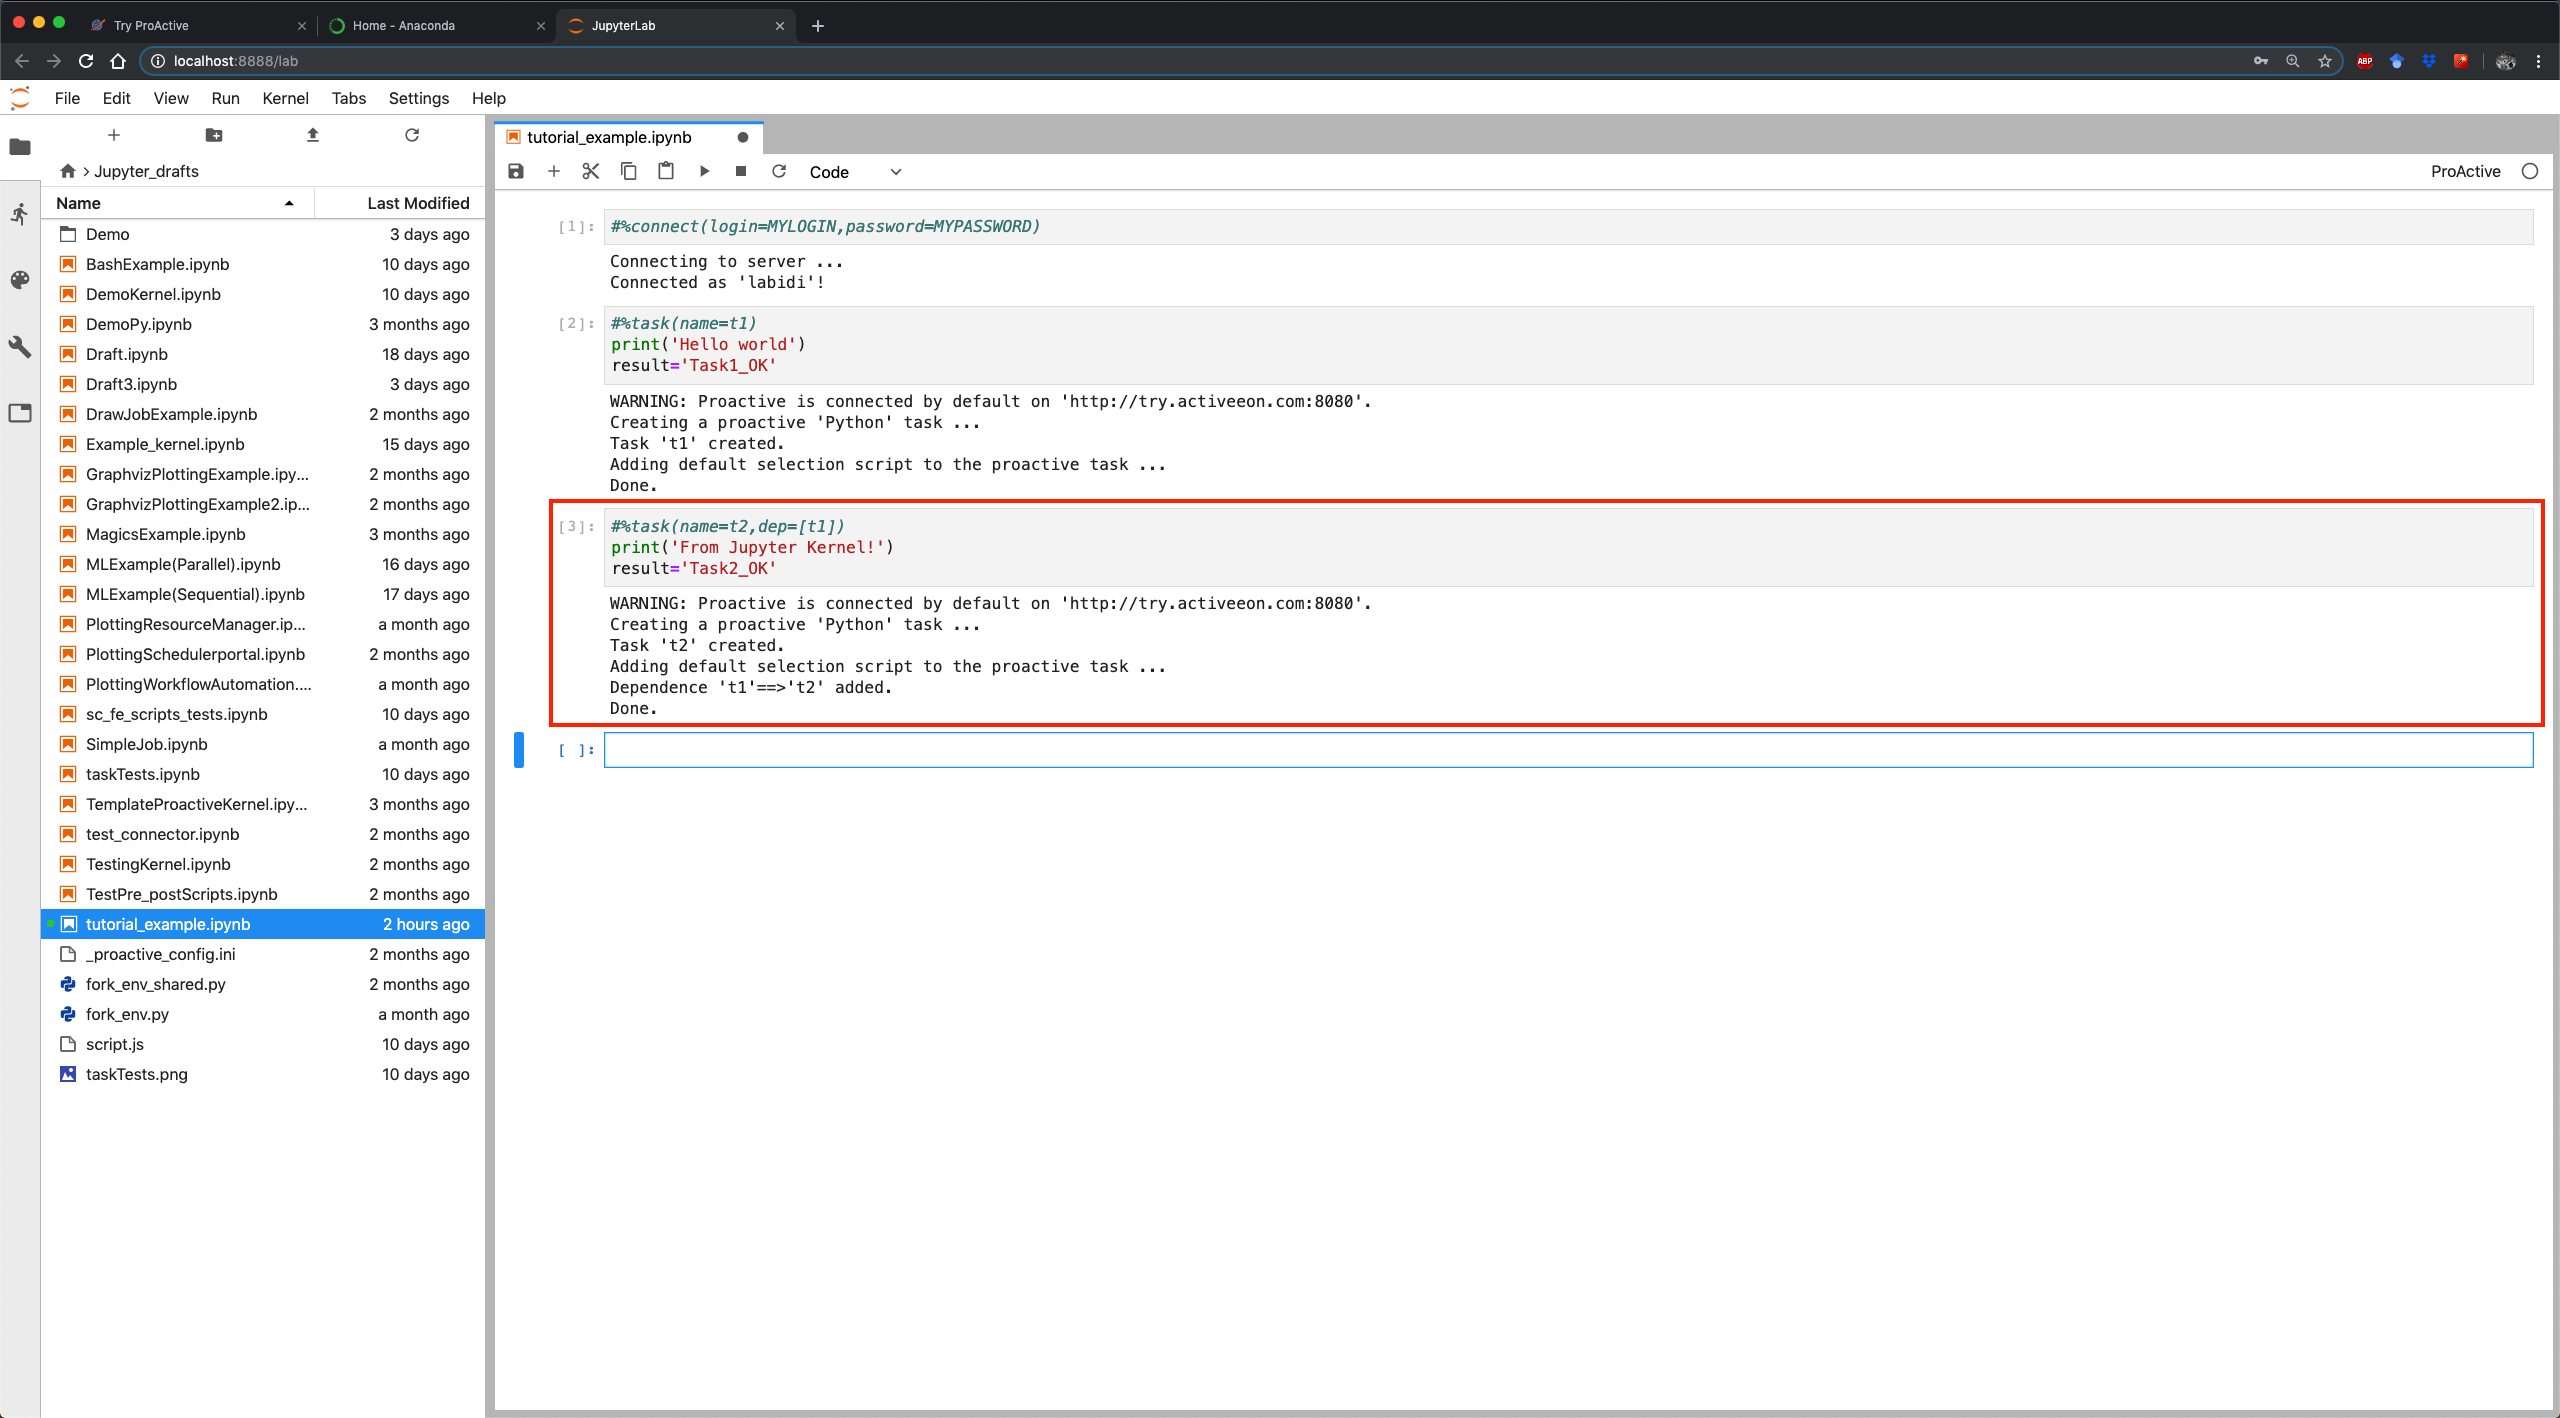
#%task(name=t2, dep=[t1])
print('From Jupyter Kernel!')
result='Task2_OK'
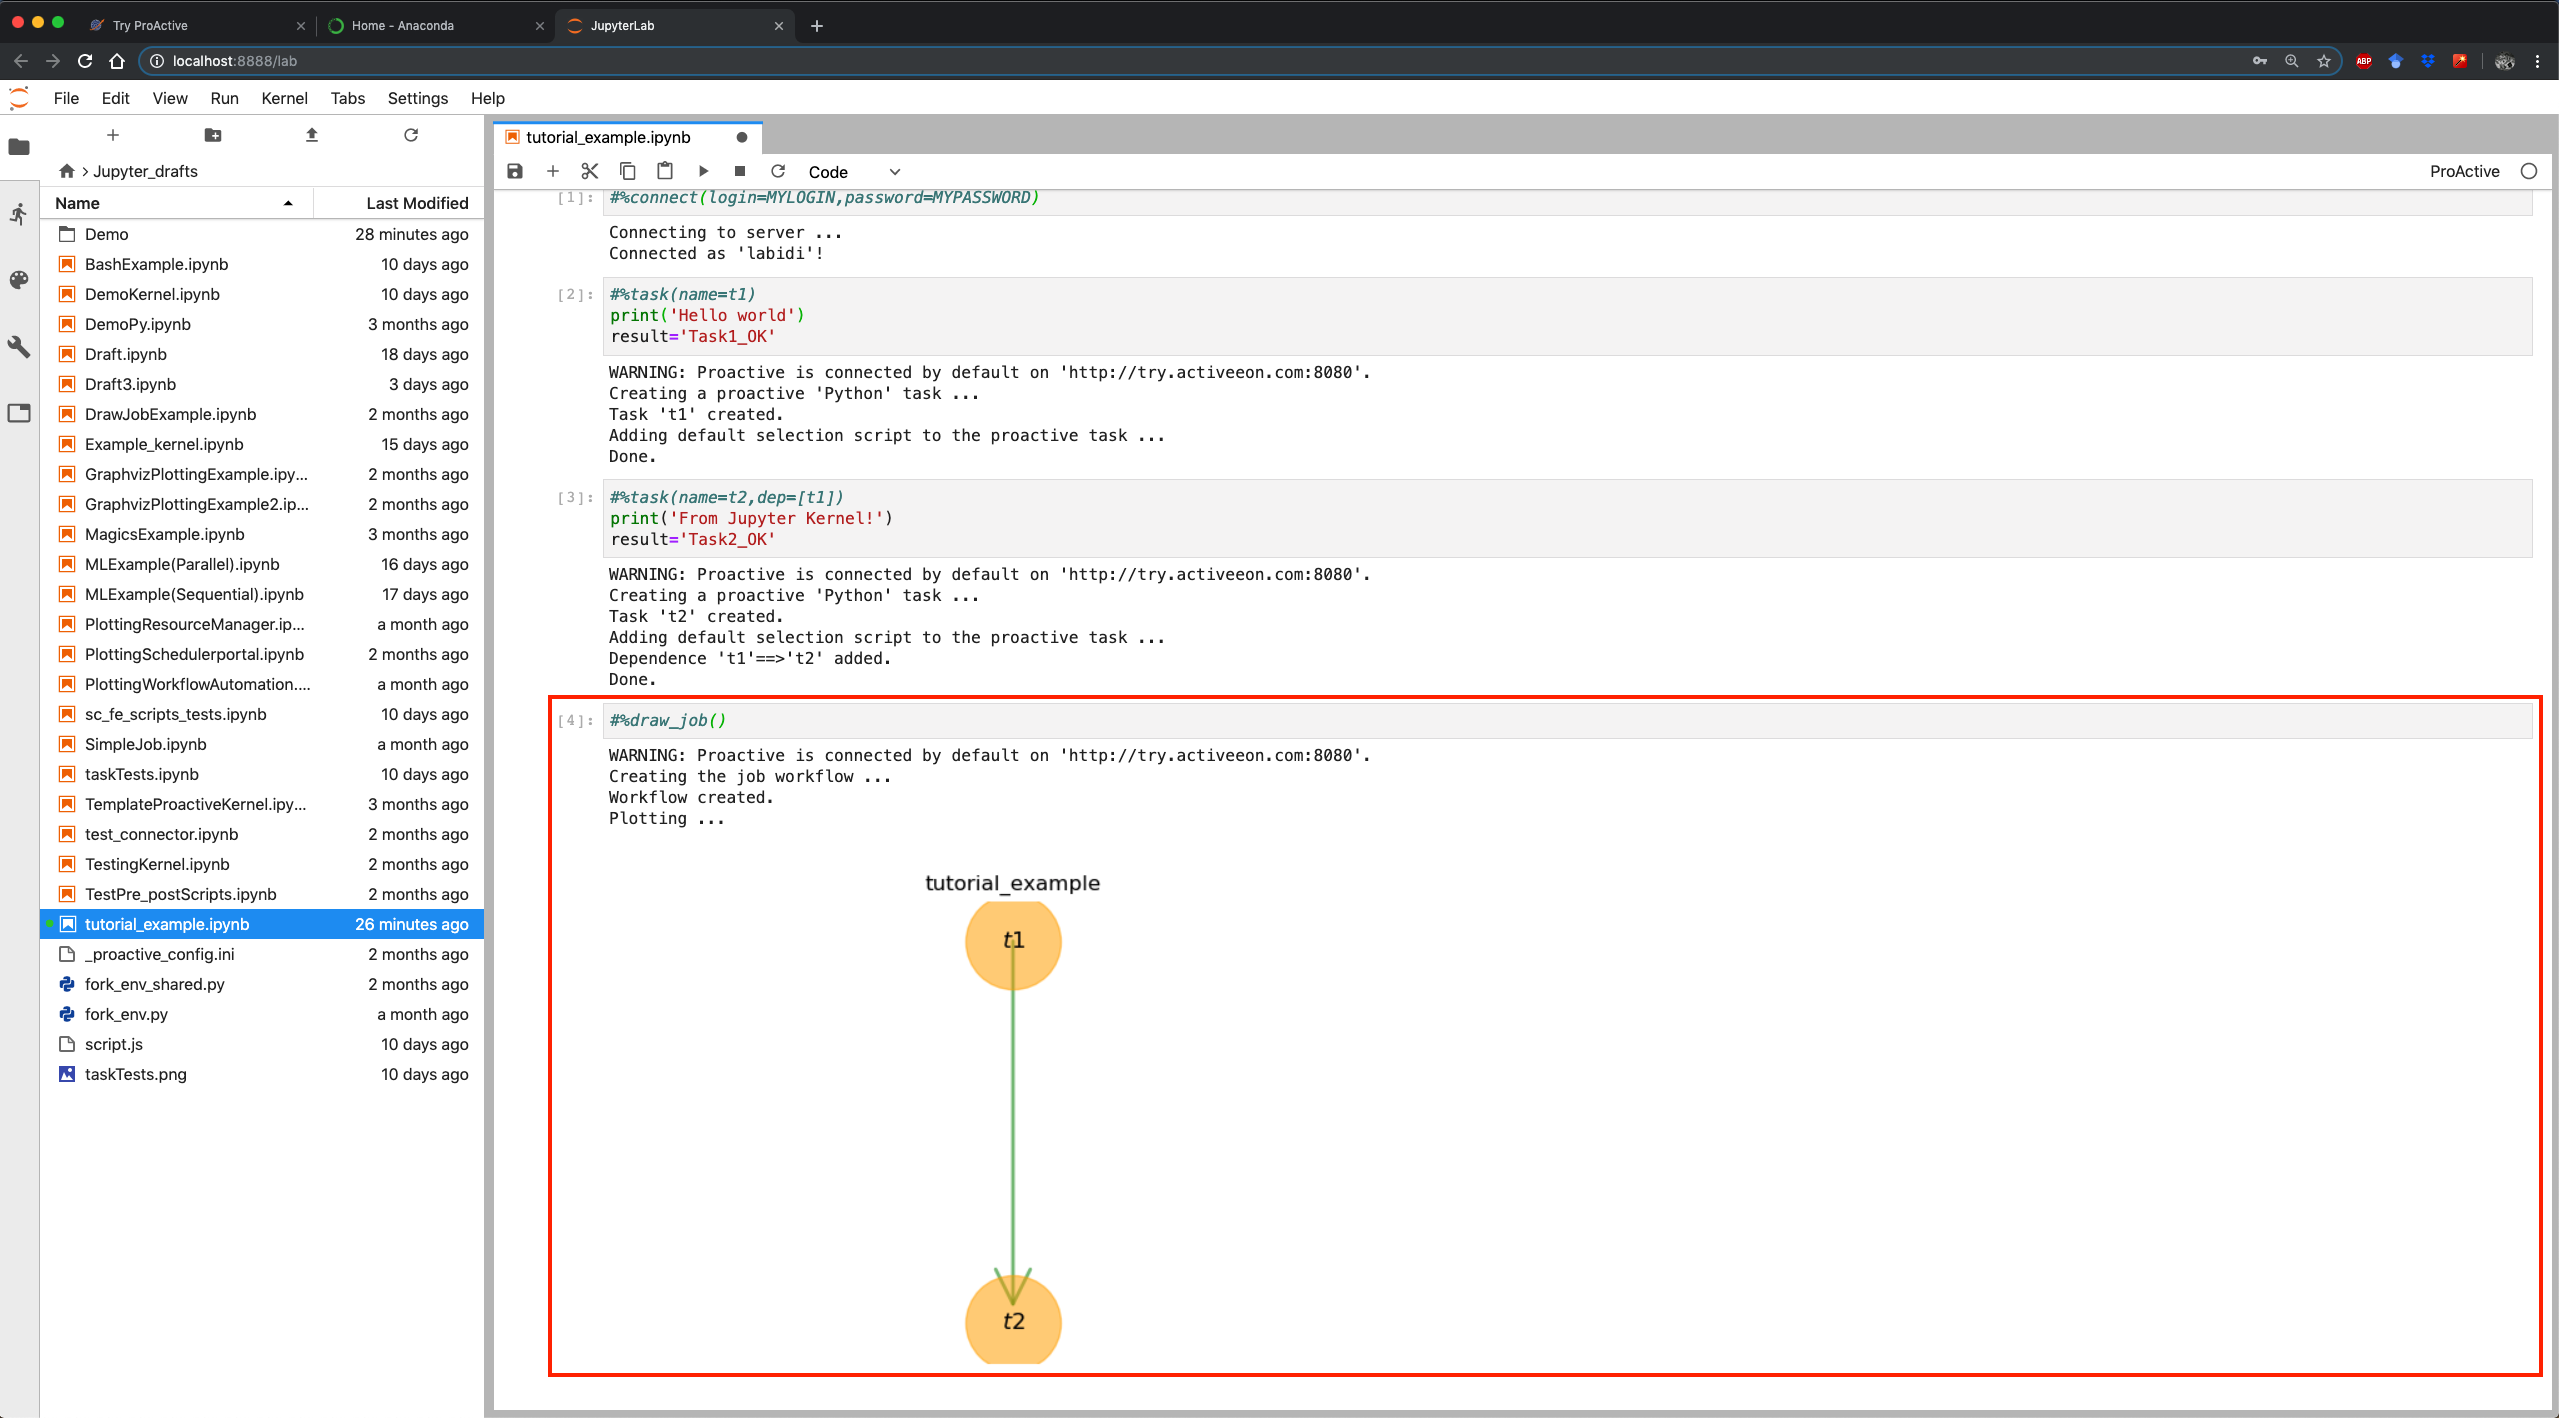
#%draw_job()
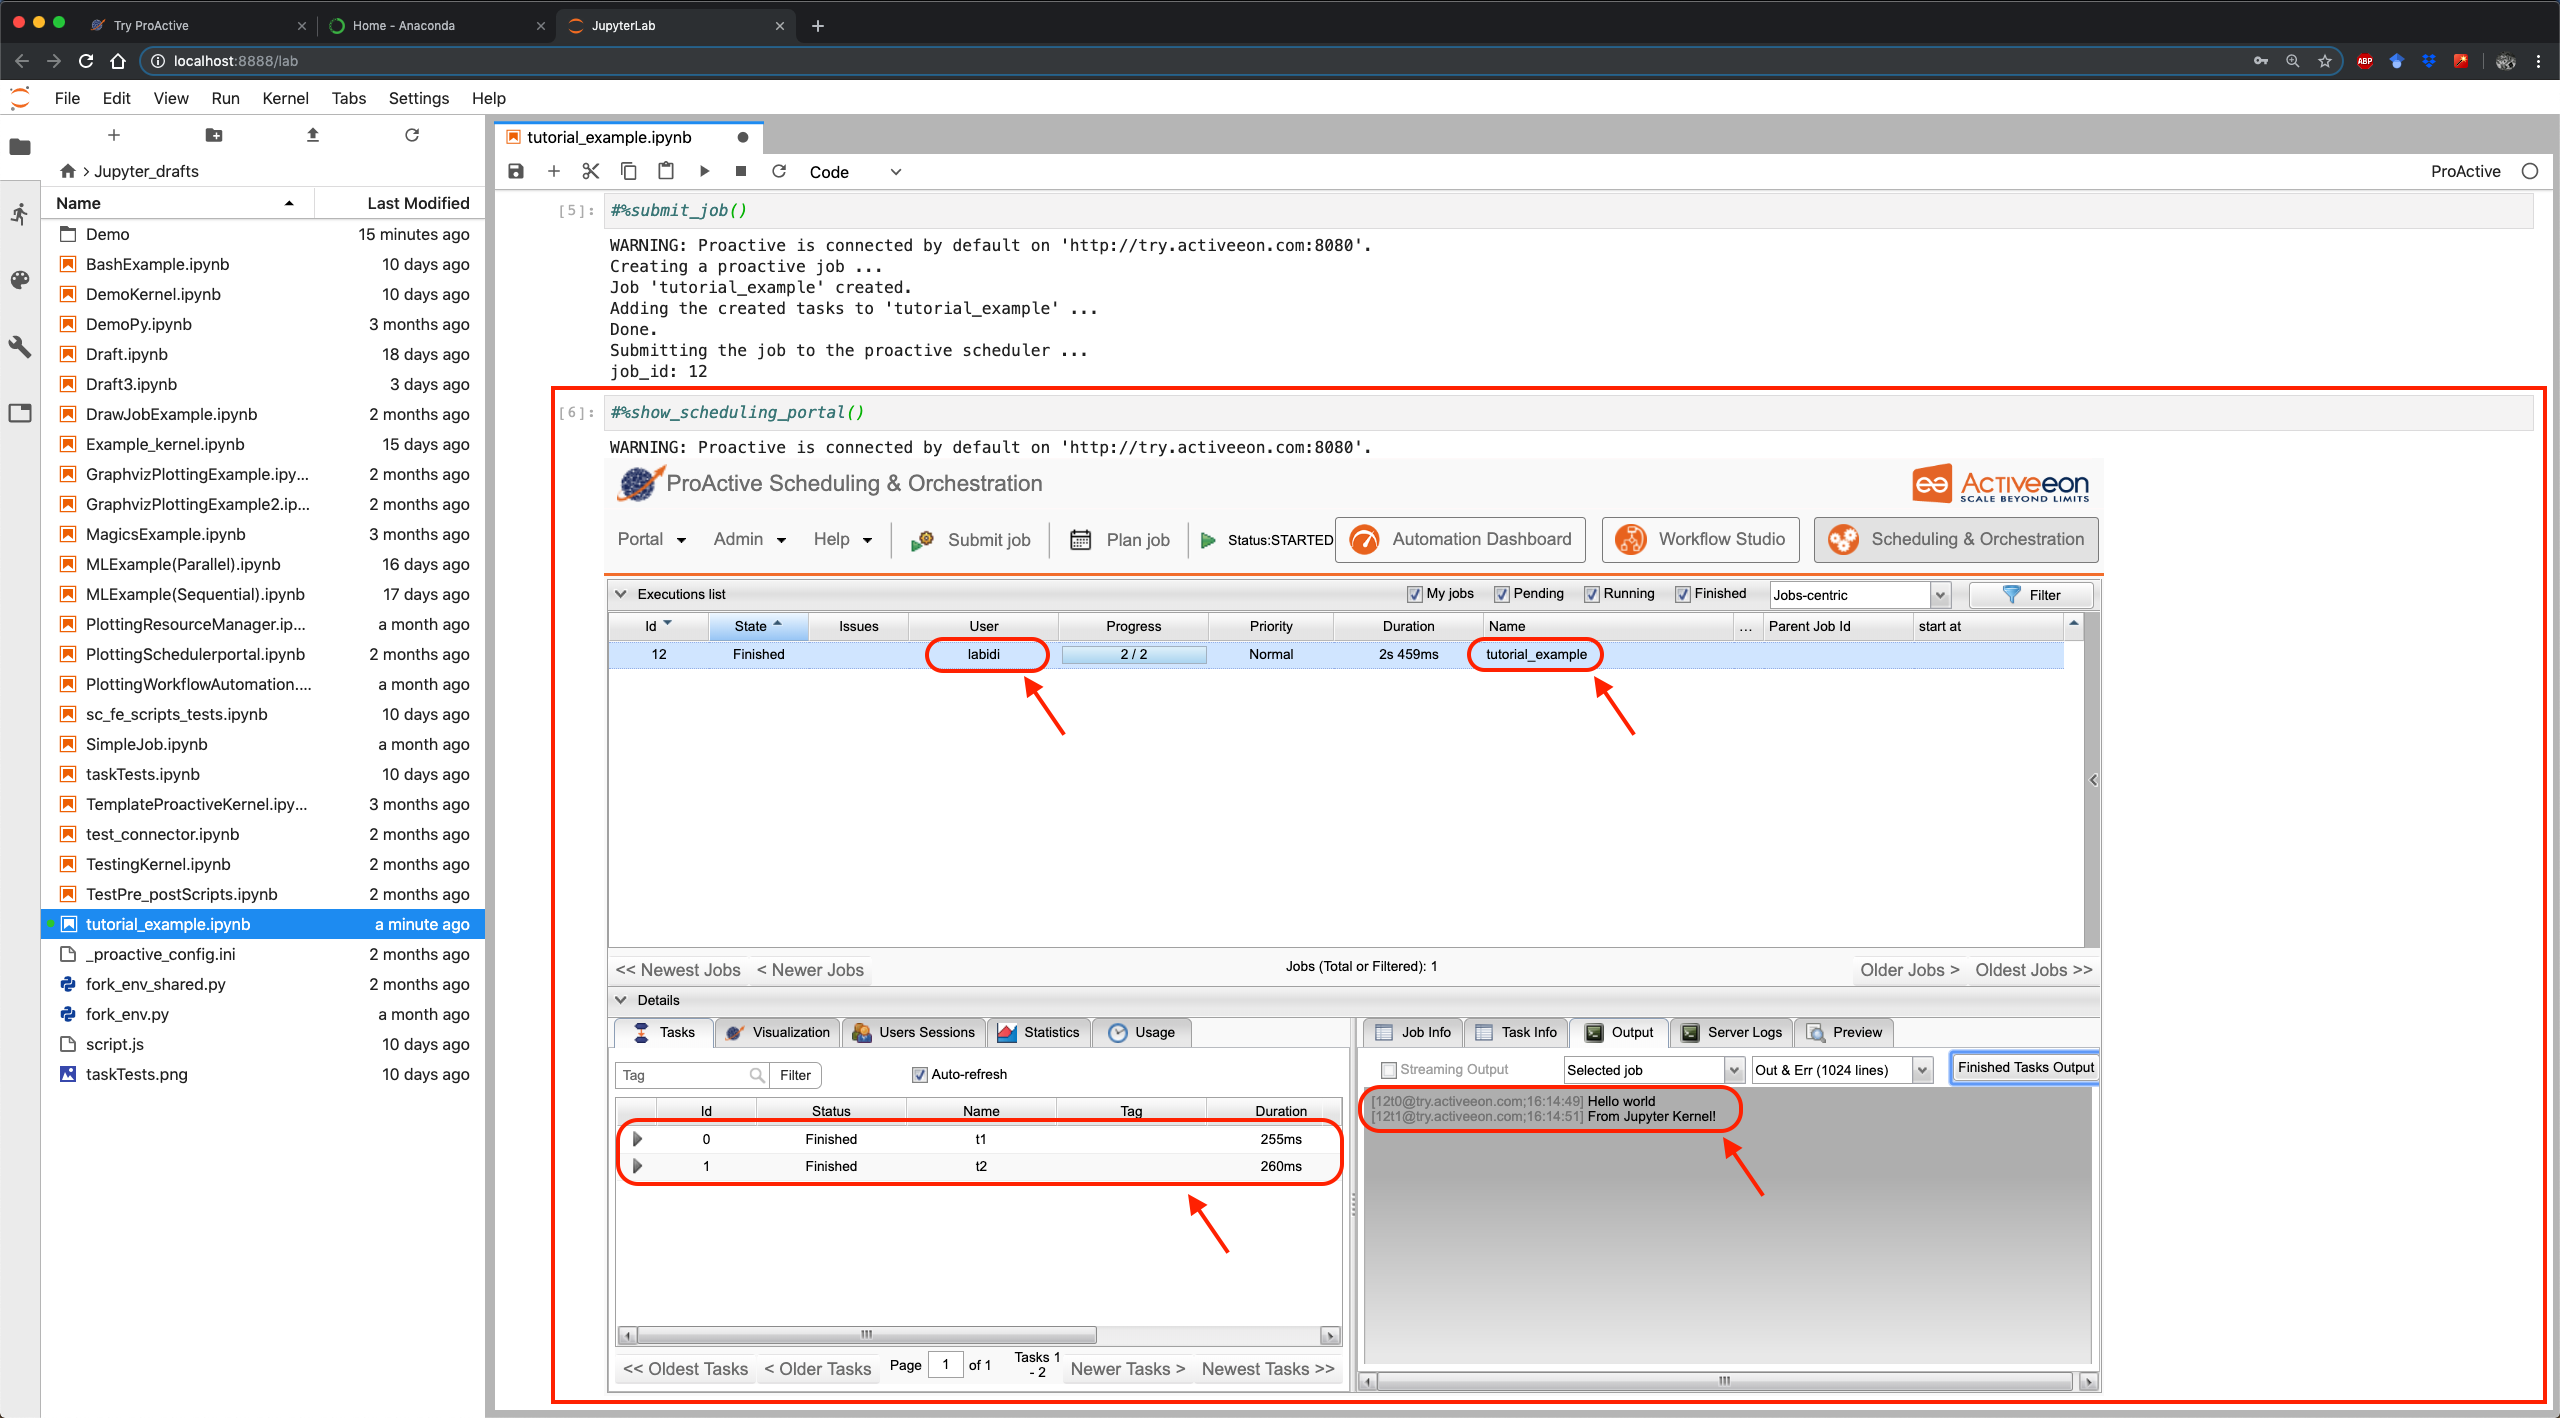
3 Submit to the scheduler and visualize results

-
execute the help pragma
#%help()
- watch Hands on Proactive Jupyter Kernel
- go through our documentation for more details