Advanced workflows - Image processing
As shown in the Quickstart tutorial, a job is a workflow of tasks to be executed. Workflows provide the ability to replicate tasks and transfer data between tasks.
In this tutorial, we will first upload an image to the user space then use the Studio to create a workflow with task replication that will process the image by applying an edge detection algorithm in parallel.
1 Create and Submit the Image Processing Workflow
We want to apply a Canny Edge Detector algorithm to the neptune_triton_01_3000x3000.jpg that is is too large to be processed on a single machine. So we will cut it into an equal number of parts and process each part separately on a different node in parallel.
For that we will use groovy script tasks and task replication mechanism. A first task will split the image, the following task will be replicated for each part of the image and produce a processed part, finally the last task will merge all processed parts into a final image.
Follow these steps to create the workflow:
- Start by saving the image on your computer. This image will need to be uploaded later to the ProActive server (user space), at workflow submission.
Open the ProActive Studio and Login using the user and password you received by e-mail when you first signed up.
Create a new workflow by clicking on the Create button, select it, and call it image-processing by filling in the Name filed under the General Parameters section in the left panel.
From the workspace, drag and drop the Replicate workflow from the Controls bucket.
Define the following workflow variables in the Workflow Variables section of the left panel by clicking on Add button :
inputFilenamewith PA:USER_FILE as model. This will pop up at the job submission, a file browser UI to select and upload to your user space, the image to process. No need to specify a value since it will be set by the file browser.outputFilenamewith result.jpg as value, the name of the resulting image.nbPartswith 4 as value, the number of parallel processing.
Click on the first task called Split and rename it to split-image by filling the Task Name field in the left panel.
To make the image file accessible to the task, go into the Data Management section in the left panel, click on the Add button of Input Files then specify ${inputFilename} as Includes and set the Access Mode to transferFromUserSpace.
Then under the Task Implementation section in the left panel, select groovy as Language and click on
 to open the
Script Editor and paste the content of split-image.groovy.
to open the
Script Editor and paste the content of split-image.groovy.
Note that, thanks to the transferFromUserSpace access mode, the image file is transferred from the user space to the task local space, that is referred by the built-in variable
localspace. The script contains the following code to load the image from the local space :// Load the image from local space File imgFile = new File(localspace, imgFilename) BufferedImage img = ImageIO.read(imgFile)
Also note that the
resultvariable is a java.util.ArrayList containing split parts to transmit to the next tasks.Rename the second task called Process to process-part. This task will be executed only after split-image task finished.
For this task we will use a java implementation of the Canny Edge Detector written by Tom Gibara. To make the class definition available to our script task, the jar must be available on the machine hosting the node. We already put it to the global space on the server for you. You have to enable the jar transfer from the global space to the task space: go into the Data Management section in the left panel, click on the Add button of Input Files, then specify canny-edge-detector.jar as Includes and set the Access Mode to transferFromGlobalSpace. We also need to update the task's classpath: under the Fork Environment section, put canny-edge-detector.jar in additionnal classpath.
As for the previous task, select groovy as Task Implementation Language and paste the content of process-part.groovy.
Note that the replication index is provided as a system property, and is used to get the part of the image to process:
int partIndex = variables.get("PA_TASK_REPLICATION")The
resultsvariable is an array of org.ow2.proactive.scheduler.common.task.TaskResult that contains the result of the previous task split-image. Since there is only one parent task, the array contains a single element: the ArrayList of splitted parts. But each Process task will process its own image part indexed by thepartIndexvariable, this latter being the replication index of each task.Here is the section of code used to process the image part:
CannyEdgeDetector detector = new com.CannyEdgeDetector()
detector.setLowThreshold(0.5)
detector.setHighThreshold(1)
detector.setSourceImage(partImage)
detector.process()
To specify how many times the process-part task will be replicated, click on the
 box of the workflow, and paste the
following code into the Code section under the Control Flow view in the left panel:
box of the workflow, and paste the
following code into the Code section under the Control Flow view in the left panel:
runs=variables.get("nbParts")Rename the Merge task to merge-parts. This task will merge the processed parts into a final image after his parent processing tasks finished.
Under the General Parameters section, enable Task Result Added to Job Result to make the merge task result (the resulting image) as the job result. This will ease the way to get it.
Select groovy as Task Implementation Language and paste the content of merge-parts.groovy.
Note that the size of the
resultsarray is set to 4, i.e. the number of replicated processing tasks.Once your workflow is ready, click on
 . A pop up will ask you to set your variables.
Since you already set the default values of outputFilename et nbParts, you only need to set the inputFilename
variable by clicking on
. A pop up will ask you to set your variables.
Since you already set the default values of outputFilename et nbParts, you only need to set the inputFilename
variable by clicking on  , then by clicking on
  ,
and selecting neptune_triton_01_3000x3000.jpg on your machine.
You are now ready to click on Execute to submit your workflow as a job to the Scheduler.
,
and selecting neptune_triton_01_3000x3000.jpg on your machine.
You are now ready to click on Execute to submit your workflow as a job to the Scheduler.-
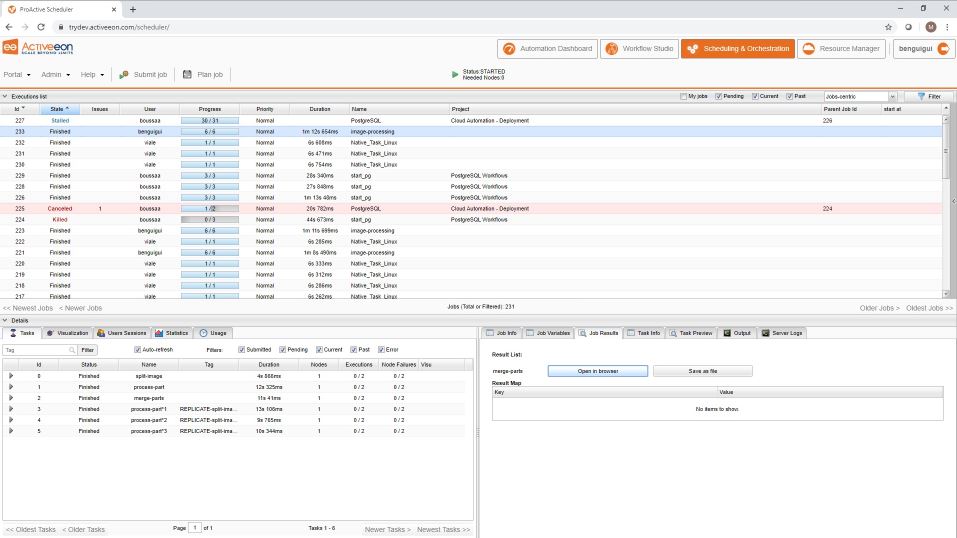
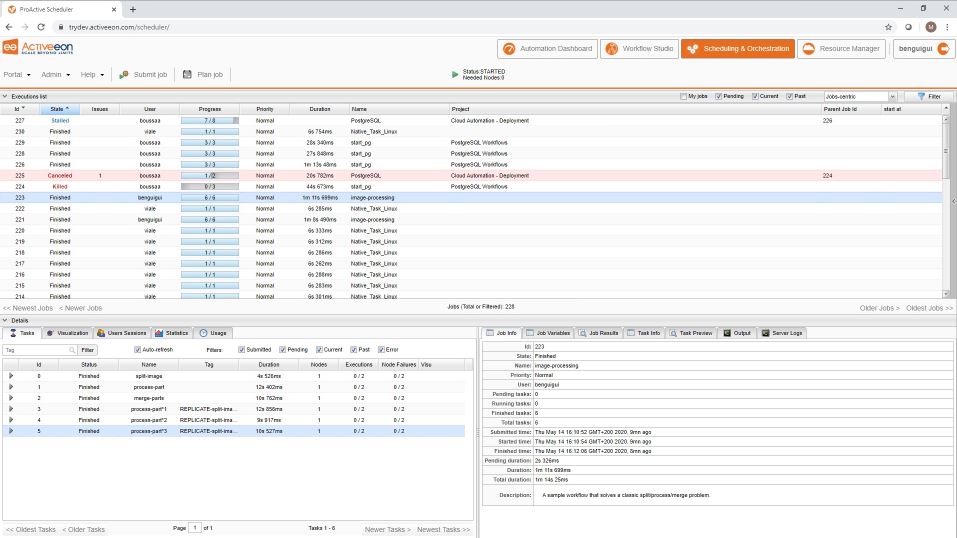
Login to the Scheduler portal using the login and password you received by e-mail when you first signed up. Your job should appear in the job list panel
-
Depending on the available nodes, you can try to execute the workflow by setting
nbPartsto a higher square number: 9, 16, 25, 36. This will split the image into smaller parts, produce more tasks and reduce the tasks computation time. -
The full version of the processing workflow is available in the basic-examples bucket under Parallel_Image_Processing. This worklow slightly differs from the version described here: the model of the
inputFilenameworkflow variable is PA:GLOBAL_FILE and its access mode from the split task is transferFromGlobalSpace.
2 Visualize or Download the resulting Image
From the Scheduler portal, simply select your job from the job list, and select the way to retrieve the processed image under the Job Results view: Open in browser or Save as file.